Easy Maki Roll Recipe – Make Your Own Sushi
Embarking on the journey of making sushi at home can seem like a culinary Everest, but this accessible Maki Roll recipe is designed to guide you gently to its summit.
With perfectly seasoned sushi rice, crisp vegetables, and savory imitation crab nestled within toasted nori, each bite offers a delightful explosion of flavors and textures, proving that gourmet sushi is well within your reach.
Why You Will Love This Recipe
- Effortless Assembly: Despite its elegant appearance, assembling these maki rolls is straightforward, making it a perfect weekend project or a fun family activity.
- Fresh, Vibrant Flavors: The combination of crunchy cucumber and carrot, creamy avocado, and the satisfying chew of seasoned rice creates a harmonious and incredibly satisfying taste profile.
- Customizable Fillings: While this recipe features a classic California-inspired mix, the possibilities for fillings are virtually endless, allowing you to tailor each roll to your personal preferences.
- Impressive Presentation: Homemade maki rolls are always a showstopper, perfect for entertaining guests or simply elevating a weeknight dinner into a special occasion.
- Satisfyingly Healthy: Packed with wholesome ingredients, these rolls offer a lighter, yet deeply satisfying alternative to many takeout options, providing a good balance of carbohydrates, vegetables, and protein.
Ingredients You Need
The foundation of any great maki roll lies in the quality of its components, from the perfectly cooked sushi rice to the freshest vegetables. Ensuring each ingredient is top-notch will elevate your homemade sushi experience to new heights.
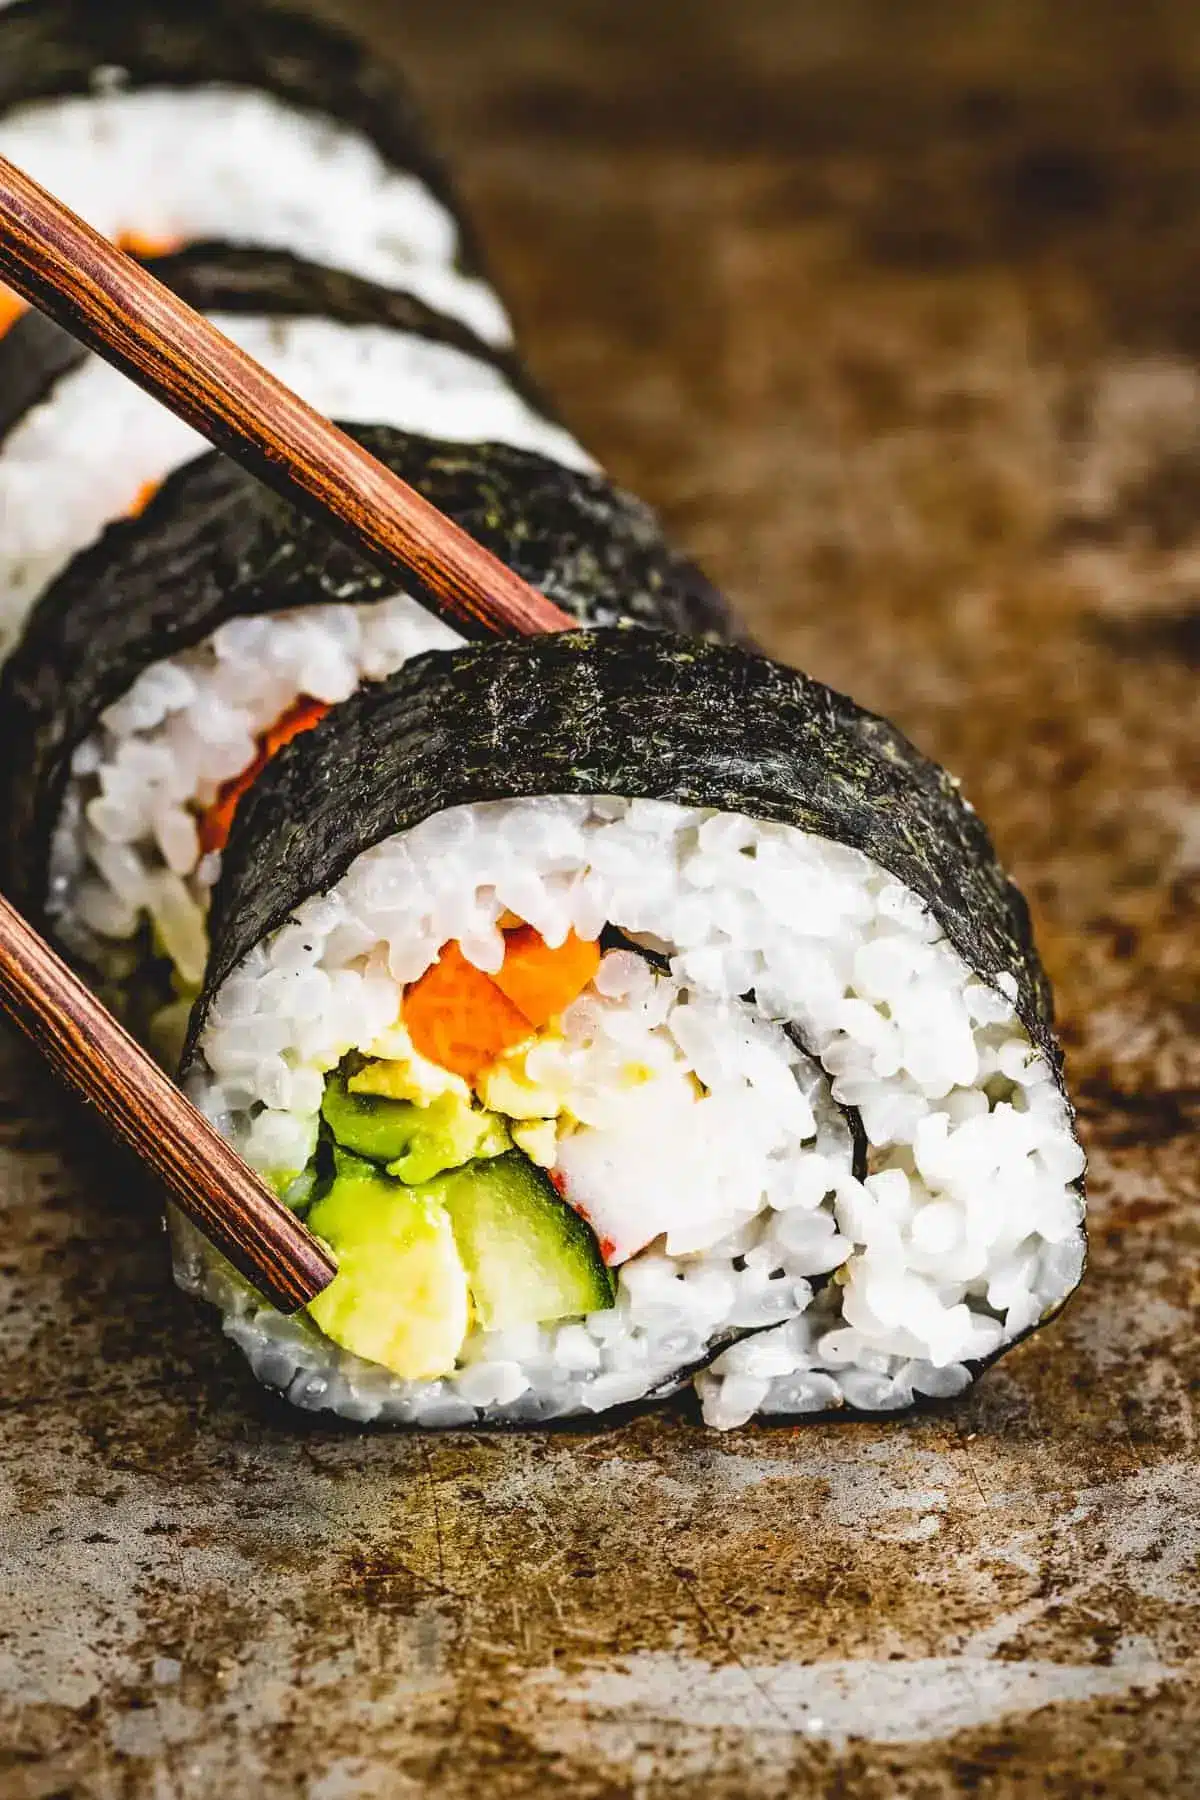
Maki Roll Recipe

Master the art of homemade sushi with this easy Maki Roll recipe! Featuring nori and perfectly cooked sushi rice wrapped around a colorful combo of imitation crab, cucumber, avocado, and carrots, these rolls promise a fun and flavorful dining experience! Forget going out. Make your own maki sushi!
- 1½ cups sushi rice
- 1½ cups water
- 1½ tablespoons granulated sugar
- 4 sheets sushi Nori
- 1 English cucumber, peeled and sliced into thin strips
- 1 medium carrot, peeled and sliced into thin strips
- 1 avocado, sliced
- 4 sticks imitation crab, cut in half, longwise
- 1For the sushi rice: Rinse the rice until the water runs clear. Cook the rice according to package directions or in an Instant Pot for 10 minutes on high pressure, with a 12-minute natural pressure release.
- 2Meanwhile, make the rice wine vinegar mixture: In a small saucepan, combine the rice wine vinegar and sugar and cook over medium heat until the sugar dissolves.
- 3Fold the rice vinegar mixture into the cooked sushi rice. Allow the rice to cool to just above room temperature.
- 4To assemble: Place a sheet of nori over a bamboo sushi mat. Wet your fingers with warm water.
- 5Press about ¾ cup of the prepared sushi rice evenly over the nori.
- 6Layer the filling: Stack 1 row of cucumber, 1 row of carrot, 1 row of imitation crab, and 1 row of avocado slices in a line at one end of the mat.
- 7Roll the nori and rice over the filling, then squeeze the bamboo mat to create a tight cylinder. Continue folding and squeezing until the roll is complete. Repeat with remaining ingredients.
- 8Wet a sharp knife with warm water and slice the rolls into ½ inch slices, wetting the knife between cuts as needed. Serve with your favorite sushi dipping sauce(s).
Keywords: sushi, maki rolls, Japanese, seafood, imitation crab, cucumber, avocado, carrot, homemade sushi, easy sushi recipe
- sushi rice: a short-grain variety with a high starch content, essential for its sticky texture.
- water: used to cook the sushi rice to perfection.
- rice wine vinegar: adds a subtle tang and sweetness to the cooked rice, crucial for authentic sushi flavor.
- granulated sugar: balances the acidity of the vinegar and enhances the rice’s natural sweetness.
- sushi nori: toasted seaweed sheets that form the outer wrapper of the maki roll.
- English cucumber: peeled and cut into thin strips for a refreshing crunch.
- carrot: peeled and julienned to provide color and a slightly sweet, crisp element.
- avocado: sliced to add a creamy, rich texture that complements the other ingredients beautifully.
- imitation crab sticks: a classic filling, these are typically made from white fish and seasoned to mimic crab meat.
For the exact quantities and precise measurements needed to create these delightful rolls, please refer to the recipe card above.
Variations
For those seeking a plant-based delight, transforming this maki roll recipe into a vegan masterpiece is wonderfully simple. Omit the imitation crab entirely and double down on the crispness of julienned carrots, refreshing cucumber, and creamy avocado.
Consider adding other vibrant vegetables like bell peppers, thinly sliced red onion for a slight bite, or even some marinated shiitake mushrooms for an umami depth that truly sings.
To cater to a lower carbohydrate lifestyle, the approach shifts to minimizing the rice component or exploring alternatives. One effective method involves using a finely grated cauliflower “rice” mixed with a touch of rice vinegar and seasoning, which mimics the texture while significantly reducing carbs.
Alternatively, embrace a “rice-less” roll by using thinly sliced cucumber or even blanched shiso leaves as the base instead of the nori, and focus on fillings like salmon, tuna, or an assortment of colorful vegetables, ensuring all ingredients are low-carb compliant.
For an adventurous twist that adds a burst of tropical sweetness, incorporating thin slices of ripe mango into the roll is an absolute game-changer. The natural sugars in the mango pair surprisingly well with the savory elements and the sticky rice.
This addition introduces a delightful textural contrast and a sunny, exotic note that transforms a familiar maki roll into something truly special and unexpected, perfect for a summery treat.
Expanding the protein options opens up a world of flavor possibilities beyond imitation crab. For seafood aficionados, consider the delicate, buttery texture of sushi-grade salmon or tuna, thinly sliced and layered with the vegetables.
Cooked options like grilled shrimp, flaky cooked salmon, or even finely chopped imitation shrimp also provide excellent, accessible alternatives that broaden the appeal and dietary flexibility of this versatile dish.
To enhance the savory depth and add a satisfying crunch, consider introducing a layer of toasted sesame seeds or finely chopped nuts like macadamia or cashews. These additions not only provide an interesting textural counterpoint to the creamy avocado and crisp vegetables but also contribute a subtle nutty aroma.
This simple inclusion can elevate the overall sensory experience of the maki roll, making each bite more complex and engaging for the palate.
For those who enjoy a little heat, a thin smear of spicy mayonnaise or a sprinkle of Sriracha before rolling can add a delightful kick. This simple addition transforms the flavor profile, offering a zesty contrast to the mild sweetness of the rice and the fresh fillings.
It’s an easy way to customize the spice level and add an extra layer of excitement to each individual roll, catering to those who love a bit of warmth in their meals.
Exploring different dipping sauces can also dramatically alter the experience of enjoying your maki rolls. Beyond the classic soy sauce and wasabi combination, consider a sweet and savory teriyaki sauce, a rich and complex unagi sauce, or even a zesty sweet chili sauce for a different flavor dimension.
Each sauce offers a unique profile that can complement or contrast with the fillings, allowing for endless experimentation and enjoyment of your homemade creations.
How to Prepare maki roll recipe
Step 1: Preparing the Sushi Rice
The journey to perfect maki rolls begins with the rice, and for sushi, that means using short-grain sushi rice. Its high starch content is crucial for achieving that signature sticky texture, which is paramount for holding the rolls together.
Begin by rinsing the sushi rice thoroughly in a fine-mesh strainer under cold running water. Continue rinsing until the water runs clear, a step that removes excess surface starch and prevents the rice from becoming gummy or mushy after cooking, ensuring a delightful texture.
Cook the rinsed rice according to the instructions on your package, or for a more precise method, combine 1½ cups of sushi rice with 1½ cups of water in an Instant Pot, sealing and cooking on high pressure for 10 minutes. Allow the pressure to release naturally for 12 minutes before fluffing the rice gently with a fork.
While the rice is cooking, prepare the sushi vinegar mixture. In a small saucepan, combine ¼ cup of rice wine vinegar with 1½ tablespoons of granulated sugar. Gently heat this mixture over medium heat, stirring occasionally, until the sugar completely dissolves, creating a flavorful seasoning for the rice.
Once the rice is cooked and fluffed, carefully fold the warm sushi vinegar mixture into the rice using a cutting motion with a rice paddle or a spatula. Be gentle to avoid breaking the rice grains. Continue to fold until the vinegar is evenly distributed throughout the rice, coating each grain.
Allow the seasoned sushi rice to cool to just above room temperature. This is a critical step; if the rice is too hot, it can make the nori brittle and difficult to work with, and if it’s too cold, it won’t be pliable enough. Covering the rice with a damp cloth while it cools helps prevent it from drying out.
This meticulously prepared sushi rice is the sticky, flavorful base upon which all great maki rolls are built, ensuring structural integrity and authentic taste.
Step 2: Preparing the Fillings
With the sushi rice cooling to perfection, it’s time to prepare all the delicious ingredients that will fill your maki rolls. Having everything ready and accessible before you start rolling will make the assembly process smooth and efficient.
Begin with the vegetables. Take one English cucumber, peel it carefully, and then slice it into thin, uniform strips, approximately ¼ inch thick. The goal is to create strips that are long enough to span the width of the nori sheet and easy to bite through.
Next, prepare the carrot. Peel a medium-sized carrot and julienne it into thin strips, similar in size and shape to the cucumber strips. If your carrots are particularly hard, you can briefly blanch them in boiling water for about 30 seconds to slightly soften them, making them easier to roll and chew.
For the avocado, select a ripe but firm avocado. Slice it lengthwise and then cut these slices into strips. If the avocado is too ripe, it can become mushy, so aim for one that yields slightly to gentle pressure but isn’t overly soft.
Finally, prepare the imitation crab sticks. Typically, these come in long sticks. Cut each stick in half lengthwise, so you have two thinner strips from each original stick. This ensures they fit neatly within the roll and provide a balanced amount of filling.
Having all your fillings prepped and arranged within easy reach, perhaps in small bowls or on a platter, allows for quick and organized assembly. This mindful preparation is key to a stress-free and enjoyable sushi-making experience.
Step 3: Assembling the Maki Rolls
This is where the magic happens – bringing all the prepared components together to form beautiful, edible sushi rolls. It requires a bit of dexterity, but with practice, it becomes quite intuitive and rewarding.
Start by placing a bamboo sushi mat on a clean, flat surface. If you don’t have a bamboo mat, you can improvise by wrapping a thick kitchen towel securely with plastic wrap; this creates a similar rolling surface.
Lay one sheet of sushi nori, shiny side down, onto the bamboo mat, aligning the bottom edge of the nori with the bottom edge of the mat. Ensure the lines on the nori are running horizontally or vertically as you prefer.
Prepare a small bowl of warm water nearby. Keep your hands slightly damp by dipping your fingertips into the warm water before handling the sushi rice. This simple trick is crucial for preventing the sticky rice from adhering to your hands, allowing for easier and cleaner spreading.
Gently scoop approximately ¾ cup of the prepared sushi rice onto the nori sheet. Using your damp fingertips, carefully spread the rice evenly across the nori, leaving about a 1-inch border of nori bare along the top edge. Apply gentle pressure to create a compact, even layer without mashing the rice.
The goal is to cover the nori almost entirely with a thin, consistent layer of rice, which acts as the outer casing for your fillings. Ensure the rice layer is not too thick, as this can make rolling difficult and the flavor unbalanced.
Step 4: Adding the Fillings
With the base of rice spread evenly on the nori, it’s time to artfully arrange the prepared fillings. The strategic placement of these ingredients is key to both the appearance and the taste of the final maki roll.
Carefully stack your prepared fillings in a neat line across the rice, about one-third of the way up from the bottom edge of the nori sheet. Imagine you are creating a beautiful arrangement that will be enclosed within the roll.
Begin by layering one row of the thinly sliced English cucumber strips. Next, add a row of the julienned carrot strips on top of the cucumber. Then, place one or two of the halved imitation crab sticks alongside the vegetables.
Finally, carefully lay a row of the sliced avocado strips adjacent to the other fillings. The aim is to create a compact, even line of ingredients that will be easy to roll without spilling out the sides.
Ensure that the fillings are not piled too high, as this can make it challenging to achieve a tightly rolled cylinder. A balanced distribution of each ingredient contributes to a harmonious flavor profile in every slice.
The colorful arrangement of these fresh ingredients is visually appealing even before the roll is complete, hinting at the deliciousness within. This deliberate placement ensures that each bite will contain a delightful mix of textures and tastes.
Step 5: Rolling the Maki
This is the most engaging part of the process, where your ingredients are transformed into a perfect sushi roll. Patience and a firm but gentle touch are your best allies here.
Begin by lifting the bottom edge of the bamboo sushi mat, along with the nori and rice, using your thumbs. Use your fingers to hold the filling in place as you start to fold the nori and rice over the line of fillings. The edge of the nori should meet the filling, enclosing it.
Once you’ve made the initial fold, gently squeeze the roll through the bamboo mat. This action helps to compact the ingredients and shape them into a tight cylinder, ensuring that the roll will hold its form when sliced.
Continue to roll the sushi forward, lifting the bamboo mat with each turn to prevent it from getting rolled into the sushi itself. After each complete turn of the mat, give the roll another gentle squeeze. This consistent pressure is what creates a firm, cohesive roll that won’t fall apart.
Keep rolling until you reach the bare strip of nori at the top edge. Use a little bit of the moisture from the damp nori edge to seal the roll shut. You can lightly moisten this bare edge with a fingertip dipped in water if needed.
Once the roll is complete, gently shape it once more within the bamboo mat to ensure it is perfectly cylindrical. Carefully unroll the mat to reveal your beautifully formed maki roll, ready to be sliced and enjoyed. Repeat this entire process with the remaining ingredients.
Step 6: Slicing and Serving
The final step is transforming your perfectly rolled sushi cylinders into bite-sized pieces. This requires a sharp knife and a bit of technique to achieve clean, appealing cuts.
Gather your sliced sushi rolls and a very sharp knife. It is imperative to use a knife that is sharp; a dull knife will crush the roll rather than cut it cleanly.
Prepare a small glass of warm water and keep a clean, damp kitchen towel nearby. Dip the blade of your sharp knife into the warm water, allowing excess water to drip off, then wipe it lightly with the damp towel. This lubrication helps prevent the rice from sticking to the knife, ensuring each slice is neat.
Place a sushi roll on a cutting board and position the knife to cut the roll into approximately ½-inch thick slices. Apply even, steady pressure, using a gentle sawing motion if necessary, to slice through the roll cleanly.
After each cut, or whenever the knife begins to feel sticky, re-wet and wipe the blade. This consistent attention to the knife’s condition will result in perfectly formed sushi pieces every time.
Arrange the sliced maki rolls attractively on a serving platter. They can be served immediately, perhaps with some soy sauce, wasabi, and pickled ginger on the side. The vibrant colors and neat presentation will undoubtedly impress your guests or provide a delightful personal treat.
If you are not serving all the rolls immediately, they can be wrapped tightly in plastic wrap and stored in the refrigerator for a short period, though they are best enjoyed fresh. Enjoy the fruits of your labor!
Pro Tips for maki roll recipe
Master the Rice Texture: The key to successful maki rolls lies in perfectly cooked sushi rice. Ensure you rinse the rice thoroughly until the water runs clear to remove excess starch, and resist the urge to add too much water when cooking, as this can lead to a gummy, unmanageable texture.
Keep Your Hands Damp: Working with sticky sushi rice can be challenging, but a simple trick can make all the difference. Keep a small bowl of warm water nearby and dip your fingertips into it periodically. This prevents the rice from sticking to your hands, allowing for a much smoother and more efficient spreading process on the nori.
Roll with Purposeful Pressure: When it comes to rolling the maki, don’t be afraid to apply firm, consistent pressure. Squeeze gently but firmly through the bamboo mat after each fold. This ensures that the ingredients are packed tightly together, creating a cohesive roll that will slice beautifully without falling apart.
The Sharp, Wet Knife is Crucial: Cutting maki rolls requires a sharp knife; a dull one will crush your beautiful work. Before each cut, dip the blade of your sharp knife into warm water and wipe it lightly with a damp cloth. This lubrication is essential for achieving clean, distinct slices and preventing the rice from sticking to the blade.
Don’t Overfill Your Rolls: While it’s tempting to pack in as many delicious fillings as possible, overfilling your maki rolls can make them extremely difficult to roll tightly and can lead to them bursting open when sliced. Aim for a balanced amount of filling that complements the rice and nori, ensuring a harmonious flavor and texture in every bite.
Practice Makes Perfect: If your first few rolls aren’t perfectly cylindrical or uniformly sliced, don’t be discouraged! Sushi rolling is a skill that improves with practice. Each attempt will give you a better feel for the amount of rice, the density of fillings, and the technique for rolling and slicing.
Experiment with Fillings: While the classic combination of imitation crab, cucumber, carrot, and avocado is delicious, feel free to get creative with your fillings. Consider adding cooked shrimp, thinly sliced cooked salmon, pickled daikon radish, or even a sprinkle of toasted sesame seeds for added flavor and texture.
Consider Rice Alternatives for Variety: For those looking to reduce carbohydrate intake or simply experiment, consider alternative “rice” bases. Finely riced cauliflower, lightly seasoned, can serve as a lower-carb alternative, or even thinly sliced cucumber can be used as a wrap for a truly rice-free option.
Serving Suggestions for maki roll recipe
Decoration
Elevate the visual appeal of your maki rolls with simple yet elegant garnishes. A sprinkle of toasted sesame seeds, either black or white, adds a touch of sophistication and a subtle nutty aroma.
Finely chopped chives or thinly sliced scallion greens can provide a vibrant pop of color and a mild oniony freshness. For a touch of heat and color, a small dollop of bright red tobiko (flying fish roe) or masago (capelin roe) perched atop the rolls makes for a striking presentation.
A few artfully placed slivers of pickled ginger on the side not only cleanse the palate but also add a delicate pink hue to the platter, enhancing the overall aesthetic.
Side Dishes
Maki rolls are wonderfully versatile and pair beautifully with a variety of light and flavorful side dishes. A classic accompaniment is a simple yet refreshing Asian cucumber salad, often dressed with rice vinegar, soy sauce, and a hint of sesame oil.
A light Miso soup, with its comforting umami broth, delicate tofu, and seaweed, provides a warm and satisfying contrast to the cool sushi. Steamed edamame, lightly salted, is another excellent choice, offering a healthy protein boost and a satisfying chew.
For a more substantial meal, consider a small bowl of flavorful ramen broth or a side of seasoned seaweed salad (wakame). These options add depth and variety to the dining experience without overpowering the delicate flavors of the maki rolls.
Creative Serving Ideas
Transform your maki rolls into a delightful interactive experience by setting up a DIY sushi bar. Arrange all the prepared fillings, rice, nori, and dipping sauces in separate bowls, allowing guests to assemble their own custom rolls.
Serve the maki rolls not just as individual pieces, but also arrange them artfully on a large platter in a mosaic pattern, perhaps incorporating different types of rolls for visual interest and variety. This creates a stunning centerpiece for any gathering.
Consider a “sushi flight” by offering a small selection of different maki rolls, each with a unique combination of fillings or sauces, allowing diners to explore a range of flavors and textures. This curated approach elevates the meal into a culinary adventure.
Preparation & Storage
Storing Leftovers
To store leftover maki rolls, it is crucial to maintain their freshness and prevent them from drying out. Wrap each individual roll tightly in plastic wrap to create a seal that minimizes air exposure.
Once wrapped, place the maki rolls in an airtight container. This double layer of protection helps to preserve the texture of the rice and nori, and prevents them from absorbing unwanted odors from other foods in the refrigerator.
Store the container in the refrigerator for no more than 1-2 days. It’s important to note that sushi is best enjoyed fresh, as the texture of the rice can change over time, becoming firmer and less appealing.
Freezing
Freezing maki rolls is generally not recommended for optimal quality. The process of freezing and thawing can significantly alter the texture of the sushi rice, making it mushy and watery once defrosted, and can also affect the crispness of the nori and vegetables.
If you absolutely must store them for a longer period and are willing to accept a compromise in texture, wrap them very tightly in plastic wrap, followed by a layer of aluminum foil, and then place them in a freezer-safe bag or container. This helps to minimize freezer burn.
However, for the best culinary experience, it is highly advisable to prepare only the amount of maki you intend to consume fresh, or to store components separately if making ahead.
Reheating
Maki rolls are best enjoyed at room temperature or slightly chilled, and reheating is not a recommended practice. The delicate nature of the ingredients, particularly the sushi rice and nori, means that any attempt to heat them will likely result in an undesirable texture and flavor profile.
If your rolls have been refrigerated, simply allow them to sit at room temperature for about 15-30 minutes before serving. This will bring them back to a more palatable temperature without altering their integrity.
Any attempt to microwave or bake maki rolls will likely result in soggy nori, hard or mushy rice, and a generally unappetizing outcome. Therefore, fresh preparation or proper refrigeration and bringing to room temperature are the preferred methods.
Frequently Asked Questions
-
Can I use regular short-grain rice instead of sushi rice?
While regular short-grain rice shares some similarities with sushi rice, it is not ideal for making maki rolls. Sushi rice is specifically bred to have a higher starch content, which gives it the necessary stickiness to hold the rolls together without becoming overly gummy or mushy. Regular short-grain rice may not achieve the same cohesive texture, potentially leading to rolls that fall apart easily.
-
What is the best way to ensure my maki rolls are tightly rolled and don’t fall apart?
Achieving tightly rolled maki rolls involves a combination of techniques. Firstly, ensure your sushi rice is properly seasoned and cooled to the correct temperature; it should be sticky but not wet. When spreading the rice on the nori, apply even, gentle pressure without mashing the grains. During the rolling process, use your bamboo mat to apply firm, consistent pressure with each fold, squeezing the roll to compact the ingredients. Finally, be sure not to overfill the roll, as too much filling will make it difficult to achieve a tight seal and can cause the roll to break.
-
How can I prevent the rice from sticking to my hands when I’m spreading it on the nori?
The most effective method for preventing sushi rice from sticking to your hands is to keep them slightly damp. Prepare a small bowl of warm water and dip your fingertips into it before touching the rice. Re-dampen your fingers as needed throughout the process. This simple trick creates a barrier between the sticky rice and your skin, allowing for much easier and cleaner spreading of the rice evenly over the nori sheet.