Mini Chocolate Chip Cookies – Easy Bite-Sized Recipe!
There’s something undeniably comforting about a freshly baked cookie, especially one that’s perfectly portioned for a delightful, single-serving treat. These mini chocolate chip cookies are precisely that—a bite-sized explosion of classic flavor that satisfies a sweet craving without overwhelming your senses.
They capture the essence of a beloved classic in a miniature form, making them ideal for sharing, gifting, or simply enjoying a moment of sweet indulgence. The joy of these cookies lies not just in their taste but also in their charming size and effortless preparation.
Why You Will Love This Recipe
- Perfectly Portioned: These cookies are delightfully bite-sized, offering a satisfying treat without being too indulgent, making them ideal for snacking or sharing.
- Incredibly Quick to Make: With simple pantry staples and no chilling required, you can have warm, homemade cookies ready in a flash, perfect for spontaneous baking sessions.
- Endlessly Customizable: While the classic chocolate chip combination is irresistible, this recipe serves as a fantastic base for various creative twists and additions.
- Versatile for Any Occasion: Whether for a party, a thoughtful gift, or an addition to a cookie platter, their charming size and delicious taste make them a crowd-pleaser.
- Irresistible Texture: Each cookie boasts crisp, buttery edges that give way to a soft, chewy center, creating a delightful contrast with every bite.
Ingredients You Need
Crafting these delightful mini chocolate chip cookies begins with selecting high-quality ingredients that will form the foundation of their delicious flavor and perfect texture. Using fresh, good-quality staples ensures that the simple magic of this classic recipe truly shines through, creating a memorable baking experience and an even more memorable cookie.
Mini Chocolate Chip Cookies

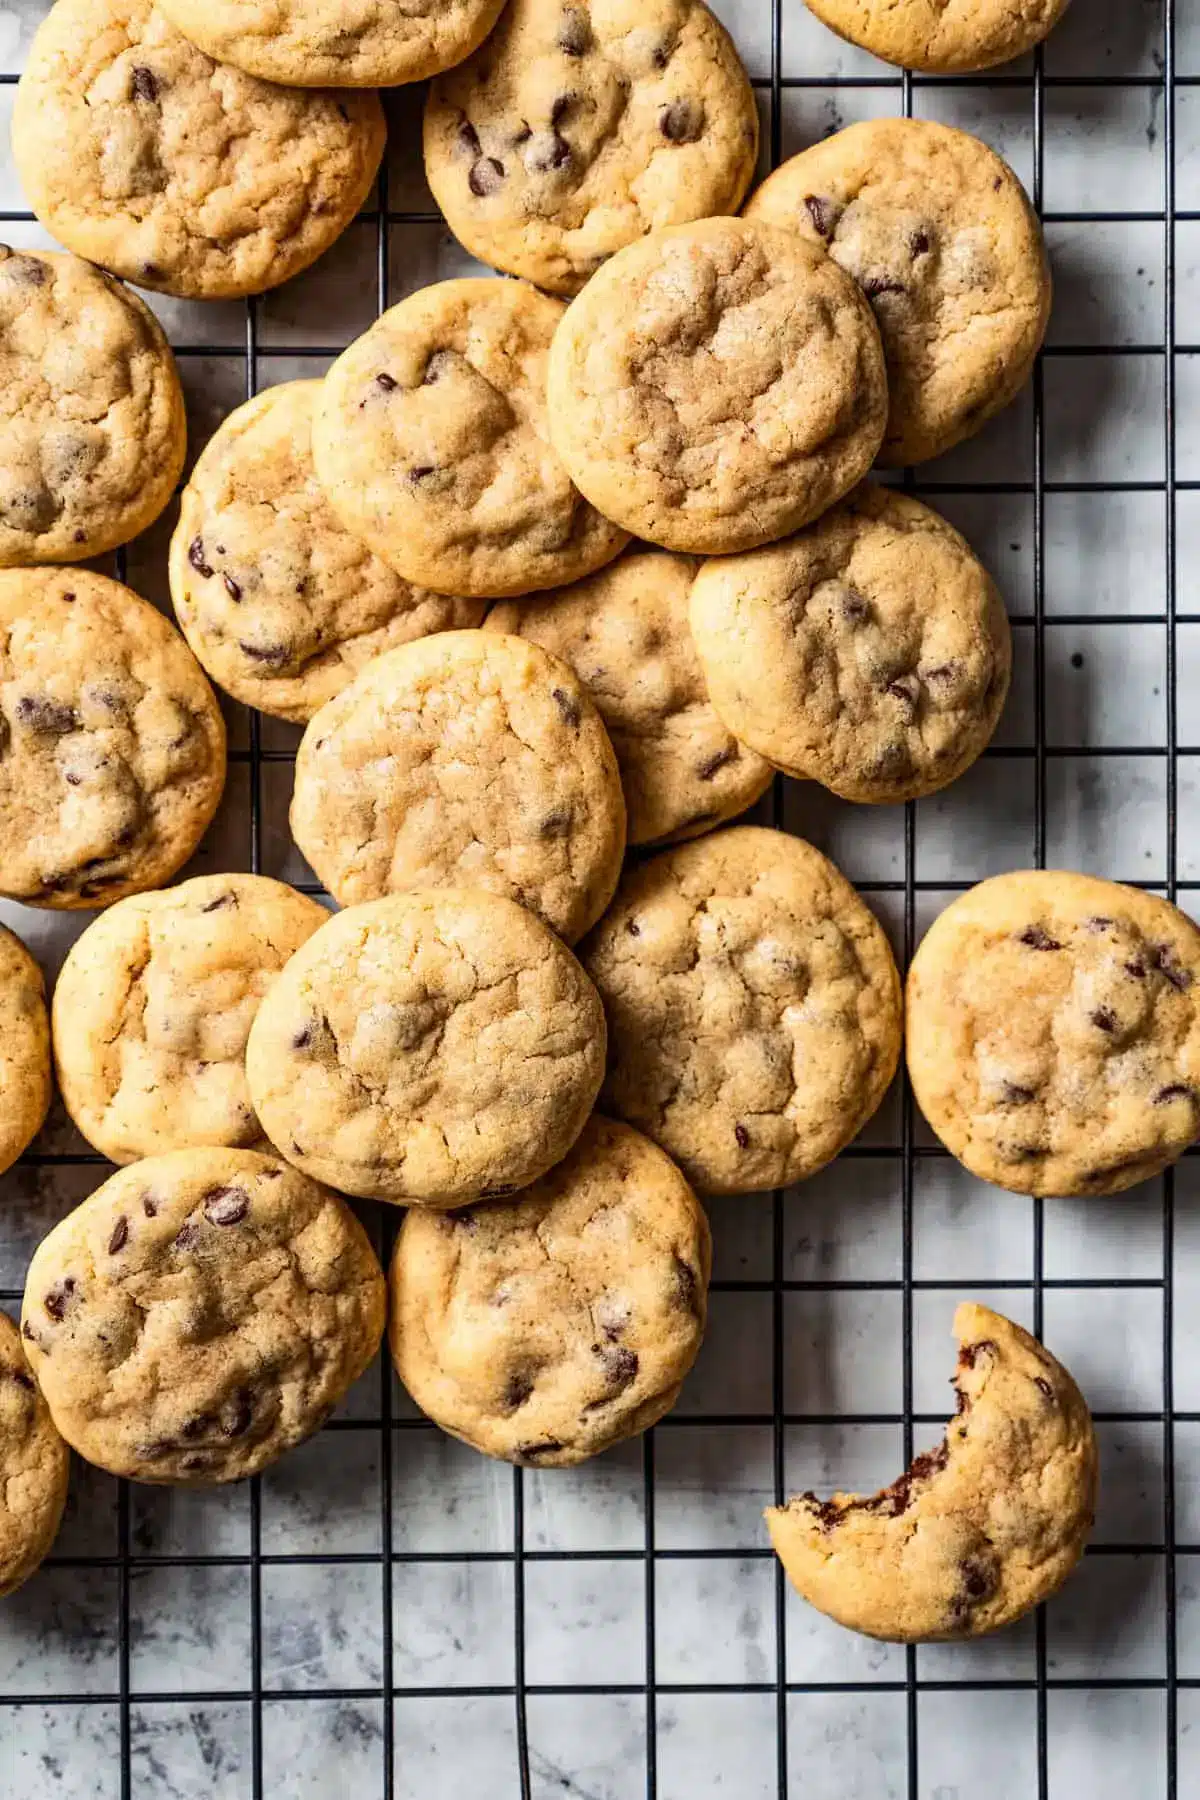
These mini chocolate chip cookies are perfectly sized to satisfy a craving! They’re soft, chewy, and bursting with mini chocolate chips in bite-sized form. They are quick to make with basic pantry ingredients, no chilling required, and a short baking time.
- 1¼ cups all-purpose flour
- ¼ teaspoon salt
- ½ teaspoon baking powder
- ½ teaspoon baking soda
- ½ cup butter, softened
- ¼ cup sugar
- ½ cup dark brown sugar
- 1 large egg
- 1 teaspoon pure vanilla extract
- ½ cup mini chocolate chips
- 1Preheat oven to 350°F. Line one baking sheet with wax paper and line another baking sheet with parchment paper.
- 2In a mixing bowl, combine the flour, salt, baking powder, and baking soda; whisk until well combined and set aside.
- 3In your mixer's bowl, combine the butter, sugar, brown sugar, egg, and vanilla; cream until smooth and creamy.
- 4Gently stir the flour mixture into the butter mixture until thoroughly combined. Stir in the mini chocolate chips.
- 5Scoop out 1/2 teaspoon of cookie dough at a time and drop it onto the wax paper-lined baking sheet. Shape each cookie dough into a ball and transfer the cookie balls to the parchment paper-lined baking sheet, spacing them about 2 inches apart.
- 6Bake for 5 to 6 minutes, or until the edges are light brown and the cookies still feel soft in the middle.
- 7Remove from the oven and let cool on the baking sheet for 2 minutes; then, transfer to a wire rack to cool completely.
Keywords: mini chocolate chip cookies, bite-sized cookies, quick cookies, easy cookies, dessert, cookies
- all-purpose flour: the backbone of our cookie dough, providing structure.
- salt: enhances all the other flavors and balances the sweetness.
- baking powder: helps to give the cookies a slight lift and airy texture.
- baking soda: aids in spreading and browning, contributing to that classic cookie texture.
- butter, softened: provides richness, tenderness, and a wonderful buttery flavor.
- sugar: contributes to sweetness, crispness, and aids in browning.
- dark brown sugar: adds moisture, chewiness, and a deeper caramel note.
- large egg: binds the ingredients together and adds richness and structure.
- pure vanilla extract: imparts a warm, aromatic sweetness that complements the chocolate.
- mini chocolate chips: the star of the show, providing pockets of melted chocolatey goodness.
The precise quantities for each ingredient can be found in the recipe card at the end of this article, ensuring you have all the necessary measurements for success.
Variations
Elevate your mini chocolate chip cookie experience with these creative variations, transforming a classic into something uniquely yours. Each idea offers a different flavor profile and texture, ensuring there’s a mini cookie to suit every palate and occasion.
Vegan Delight: To create a delicious vegan version, simply substitute the butter with a high-quality vegan butter alternative or coconut oil (ensure it’s solid but softened). For the egg, you can use a flax egg (1 tablespoon ground flaxseed mixed with 3 tablespoons water, left to sit for 5 minutes) or a commercial egg replacer. The result is a wonderfully rich and satisfying vegan cookie that rivals its traditional counterpart, perfect for those avoiding animal products or seeking a plant-based treat.
Low-Carb Indulgence: For those watching their carbohydrate intake, these mini cookies can be adapted with a few simple swaps. Replace the all-purpose flour with an almond flour and coconut flour blend for a nuttier, denser texture that’s lower in net carbs. Sweeten the dough with erythritol or your favorite sugar-free sweetener, adjusting the amount to your preferred sweetness level. Ensure your chocolate chips are sugar-free as well; many excellent options are available that maintain that delightful chocolatey burst without the added sugar.
Seasonal Spiced Cookies: Infuse your mini cookies with the warmth of the seasons by adding aromatic spices to the dough. A pinch of ground cinnamon and a whisper of nutmeg can transform these treats into cozy delights, perfect for autumn or winter gatherings. You could even experiment with a touch of ground ginger or cloves for a more complex flavor profile. This subtle addition brings a comforting depth that pairs beautifully with the chocolate chips, making them a favorite during festive periods.
How to Prepare mini chocolate chip cookies
Step 1: Gather and Mix Your Dry Ingredients
Begin by preheating your oven to 350°F (175°C), a crucial step for ensuring even baking and perfect crispness at the edges. While the oven heats, prepare your baking sheets; line one with wax paper for easy dough portioning and another with parchment paper or a silicone baking mat for the actual baking process. Having these ready streamlines the entire cookie-making workflow, preventing dough from sticking and making cleanup a breeze.
In a medium-sized mixing bowl, carefully measure out your all-purpose flour. Add the salt, baking powder, and baking soda to the flour. Whisk these dry ingredients together thoroughly until they are well combined, ensuring that the leavening agents are evenly distributed throughout the flour. This even distribution is vital for achieving the desired texture and rise in your mini cookies. Set this bowl of perfectly blended dry ingredients aside for now.
Step 2: Cream the Wet Ingredients Together
In a separate, larger mixing bowl, place your softened butter. Add the granulated sugar and the dark brown sugar to the bowl with the butter. Using an electric mixer, whether a stand mixer with a paddle attachment or a handheld mixer, cream these ingredients together on medium speed. Continue mixing until the mixture is light, fluffy, and has achieved a pale, creamy appearance.
This creaming process is essential for incorporating air into the dough, which contributes to the cookie’s texture and helps create that desirable chewiness. Once the butter and sugars are perfectly creamed, crack in the large egg. Add the pure vanilla extract to the same bowl. Continue to mix on low speed, just until the egg and vanilla are fully incorporated into the butter and sugar mixture. Be careful not to overmix at this stage, as it can lead to tougher cookies.
Step 3: Combine Wet and Dry Mixtures
Now it’s time to bring the two sets of ingredients together to form the cookie dough. Gradually add the pre-whisked dry ingredients (from Step 1) to the creamed wet ingredients (from Step 2). It’s best to add the dry ingredients in two or three additions, mixing on a low speed with your electric mixer after each addition. This prevents flour from flying everywhere and ensures a more controlled incorporation.
Mix only until the flour is just combined into the wet ingredients. You should no longer see streaks of dry flour. Overmixing at this stage can develop the gluten in the flour too much, resulting in tough cookies instead of tender ones. The dough will start to look cohesive and slightly thick. This is the perfect moment to gently fold in your mini chocolate chips.
Step 4: Fold in the Chocolate Chips
Using a spatula or a wooden spoon, gently fold the mini chocolate chips into the cookie dough. Ensure that the chocolate chips are evenly distributed throughout the dough. You want to make sure that almost every bite of your cookie will contain at least one delightful morsel of melted chocolate. Be careful not to overwork the dough when folding in the chips; just mix until they are dispersed.
The dough should now be a beautiful, chocolate-flecked mixture, ready for shaping. At this point, you have the option to proceed directly to scooping and baking, or you can cover the dough and refrigerate it if you wish to chill it for a slightly different texture or bake it later. Chilling is not strictly necessary for this particular recipe, but it can sometimes lead to a slightly thicker cookie if that’s your preference.
Step 5: Scoop and Shape the Dough
Using a small cookie scoop, such as a 1/2 teaspoon or a small melon baller, portion out the cookie dough. This precise portioning is key to achieving uniform mini cookies that bake evenly and look beautifully consistent. Drop each portion of dough onto the wax paper-lined baking sheet you prepared earlier. Having the dough on wax paper first allows you to easily roll each portion into a neat, compact ball.
Once you have scooped all the dough portions, take each one and gently roll it between your palms to form a smooth, round ball. Transfer these perfectly shaped dough balls to the second baking sheet, the one lined with parchment paper or a silicone mat. Arrange the dough balls about 2 inches apart from each other on the baking sheet. This spacing is important to allow for slight spreading during baking without the cookies merging into one giant cookie blob.
Step 6: Bake to Golden Perfection
Place the baking sheet with the shaped cookie dough balls into your preheated oven. Bake for a short duration of 5 to 6 minutes. It might seem incredibly brief, but these mini cookies bake very quickly. You are looking for the edges to be lightly golden brown. The centers of the cookies should still appear soft and slightly underbaked when you pull them out of the oven.
This slight underbaking is crucial for achieving that signature soft and chewy texture that makes these cookies so irresistible. As the cookies cool on the baking sheet and then on the wire rack, they will continue to set up and firm slightly, reaching their perfect chewy consistency. Overbaking will result in a drier, crisper cookie, so keeping a close eye on them during their short bake time is paramount.
Step 7: Cool and Enjoy
Once the baking time is up, carefully remove the baking sheet from the oven. Allow the mini chocolate chip cookies to cool on the hot baking sheet for about 2 minutes. This short cooling period on the sheet helps them firm up just enough to be moved without falling apart. The residual heat from the baking sheet will continue to gently set the bottoms of the cookies.
After those initial 2 minutes, use a spatula to carefully transfer the cookies to a wire cooling rack. Allow them to cool completely on the wire rack. This promotes air circulation around the cookies, preventing the bottoms from becoming soggy and ensuring they reach their final, delicious texture. Once fully cooled, they are ready to be devoured or stored for later enjoyment. The hardest part, of course, is resisting the urge to sneak one (or several!) straight from the cooling rack.
Pro Tips for mini chocolate chip cookies
Use room temperature ingredients: Ensure your butter and egg are at room temperature before you start. This is essential for proper creaming of butter and sugar, which incorporates air and leads to a lighter, chewier cookie texture. Cold ingredients won’t emulsify properly, impacting the final outcome significantly.
Don’t skip the brown sugar: While you can use all granulated sugar, the combination with dark brown sugar is key to that sought-after chewy texture and rich, caramel-like flavor. Brown sugar has more moisture content than granulated sugar, contributing to a softer cookie that stays chewy longer.
Measure flour correctly: Spoon your flour into the measuring cup and level it off with a straight edge; don’t scoop directly from the bag. Scooping can pack too much flour into the cup, leading to dry, dense cookies that lack the desired tenderness and chewiness.
Chill the dough if you prefer thicker cookies: While this recipe is designed for no-chill dough, if you prefer a slightly thicker cookie that spreads less, you can chill the dough for 30-60 minutes. This allows the fats to firm up, resulting in a more compact cookie after baking.
Resist the urge to overbake: These cookies bake very quickly due to their small size. Pull them from the oven when the edges are set and lightly golden, but the centers still look soft. They will continue to bake and firm up as they cool on the baking sheet, achieving that perfect chewy texture.
Serving Suggestions for mini chocolate chip cookies
Decoration
These mini chocolate chip cookies are so charming on their own that elaborate decoration isn’t always necessary, but a few thoughtful touches can elevate their presentation. A light dusting of edible glitter can add a touch of sparkle for special occasions, making them seem even more festive and magical.
For a more decadent look, consider a very fine drizzle of melted chocolate (dark, milk, or white) across the top of the cooled cookies. Alternatively, a tiny dollop of colorful frosting in the center can add a playful pop of color, transforming them into miniature works of edible art perfect for parties or themed events.
Side Dishes
While mini chocolate chip cookies are a delightful treat on their own, they pair wonderfully with a variety of beverages and accompaniments. A tall glass of cold milk is a classic pairing that enhances the chocolatey goodness and provides a comforting contrast.
For adults, consider serving them alongside a warm cup of coffee or an espresso, where the bitterness of the coffee can beautifully complement the sweetness of the cookie. A scoop of vanilla bean ice cream alongside a couple of these mini cookies can also transform a simple treat into an impressive mini ice cream sandwich experience.
Creative Serving Ideas
Think beyond a simple cookie plate when serving these mini delights; their small size opens up a world of creative possibilities. Assemble them into charming cookie skewers by alternating cookies with fresh berries like raspberries or strawberries for a colorful and portable dessert option, perfect for barbecues or outdoor gatherings.
Create a “cookie bar” where guests can customize their cookies by adding a small amount of frosting or sprinkles themselves, adding an interactive element to your dessert spread. They also make incredibly cute cupcake toppers; simply place one or two mini cookies on top of frosted cupcakes for a delightful, bite-sized addition that guests will adore.
Preparation & Storage
Storing Leftovers
To keep your mini chocolate chip cookies at their best, store them in an airtight container at room temperature. This prevents them from drying out and helps maintain their soft, chewy texture for as long as possible. Ensure the container is truly airtight to lock in freshness and prevent unwanted odors from transferring.
If stored properly, these cookies can remain delicious for up to 4 to 5 days. Avoid stacking them too high if they are still slightly warm, as this can cause them to compress and lose their shape or stick together undesirably.
Freezing
The excellent news is that these mini chocolate chip cookies freeze exceptionally well, making them perfect for advance preparation or for ensuring you always have a sweet treat on hand. Baked cookies can be frozen for up to 3 months, maintaining their delightful flavor and texture.
To freeze, ensure the cookies are completely cooled. Arrange them in a single layer on a baking sheet and freeze until solid, about 1-2 hours. Once frozen, transfer the cookie “bricks” to a freezer-safe airtight container or a heavy-duty freezer bag, separating layers with parchment paper to prevent sticking. This method ensures they remain individual and ready to enjoy.
Reheating
When you’re ready to enjoy your frozen mini chocolate chip cookies, the thawing process is simple and effective. It’s best to let them thaw at room temperature for about 15-30 minutes before serving. This allows them to return to their ideal soft and chewy consistency without becoming soggy.
If you’re craving a warm cookie experience, you can gently reheat them. Place the thawed cookies on a baking sheet in a preheated oven at a low temperature, around 250°F (120°C), for just a few minutes until warmed through. Be very careful not to over-warm them, as their small size means they can quickly go from perfectly warm to overcooked.
Frequently Asked Questions
-
Can I make these mini chocolate chip cookies ahead of time?
Absolutely! These mini chocolate chip cookies are perfect for making ahead. You can store the baked and cooled cookies in an airtight container at room temperature for up to 4-5 days. For longer storage, they freeze beautifully for up to 3 months. Ensure they are completely cooled before freezing, and it’s advisable to freeze them in a single layer initially until firm before transferring to an airtight container or freezer bag to prevent them from sticking together.
-
Why are my mini chocolate chip cookies spreading too much?
Cookie spread can be influenced by several factors, often related to the ingredients and preparation. If your cookies are spreading excessively, it might be due to using melted butter instead of softened butter, an excess of sugar or liquid in the dough, or an oven temperature that is too low. Ensuring your butter is properly softened (not melted) and accurately measuring your ingredients, particularly sugar and flour, is crucial. Also, double-check your oven temperature with an oven thermometer, as inaccurate readings can lead to over-spreading. If your dough seems too soft, chilling it for 30 minutes before baking can help reduce spread.
-
How can I ensure my mini chocolate chip cookies are chewy and not cakey or crisp?
Achieving the perfect chewy texture in mini chocolate chip cookies primarily comes down to your baking time and ingredient ratios. Ensure you are using a good amount of brown sugar, as its molasses content contributes significantly to chewiness. When it comes to baking, the key is to underbake them slightly; pull them out of the oven when the edges are set and lightly golden, but the centers still look soft and slightly underdone. They will continue to firm up as they cool on the baking sheet. Avoid overmixing the dough after adding flour, as this can develop gluten and lead to a cakier texture.