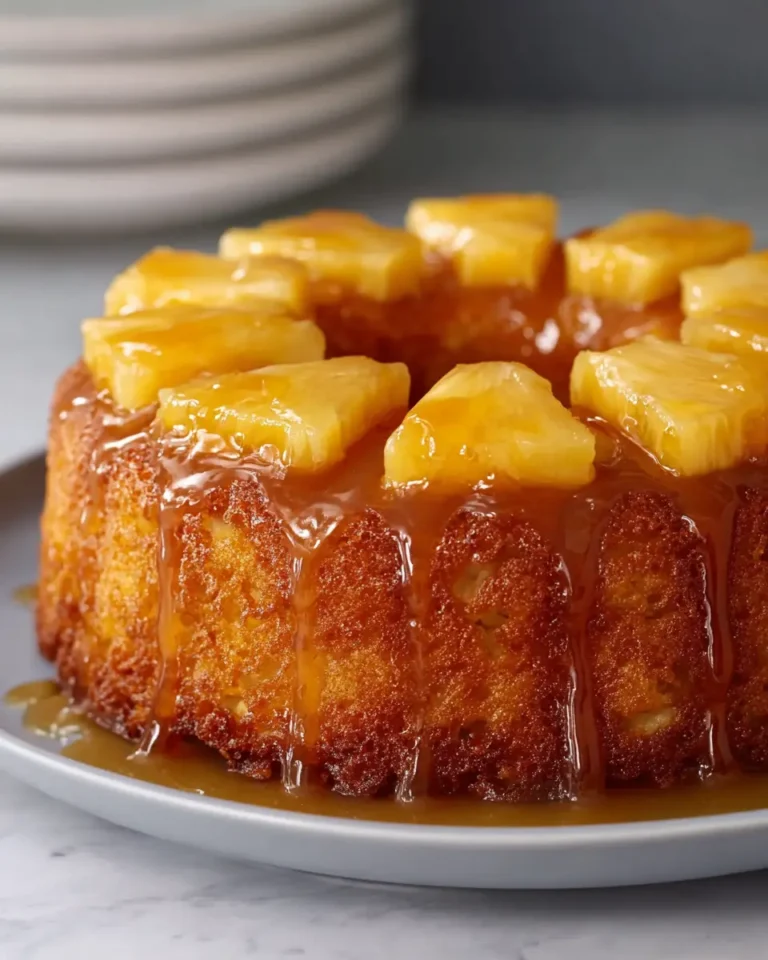
Sweet Pineapple Cake Filling

A luscious pineapple cake filling can elevate any dessert from ordinary to extraordinary, offering a delightful balance of sweetness and tartness. This versatile component adds a burst of tropical flavor and a wonderfully smooth texture that complements various cake bases and frosting styles. It’s a simple addition that makes a significant impact, transforming a good cake into a truly memorable one.
Whether you’re a seasoned baker or just starting, mastering a reliable pineapple filling recipe is a valuable skill. It allows for creative customization and can be prepared in advance, streamlining the dessert assembly process for those busy occasions. The vibrant taste and pleasing consistency make it an indispensable element for many of your favorite sweet creations.
Why You Will Love This Recipe
- Bright Tropical Flavor: Experience the quintessential taste of pineapple, enhanced with just the right amount of sweetness and tang, creating a vibrant fruit layer.
- Silky Smooth Texture: The careful cooking process ensures a luscious, spreadable consistency that melts in your mouth and complements cake layers beautifully.
- Versatile Preparation: Choose between using fresh, juicy pineapple for an intense flavor or convenient canned pineapple for ease and speed, without compromising on quality.
- Make-Ahead Convenience: Prepare this filling days in advance and store it chilled, making it perfect for simplifying the assembly of elaborate cakes and desserts.
- Adaptable for Various Desserts: Beyond cakes, this filling is ideal for cupcakes, parfaits, trifles, or even as a topping for pancakes and waffles, showcasing its wide-ranging appeal.
Ingredients You Need
The quality of your ingredients plays a crucial role in the final flavor and texture of this pineapple cake filling. Opting for ripe, fresh pineapple will yield a more vibrant and nuanced taste, while good quality canned pineapple offers convenience without sacrificing deliciousness. The interplay of brown sugar and lemon juice is key to achieving that perfect sweet-tart balance.
Pineapple Cake Filling
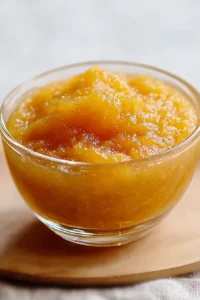
A smooth, sweet-tart pineapple filling prepared in two variations: one made with fresh fruit and the other with canned pineapple. Each version is cooked gently until thickened, then cooled before use in cakes or other desserts.
- For the fresh pineapple filling:
- 9.7 ounces fresh pineapple, peeled and cut into small, even pieces
- 2 teaspoons freshly squeezed lemon juice
- 3.5 ounces brown sugar, firmly packed
- 1/2 tablespoon cornstarch
- 1/4 cup water
- For the canned pineapple filling:
- 3.5 ounces packed brown sugar (either light or dark)
- 9.7 ounces canned pineapple, thoroughly drained
- 2 teaspoons lemon juice
- 1/2 tablespoon cornstarch
- 1/4 cup juice reserved from the canned pineapple
- 1For the fresh pineapple filling: Peel the fresh pineapple and cut it into evenly sized cubes. Place the fresh pineapple pieces into a food processor with the water, then blend until the mixture is completely smooth. Pour the puréed pineapple into a medium saucepan. Add the lemon juice and brown sugar, then cook over medium-low heat, stirring continuously. Once the mixture reaches a gentle simmer, lower the heat to low. Add the cornstarch slurry promptly and stir well so it is fully incorporated. Continue cooking over low heat until the filling becomes thicker. Remove the pan from the heat and allow the fresh pineapple filling to cool fully. If it will not be used right away, refrigerate it until needed.
- 2For the canned pineapple filling: Drain the canned pineapple thoroughly to begin the second filling. Transfer the drained pineapple to a food processor with the reserved pineapple juice, then blend until smooth. Pour the blended mixture into a medium pan. Stir in the lemon juice and brown sugar. Cook over medium-low heat until the mixture begins to simmer. Reduce the heat to low and stir constantly. Quickly add the cornstarch slurry and mix thoroughly. Continue cooking over low heat until the filling reaches the consistency you want. Remove from the heat and let the canned pineapple filling cool completely. Refrigerate the filling if it is not being used immediately.
- 3After both fillings have cooled entirely, keep them stored in the refrigerator until ready to use.
Quantities for these ingredients are detailed in the accompanying recipe card, ensuring you have precisely what you need for the best results.
Variations
This pineapple cake filling is incredibly adaptable, allowing you to tailor it to specific dietary needs or flavor preferences. For a delightful dessert experience that is entirely plant-based, a vegan version can be achieved with simple substitutions. Instead of traditional butter or dairy, use a vegan butter alternative or coconut oil for richness, and ensure your sugar is certified vegan. The cornstarch and fruit base remain the same, guaranteeing that familiar fruity goodness.
For those following a low-carbohydrate lifestyle, a sugar-free variation is easily attainable. You can replace the brown sugar with your preferred low-carb sweetener, such as erythritol, stevia, or monk fruit. It’s advisable to start with a smaller amount of sweetener and adjust to taste, as the intensity can vary. This modification allows you to enjoy the bright pineapple flavor without the sugar content, making it suitable for a keto-friendly cake or tart.
Another exciting variation involves infusing the filling with complementary spices or extracts. Consider adding a pinch of cinnamon or a whisper of nutmeg for a warm, cozy twist that pairs wonderfully with autumn-themed cakes. Alternatively, a splash of rum extract or a few drops of almond extract can add an unexpected layer of complexity and sophistication to the tropical fruit profile. These small additions can dramatically alter the character of the filling, making it suitable for a wide array of creative baking projects.
How to Prepare pineapple cake filling
Step 1: Initial Fruit Preparation
The journey to a perfect pineapple cake filling begins with meticulously preparing your chosen fruit. If you opt for fresh pineapple, the first critical step involves peeling the spiky exterior and diligently removing the tough core. It’s essential to cut the pineapple flesh into relatively small, uniform pieces. This ensures that when you blend the fruit, you achieve a consistently smooth purée without any fibrous chunks.
For those who choose the convenience of canned pineapple, the process is slightly different but equally important. You must ensure the pineapple is thoroughly drained of its syrup. However, do not discard all the liquid immediately, as a portion of the reserved juice will be used in the subsequent blending stage. This saved juice is packed with pineapple flavor, and incorporating it into the filling concentrates that tropical essence beautifully.
The precision in this initial preparation phase directly impacts the texture and ease of blending. Uniform pieces of fresh pineapple will break down more effectively, leading to a silkier final product. Similarly, properly draining canned pineapple is crucial for controlling the sweetness and moisture content of your final filling, preventing it from becoming too watery or overly sweet.
Step 2: Achieving a Silky Smooth Purée
Once your pineapple is prepped, the next crucial step is to transform it into a smooth purée. If you are working with fresh pineapple, place the cut pieces into a food processor or a high-powered blender. Add the measured amount of water, which acts as a liquid to help the blades catch and process the fruit effectively, ensuring no dry pockets remain.
For the canned pineapple variation, you will use the reserved pineapple juice that you carefully saved earlier. Add the drained canned pineapple chunks to your food processor or blender, followed by this measured amount of juice. The canned pineapple is often softer, and the juice provides a natural liquid base that enhances the concentrated fruity flavor. The goal here is to achieve an utterly smooth consistency, free from any discernible lumps or fibrous strands.
This purée forms the foundational base of your cake filling. A perfectly smooth purée guarantees a luxurious, spreadable texture for your finished filling, ensuring it integrates seamlessly between cake layers without creating an uneven or gritty sensation. It’s the secret to that professional, elegant finish that makes a homemade cake feel truly special. This stage is paramount for the overall mouthfeel of your dessert.
Step 3: Gentle Warming and Sweetening
With your smooth pineapple purée ready, transfer it to a medium-sized saucepan. Now it’s time to introduce the elements that will enhance its flavor and texture: brown sugar and lemon juice. The brown sugar not only adds sweetness but also imparts a subtle caramel note, contributing a layer of richness that complements the pineapple’s brightness. The freshly squeezed lemon juice is indispensable; it cuts through the sweetness, sharpens the fruit’s natural tang, and prevents the filling from tasting cloying.
Place the saucepan over medium-low heat. It is crucial to start on a gentler heat setting rather than high. This allows the brown sugar to dissolve thoroughly and evenly into the pineapple mixture without scorching the bottom of the pan. Stirring continuously during this phase is essential to ensure uniform heat distribution and to prevent the sugars from crystallizing or caramelizing too quickly before they have fully integrated.
The initial warming process is about coaxing out the flavors and creating a harmonious blend. As you stir, you will notice the mixture begin to warm through, and the sugar will gradually disappear, leaving a beautifully combined base. This slow, deliberate approach to heating lays the groundwork for a perfectly balanced and delicious pineapple filling, setting the stage for the thickening process that follows.
Step 4: Achieving a Steady Simmer
As the pineapple, sugar, and lemon juice mixture warms, you will reach a point where it begins to develop gentle bubbles, indicating it is approaching a simmer. At this precise moment, it’s time to adjust the heat. Reduce the heat to its lowest setting that still maintains a very gentle, consistent simmer. This step is critical for controlled cooking and flavor development. A vigorous boil can break down the fruit’s delicate flavors, while a too-low heat might not cook it sufficiently.
The goal is to maintain a soft, lazy simmer where only a few bubbles occasionally rise to the surface. This slow cooking allows the flavors to meld and concentrate naturally without becoming harsh. It also ensures that the pineapple breaks down further into a cohesive, smooth mixture, creating the ideal consistency for a filling that will spread beautifully. Patience during this stage is key to developing the depth of flavor you desire.
By maintaining this gentle simmer, you are essentially coaxing out the best qualities of the pineapple and other ingredients. The heat gently thickens the mixture slightly while allowing the sweetness to mellow and the tartness to integrate perfectly. This controlled cooking environment prevents any part of the mixture from sticking to the bottom of the pan and ensures an even texture throughout, preparing it perfectly for the next essential step.
Step 5: Incorporating the Thickener
Now that the pineapple mixture is gently simmering, it’s time to introduce the cornstarch, the magic ingredient that will transform the liquid into a luscious filling. It’s important to prepare a cornstarch slurry first. In a small, separate bowl, whisk together the cornstarch with a tablespoon or two of cold water until it forms a smooth paste, completely free of lumps. This step ensures the cornstarch disperses evenly and thickens the filling without creating a gummy texture.
Once the slurry is ready, carefully pour it into the simmering pineapple mixture in the saucepan. As soon as the cornstarch slurry enters the warm liquid, you must begin stirring immediately and continuously. This vigorous stirring is vital to prevent the cornstarch from clumping together. The friction and distribution from constant stirring will initiate the thickening process almost instantly.
Continue to stir the mixture over the low heat. You will observe a noticeable change in consistency as you stir. The filling will start to transform from a thin liquid into a glossy, noticeably thicker substance. This visual cue indicates that the cornstarch is actively doing its job, binding the liquid and creating the desired spreadable texture for your cake filling. Keep stirring until it reaches a smooth, thickened consistency.
Step 6: Reaching the Perfect Consistency and Cooling
As you continue to stir the thickening mixture over low heat, keep a close eye on its consistency. The goal is for the filling to reach a spoonable, spreadable texture. It should coat the back of a spoon thickly, and when you run your finger through it, the line should hold for a moment before slowly filling in. Avoid overcooking, as this can lead to a stiff or gummy texture; the filling will continue to thicken further as it cools.
Once the desired consistency is achieved – glossy and noticeably thicker but still fluid enough to stir easily – immediately remove the saucepan from the heat. This is a crucial step to halt the cooking process and prevent the filling from becoming too dense. The residual heat in the pan will continue to slightly thicken the mixture as it sits, achieving that perfect final texture.
After removing it from the heat, transfer the warm filling to a clean bowl or a heatproof container. Allow it to cool completely at room temperature. As it cools, it will set further and develop a smoother, more manageable consistency, ideal for layering within cakes or cupcakes. Properly cooled filling is essential for clean assembly and a professional finish, preventing it from melting frostings or soaking into cake layers.
Pro Tips for pineapple cake filling
Don’t Overcook: Once the filling begins to thicken, it’s crucial to remove it from the heat promptly. Overcooking can result in a texture that is too stiff or even gummy, which is undesirable for a smooth cake layer. Aim for a consistency that is thick enough to coat a spoon but still flows slowly.
Cool Completely: Always ensure the pineapple filling has cooled entirely before attempting to use it in your dessert. Warm filling can soften cake layers, cause frostings to melt, and make assembly messy. Chilling the filling solidifies its texture, making it easier to handle and spread evenly.
Chill for Clean Slices: For the most professional and clean-cut slices, assemble your cake and then chill it for at least 30 minutes to an hour before serving. This allows the pineapple filling to firm up slightly within the cake layers, preventing it from oozing out when cut and ensuring neat portions.
Taste and Adjust Sweetness: When using fresh pineapple, its natural sweetness can vary. Taste the mixture after adding the brown sugar and before adding the cornstarch. If it’s not sweet enough for your liking, you can add a touch more brown sugar. Conversely, if it’s too sweet, a little extra lemon juice can balance it out.
Texture Matters: For a truly elegant filling, strive for a smooth consistency by ensuring your purée is well-blended and your cornstarch is properly slurried and incorporated. A grainy or lumpy filling detracts from the overall eating experience and visual appeal of your finished cake.
Serving Suggestions for pineapple cake filling
Decoration
Elevate your cake’s appearance by using the pineapple filling artistically. A simple yet effective method is to pipe a decorative border around the edge of each cake layer before adding the filling in the center. This border acts as a dam, containing the luscious pineapple mixture and preventing it from oozing out the sides. You can also use a small offset spatula to spread a thin layer of the filling over the top of your frosted cake, creating a glistening, tropical glaze.
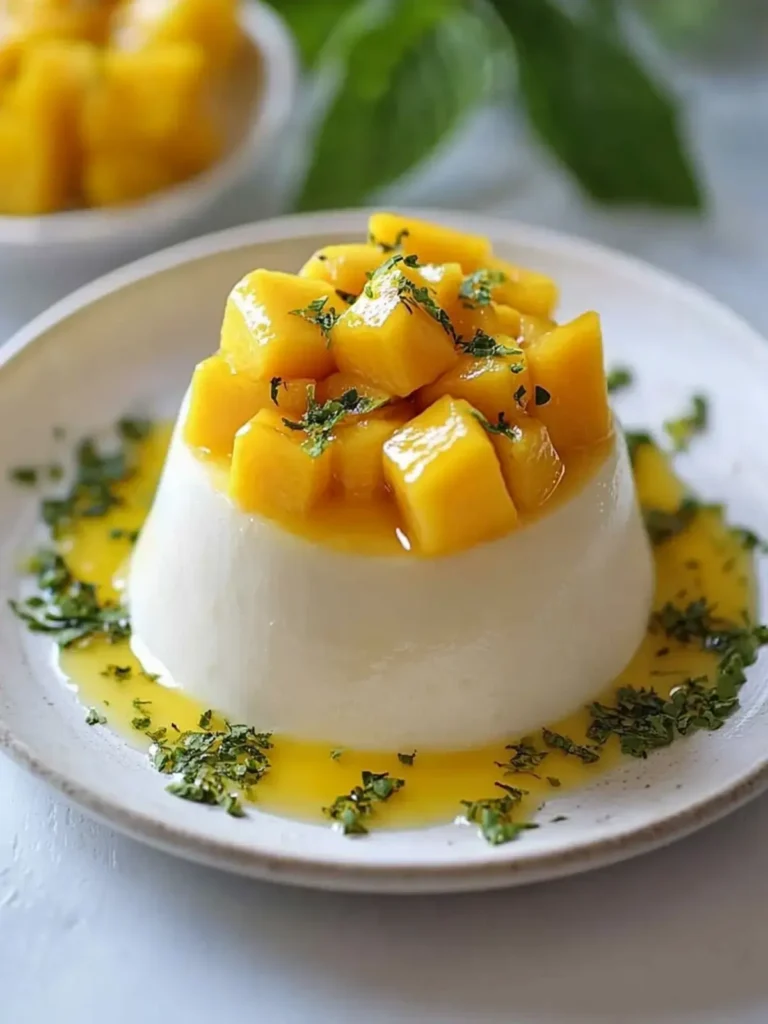
Consider incorporating garnishes that complement the pineapple’s flavor and color. Toasted coconut flakes add a delightful crunch and enhance the tropical theme, scattering them around the base or over the top of the cake. Fresh pineapple wedges, candied pineapple slices, or maraschino cherries can also serve as vibrant focal points. For a more sophisticated look, delicate edible flowers or a dusting of powdered sugar can add an elegant finish.
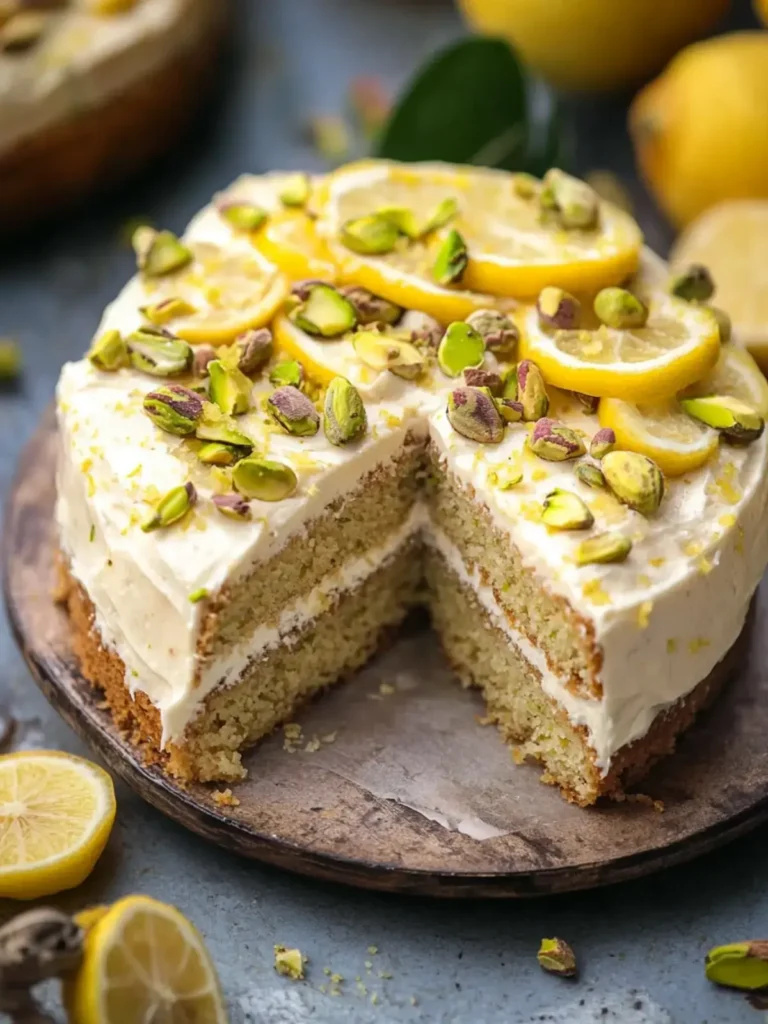
If you’re creating cupcakes, a small dollop of pineapple filling piped directly into the center of the cupcake after baking, or layered on top of the frosting, offers a delightful surprise. A sprinkle of finely chopped nuts, like macadamia or pistachios, can add another layer of texture and visual interest to these individual treats, making them as appealing to the eye as they are to the palate.
Side Dishes
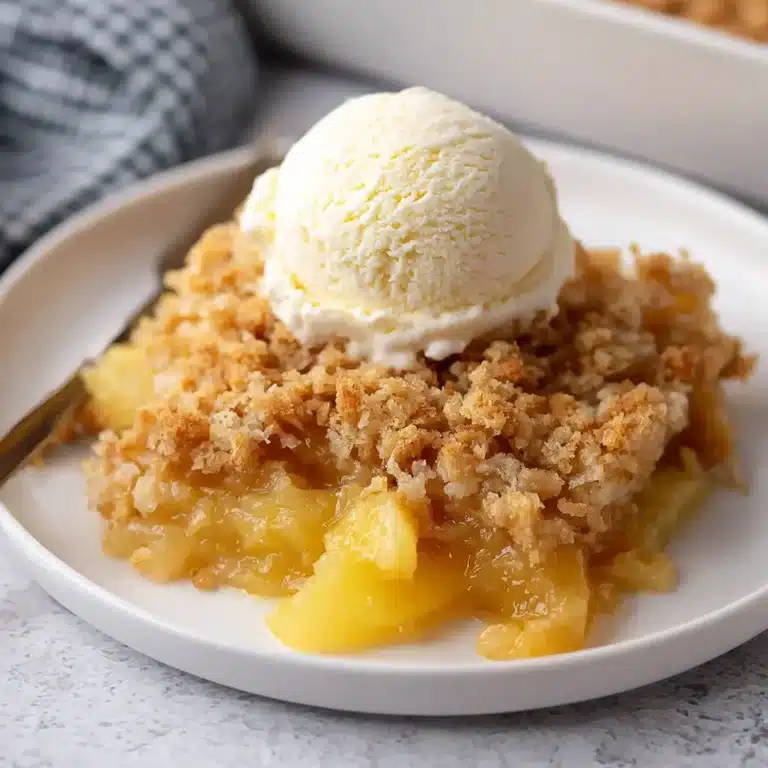
While pineapple cake filling is often an integral part of a cake, it can also be served alongside other components to create a more elaborate dessert experience. For instance, a small scoop of vanilla bean ice cream or a dollop of fresh whipped cream provides a creamy, cooling contrast to the tartness and richness of the pineapple. This classic pairing is always a crowd-pleaser and enhances the overall dessert.
Consider serving your pineapple-filled creation with a light, refreshing sorbet, such as a mango or lime sorbet, to amplify the tropical flavors without making the dessert too heavy. The icy texture of the sorbet offers a pleasant textural contrast to the soft cake and luscious filling. This combination is perfect for warmer weather or when you want a dessert that feels both indulgent and refreshing.
Another appealing option is to pair your pineapple cake with a simple fruit salad that includes complementary fruits like kiwi, mango, or passion fruit. This adds an extra burst of freshness and visual appeal to the dessert table. A drizzle of reduced pineapple syrup or a light passion fruit coulis over the fruit salad can tie the flavors together beautifully, creating a harmonious and delightful dessert spread.
Creative Serving Ideas
Move beyond traditional layer cakes by using this pineapple filling in more unconventional ways. For a delightful dessert that’s perfect for individual servings, layer the pineapple filling with chunks of moist sponge cake and a light vanilla or coconut cream in parfait glasses. This creates an elegant, no-bake treat that can be prepared ahead of time and looks stunning.
Trifle lovers will rejoice at using this filling as one of the key layers. Combine it with cubes of angel food cake, custard, and whipped cream for a tropical twist on the classic British dessert. The bright pineapple flavor cuts through the richness of the custard and cream, making each spoonful exciting and balanced. This presentation is always impressive and adaptable to different flavor profiles.
For a quick and delightful breakfast or brunch option, spoon the pineapple filling over freshly made pancakes, waffles, or even French toast. The warm, fluffy base combined with the sweet and tangy pineapple creates a satisfying and indulgent start to the day. A sprinkle of toasted nuts or a dusting of powdered sugar can further enhance the appeal of this simple yet delicious serving suggestion, bringing a touch of tropical sunshine to your meal.
Preparation & Storage
Storing Leftovers
Once your delicious pineapple cake filling has cooled completely, it’s time to think about preservation. Transfer the cooled filling into an airtight container. This is essential to prevent it from absorbing odors from other foods in the refrigerator and to maintain its freshness. Glass containers are often preferred as they don’t retain odors and are easy to clean.
Store the covered container in the refrigerator. Due to its cooked fruit and sugar content, it should keep well for several days, typically up to 3 to 4 days. Before using any leftover filling, give it a good stir, as the ingredients may settle slightly over time. This simple step ensures the consistency is uniform and ready for your next culinary endeavor, whether it’s another cake, cupcakes, or a parfait.
Ensuring the container is truly airtight is key to longevity. If the filling is exposed to air, it can dry out on the surface or develop off-flavors. Proper storage not only maintains the quality of the filling but also ensures it remains safe to consume, allowing you to enjoy its tropical goodness for an extended period.
Freezing
If you find yourself with an abundance of pineapple cake filling or simply want to prepare it further in advance, freezing is an excellent option. After the filling has cooled completely, portion it into freezer-safe containers or heavy-duty freezer bags. It’s a good idea to label the containers with the date and contents to keep track of your frozen goods.
When you are ready to use the frozen filling, the best method for thawing is to transfer it from the freezer to the refrigerator. Allow it to thaw slowly overnight or for several hours. This gradual thawing helps maintain the best possible texture, minimizing any potential separation or wateriness that can sometimes occur with frozen and thawed fruit products. Avoid thawing at room temperature, as this can lead to spoilage.
Once thawed, the texture of the filling might be slightly softer than when it was freshly made. However, it should still be perfectly usable in cakes, cupcakes, or other baked goods. Give it a thorough stir after thawing to reintegrate any separated liquids and ensure a smooth, consistent texture before incorporating it into your recipes. Freezing is a great way to have this delightful filling on hand whenever inspiration strikes.
Reheating
While this pineapple cake filling is typically used at room temperature or chilled, there might be occasions where gentle reheating is beneficial. For instance, if the filling has been refrigerated and has become quite firm, a brief reheating can make it easier to spread. You can achieve this by placing the filling in a small saucepan over very low heat, stirring constantly. Alternatively, you can microwave it in short, 15-second bursts, stirring well in between, until it reaches a more pliable consistency.
It is important to reheat the filling gently and only as much as needed. Overheating can cause the cornstarch to break down, leading to a thinner, less stable filling. The goal is simply to make it more spreadable, not to cook it further. Once it reaches the desired consistency for spreading, remove it from the heat immediately.
Allow the reheated filling to cool slightly before using it on your cake or other desserts. It should still be warm but not hot enough to damage your frosting or cake layers. This careful reheating process ensures you can still achieve a smooth, even layer of delicious pineapple flavor, even if the filling has been stored for a few days.
Frequently Asked Questions
-
Can I use fresh or canned pineapple for the same result?
Yes, both fresh and canned pineapple can be used to make this cake filling, and both yield delicious results, though with subtle differences. Fresh pineapple will provide a brighter, more vibrant tropical flavor due to its natural enzymes and sugars. It might require a bit more blending to achieve a smooth consistency. Canned pineapple, on the other hand, is more convenient and has a slightly softer texture, often already cut into tidbits. The canned version may also be slightly sweeter, so you might want to adjust the added brown sugar accordingly. Crucially, when using canned pineapple, remember to reserve some of the juice to use in place of water during the blending stage, as this is packed with concentrated pineapple flavor.
-
How thick should pineapple cake filling be?
The ideal thickness for pineapple cake filling is similar to that of a thick fruit curd or a soft jam – it should be easily spreadable but hold its shape. When hot, it will be looser, but as it cools, it will thicken considerably. When ready to remove from heat, it should coat the back of a spoon heavily and slowly drip off. If you can draw a clean line through it with your finger that holds for a few seconds, it’s likely ready. It shouldn’t be so stiff that it’s difficult to spread, nor so runny that it makes your cake layers soggy or causes the filling to ooze out excessively.
-
Can I use this filling for cupcakes and other desserts?
Absolutely, this pineapple cake filling is incredibly versatile and perfect for a wide range of desserts beyond just layer cakes. For cupcakes, you can pipe a small amount into the center after baking or use it as a layer between the cake and frosting. It also works wonderfully in trifles, layered with sponge cake, custard, and whipped cream. You can spoon it into parfaits with yogurt and granola for a delightful breakfast or dessert, or even use it as a topping for scones, muffins, or as a component in a fruit tart. Its bright flavor and smooth texture make it a welcomed addition to many sweet creations.