Antipasto Salad with Grilled Chicken – Easy Summer Salad Recipe!

Imagine a vibrant tapestry of flavors and textures, a dish that transports you straight to a sun-drenched Italian piazza with every bite. This antipasto salad with grilled chicken is precisely that kind of culinary journey, a refreshing and incredibly satisfying meal perfect for any occasion, especially those warm summer evenings.
It’s a dish that celebrates fresh ingredients, combining the simple elegance of Italian appetizers with the heartiness of perfectly grilled chicken, all brought together by a zesty, homemade vinaigrette that doubles as a flavorful marinade. Get ready to discover your new favorite salad.
Why You Will Love This Recipe
- Vibrant Flavors: Experience a delightful explosion of Italian tastes, from the tang of pepperoncini to the creaminess of fresh mozzarella and the brightness of basil pesto.
- Versatile Meal: This salad is adaptable, serving beautifully as a sophisticated starter for a dinner party or as a complete, nourishing main course for a healthy lunch.
- Quick Preparation: With minimal cooking time and straightforward assembly, you can have this delicious meal on the table in under an hour, making it ideal for busy weeknights.
- Healthy and Fresh: Packed with lean protein from the grilled chicken and a bounty of fresh vegetables and cheese, it’s a guilt-free option that doesn’t compromise on taste or satisfaction.
- Customizable: Easily adapt the ingredients to suit your preferences or what you have on hand, making it a go-to recipe that’s always fresh and exciting.
Ingredients You Need
The beauty of this antipasto salad lies in its fresh, high-quality components, each playing a crucial role in the symphony of flavors. Opting for the freshest produce and the best quality cheese will elevate this dish from good to absolutely spectacular. Understanding the role of each ingredient, from the tangy pepperoncini to the creamy mozzarella pearls, will help you appreciate the balance achieved in this delightful salad.
Antipasto Salad with Grilled Chicken
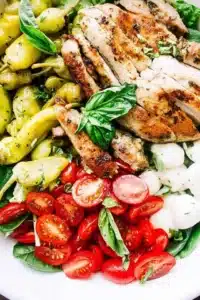
This fresh and delicious antipasto salad is packed with grilled chicken, mozzarella cheese, tomatoes, and pepperoncini, tossed in a homemade vinaigrette. It's a perfect starter or a complete meal.
- For the Vinaigrette Dressing:▢ ½ cup store-bought Basil Pesto▢ ¼ cup extra virgin olive oil▢ 3 tablespoons white wine vinegar▢ 1 tablespoon fresh lemon juice▢ Salt and fresh ground pepper, to taste
- For the Chicken:▢ 1 pound (4 pieces) boneless skinless chicken breasts
- For the Salad:▢ 4 cups chopped Romaine lettuce▢ 1 cup cherry tomatoes, halved▢ 8 ounces fresh mozzarella cheese balls▢ 1 cup pickled pepperoncini
- 1Make the dressing: In a bowl, combine pesto, olive oil, vinegar, and lemon juice; add salt and pepper to taste, and whisk until combined. Pour half of the dressing into a ziploc bag. Place the other half in the fridge.
- 2Marinate the chicken: Add the chicken breasts to the ziploc bag, seal it, and shake it all up until well combined. Place the chicken in the fridge for 30 minutes, or for up to 2 hours.
- 3Prepare to grill: When you're ready to cook your chicken, preheat the grill to 400°F. Brush grill grates with olive oil.
- 4Grill the chicken: Remove the chicken breasts from the marinade and place them on the hot grill. Cook without touching until the chicken breasts start getting some grill marks, about 5 minutes. Turn the chicken breasts over, cover the grill, and let them finish cooking, about 7 more minutes, depending on the thickness of the chicken. Chicken is done when a meat thermometer registers 165°F.
- 5Rest: Remove the chicken from the grill. Cover and let it rest for 5 minutes before slicing.
- 6Assemble the Salad: In the meantime, prepare the salad and transfer the chopped lettuce to a large salad bowl.
- 7Add antipasto: Next, top the lettuce with tomatoes, cheese, and pepperoncini.
- 8Add the chicken: Cut the chicken breasts into strips and add them to the salad.
- 9Dress the salad: Pour the remaining basil pesto dressing over the salad; toss to combine.
- 10Serve.
Keywords: antipasto, salad, grilled chicken, Italian, summer salad, pesto, mozzarella, pepperoncini
The precise quantities for each ingredient can be found within the detailed recipe card provided.
Variations
This antipasto salad is incredibly forgiving and adaptable, allowing for numerous delicious variations to suit different dietary needs and taste preferences. One fantastic alteration is a vegan version, which can be achieved by omitting the chicken and mozzarella and incorporating hearty roasted vegetables like zucchini, eggplant, and bell peppers. Adding some marinated artichoke hearts and kalamata olives will further enhance the savory depth, while a sprinkle of toasted pine nuts can provide a delightful crunch. This vegan adaptation transforms the salad into a rich and satisfying plant-based feast.
For those following a low-carb lifestyle, this salad is already a strong contender, but further modifications can make it even more suitable. Replacing the cherry tomatoes with finely diced cucumber and bell peppers can reduce the carbohydrate count further. Instead of mozzarella pearls, consider adding cubed avocado for healthy fats and creaminess. Ensure your pesto is made with low-carb ingredients, and perhaps add some grilled shrimp or a hard-boiled egg for extra protein. This low-carb option maintains the antipasto essence while adhering to strict dietary goals.
Another exciting direction is a Mediterranean twist. Swap the Romaine lettuce for a bed of mixed greens including arugula and spinach for a peppery kick. Introduce ingredients like sun-dried tomatoes packed in oil, marinated artichoke hearts, and a generous amount of pitted Kalamata olives. You could also swap the mozzarella pearls for crumbled feta cheese, which offers a wonderfully salty and tangy contrast. This Mediterranean-inspired version brings a distinct regional flair to the classic antipasto salad, offering a taste of the Aegean alongside Italian influences.
How to Prepare antipasto salad with grilled chicken
Step 1: Crafting the Luscious Pesto Vinaigrette and Marinade
The foundation of this exceptional salad is its vibrant basil pesto vinaigrette, which ingeniously doubles as a potent marinade for the chicken. To begin this crucial step, gather your ingredients for the dressing: store-bought basil pesto for convenience and excellent flavor, high-quality extra virgin olive oil for richness, white wine vinegar for a bright tang, and fresh lemon juice to add a zesty lift. A pinch of salt and freshly ground black pepper will be added to taste, balancing all the other flavors.
In a medium-sized mixing bowl, combine the basil pesto, extra virgin olive oil, white wine vinegar, and fresh lemon juice. Whisk these ingredients together vigorously until they are well emulsified and smoothly combined, creating a harmonious blend of herbs, oil, and acidity. This initial whisking is key to ensuring the dressing doesn’t separate too readily.
Once your vinaigrette is perfectly blended, it’s time to prepare it for its dual purpose. Carefully pour exactly half of this delicious mixture into a separate, clean container or bowl. This reserved half will be your salad dressing later, so ensure it remains pure and uncontaminated. This thoughtful separation is vital for food safety and flavor integrity.
The remaining half of the pesto vinaigrette in the original bowl is designated for marinating the chicken. This step is where the magic happens, infusing the chicken with the salad’s core flavors before it even hits the grill. Transfer this portion of the vinaigrette into a sturdy zip-top bag or a non-reactive container. Ensure the container is large enough to comfortably hold the chicken breasts without overcrowding.
Step 2: Marinating the Chicken for Maximum Flavor
With the marinade ready, it’s time to introduce the chicken to its flavorful bath. Take your boneless, skinless chicken breasts, ensuring they are patted dry with paper towels to help the marinade adhere better. Place the chicken breasts directly into the zip-top bag or container holding the pesto vinaigrette. Seal the bag securely, pressing out as much air as possible, or cover the container tightly.
Gently toss the chicken within the bag or container, ensuring each piece is thoroughly coated with the pesto marinade. Massage the marinade into the chicken, making sure all surfaces are covered. This even coating is essential for uniform flavor distribution and tenderization. The acidity in the vinegar and lemon juice will begin to work on the chicken fibers, tenderizing it.
Once the chicken is well-coated, place the sealed bag or covered container into the refrigerator. The recommended marinating time is at least 30 minutes. This allows the flavors of the pesto, olive oil, vinegar, and lemon to penetrate the chicken, making it incredibly juicy and flavorful. Avoid marinating for significantly longer than two hours, as the acidic components can begin to break down the chicken’s protein structure too much, potentially resulting in a mushy texture.
While the chicken is marinating, you can use this time to prepare your other salad ingredients. Wash and chop the Romaine lettuce, halve the cherry tomatoes, and ensure your mozzarella balls are ready to go. Having everything else prepped means you can quickly assemble the salad once the chicken is cooked and rested, streamlining the entire process and ensuring a fresh, vibrant final dish. This strategic timing is a hallmark of efficient home cooking.
Step 3: Grilling the Chicken to Perfection
As your chicken nears the end of its marinating time, it’s time to prepare your grill for cooking. Preheat your grill to a medium-high heat, aiming for a temperature of around 400ºF (200ºC). This temperature is ideal for achieving a beautiful sear on the chicken while ensuring it cooks through evenly without burning.
Once the grill is preheated, it’s crucial to prepare the grates. Lightly brush the grill grates with a bit of olive oil. This step is essential to prevent the marinated chicken from sticking to the hot surface, which can lead to tearing and an unsightly appearance. Using a paper towel dipped in oil and held with tongs is an effective method for oiling the grates.
Carefully remove the chicken breasts from the marinade bag, letting any excess marinade drip back into the bag. Discard this leftover marinade as it has come into contact with raw chicken and should not be used for anything else, especially not as a dressing. Place the marinated chicken breasts directly onto the hot, oiled grill grates. Resist the urge to move them immediately.
Allow the chicken to cook undisturbed for approximately 5 minutes on the first side. You’ll know it’s time to flip when you see attractive grill marks forming and the chicken begins to release easily from the grates. This initial period of undisturbed cooking is key to developing a delicious crust and preventing sticking. The heat should be consistent and intense enough to sear the exterior.
After 5 minutes, carefully flip each chicken breast using tongs. Close the grill lid and continue to cook for another 7 to 8 minutes, or until the chicken is cooked through. The exact cooking time will depend on the thickness of the chicken breasts. To ensure they are perfectly cooked, use an instant-read meat thermometer; the internal temperature should reach 165ºF (74ºC) in the thickest part. Overcooking can make the chicken dry, so vigilance is key here.
Step 4: Resting the Grilled Chicken
Once the chicken has reached the optimal internal temperature of 165ºF (74ºC), remove the breasts from the grill immediately. Place the cooked chicken onto a clean cutting board or a plate. It’s crucial to let the chicken rest before slicing it.
Cover the chicken loosely with aluminum foil or a clean kitchen towel. This resting period is not just a suggestion; it’s a vital step in ensuring juicy, tender chicken. During cooking, the muscle fibers tighten, pushing the juices toward the center. Resting allows these juices to redistribute evenly throughout the meat.
Allow the chicken to rest for at least 5 minutes. This brief pause allows the internal temperature to stabilize slightly and, more importantly, permits the juices to re-enter the meat, resulting in a much more succulent and flavorful final product. Skipping this step will cause the juices to run out onto the cutting board when you slice, leaving you with drier chicken.
While the chicken is resting, you can finalize the preparation of your salad base. Ensure your lettuce is chopped, tomatoes are halved, and mozzarella balls are ready to be added. This parallel preparation ensures that as soon as the chicken is sliced, the salad can be assembled and dressed, maximizing freshness and flavor. The aroma of the resting chicken will also start to build anticipation for the meal.
Step 5: Assembling the Antipasto Masterpiece
With the grilled chicken resting and all other components prepped, it’s time for the final assembly of this delightful antipasto salad. Begin by taking your large salad bowl and placing the chopped Romaine lettuce at the very bottom. This forms a sturdy and refreshing base for all the other ingredients, ensuring a good lettuce-to-topping ratio in every serving.
Next, artfully arrange the remaining antipasto ingredients on top of the bed of lettuce. Scatter the halved cherry tomatoes evenly across the greens, adding bursts of sweetness and acidity. Then, add the fresh mozzarella balls, distributing them so that each serving will have a good amount of creamy cheese. Finally, scatter the pickled pepperoncini throughout the salad; their tangy, slightly spicy notes are a signature of antipasto and provide a wonderful counterpoint to the richness of the cheese and the mildness of the chicken.
Now, take your rested grilled chicken. Using a sharp knife, slice the chicken breasts into uniform strips, about ½ inch thick. Aim for consistent sizing so that the chicken pieces are easy to eat and blend well with the other salad components. Arrange these succulent chicken strips attractively over the top of the salad, creating a beautiful visual appeal and ensuring protein is the star.
The final touch is dressing the salad. Retrieve the reserved half of the basil pesto vinaigrette from the refrigerator. Drizzle this dressing evenly over the entire salad, ensuring that all ingredients, from the lettuce to the chicken, are lightly coated. You can add more or less dressing depending on your preference for how moist you like your salad.
Gently toss the salad using salad tongs or two large spoons. Ensure you toss from the bottom up, bringing the lettuce and other ingredients to the top, so that everything is coated in the delicious dressing. Be careful not to over-toss, which can bruise the lettuce and make the tomatoes mushy. The goal is to coat everything lightly and evenly for maximum flavor distribution.
Step 6: Serving the Antipasto Salad
Your vibrant antipasto salad with grilled chicken is now ready to be served and enjoyed. Present the salad in the large bowl you used for tossing, or divide it among individual plates or shallow bowls for a more formal presentation. The array of colors from the tomatoes, mozzarella, peppers, and chicken, all coated in the green pesto dressing, makes for a visually stunning dish.
Serve immediately while the chicken is still warm or at room temperature and the salad ingredients are crisp and fresh. The contrast in temperatures and textures adds another layer of enjoyment to the dish. This salad is perfect as a standalone meal, offering a complete and satisfying dining experience that is both healthy and delicious, embodying the best of Italian summer cuisine.
Pro Tips for antipasto salad with grilled chicken
Ingredient Quality Matters: For the absolute best flavor, use the freshest ingredients you can find. Opt for high-quality olive oil, fresh mozzarella pearls, and vibrant cherry tomatoes. Even the pesto can be significantly improved by using a premium store-bought brand or making your own if you have the time.
Don’t Over-Marinate: While marinating is key for flavor, overdoing it, especially with acidic marinades like this one, can turn your chicken mushy. Stick to the recommended 30-minute to 2-hour window for perfectly tender and flavorful results.
Grill Temperature Control: Achieving the right grill temperature is crucial for perfectly cooked chicken. A consistent 400ºF (200ºC) ensures a good sear without burning the outside before the inside is cooked. Use a grill thermometer if you have one for accuracy.
Resting is Essential: Never skip the resting period after grilling the chicken. This step is non-negotiable for juicy chicken. Covering it loosely with foil allows the juices to redistribute, resulting in a far superior texture.
Adjust Seasoning at the End: While the marinade and dressing are seasoned, it’s always a good idea to taste the final dressed salad and adjust salt and pepper if needed. The flavors of the individual components can sometimes require a little extra boost.
Serving Suggestions for antipasto salad with grilled chicken
Decoration
Elevate the presentation of your antipasto salad with a few thoughtful decorative touches. A scattering of fresh basil leaves, torn or finely chopped, over the top will add an extra layer of aroma and vibrant green color, reinforcing the basil pesto flavor. A sprinkle of toasted pine nuts or slivered almonds can introduce a pleasing crunch and a nutty undertone. For a touch of elegance, consider a few thin shavings of Parmesan cheese or a drizzle of high-quality balsamic glaze for a sweet and tangy finish.
Side Dishes
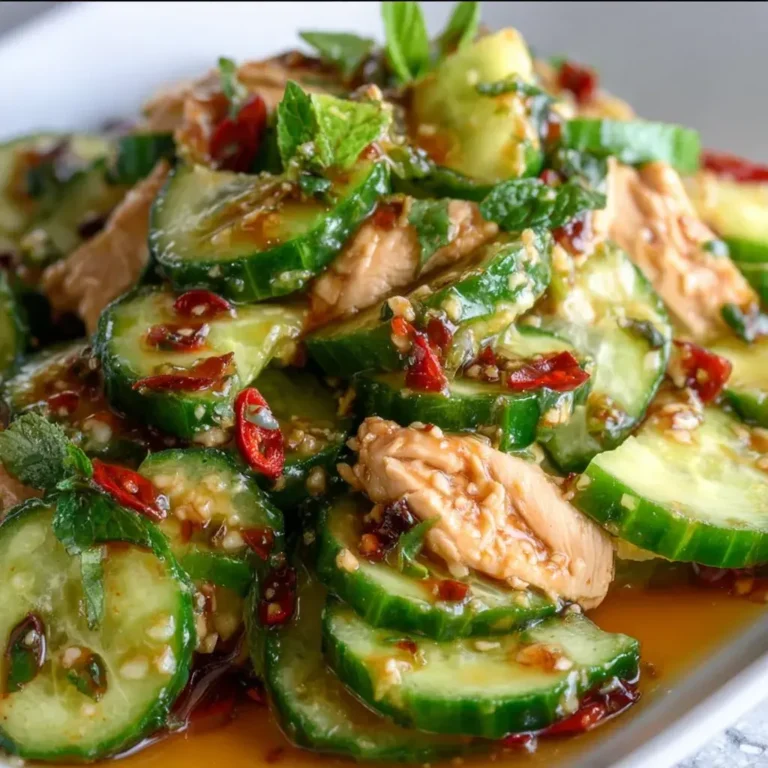
This hearty salad can stand alone as a complete meal, but it also pairs wonderfully with a few select side dishes to create a more expansive dining experience. Crusty Italian bread or focaccia is a classic accompaniment, perfect for soaking up any extra dressing from the salad. A simple side of roasted asparagus or grilled zucchini complements the flavors without overpowering them. For a lighter touch, a small bowl of chilled gazpacho or a refreshing cucumber-mint salad would provide a pleasant contrast.
Creative Serving Ideas
Think beyond the traditional salad bowl for a more engaging presentation. Serve individual portions in martini glasses or mason jars for an elegant, portable option perfect for picnics or potlucks. You could also layer the ingredients in clear serving dishes to showcase the vibrant colors and textures. Consider serving the grilled chicken sliced alongside a smaller portion of the antipasto salad as a deconstructed meal, allowing guests to customize their plate.
Preparation & Storage
Storing Leftovers
Leftover antipasto salad with grilled chicken can be stored in an airtight container in the refrigerator. It is best to store the dressing separately from the salad components to prevent the greens from becoming soggy. If the salad has already been dressed, it will keep for about 1-2 days, but the lettuce may lose some of its crispness. The grilled chicken will remain good for up to 3-4 days when stored properly.
Freezing
Due to the fresh, raw ingredients like lettuce and mozzarella, this antipasto salad is not recommended for freezing. Freezing would significantly alter the texture of these components, making them watery and unappetizing upon thawing. The grilled chicken, however, can be frozen separately if cooked in a larger batch and stored in an airtight container or freezer bag for up to 2-3 months.
Reheating
If you have stored the salad components separately, you can gently reheat the grilled chicken. The best method is to warm it briefly in a skillet over medium-low heat or in a low oven (around 250ºF or 120ºC) until just heated through. Avoid microwaving, as it can dry out the chicken. Reassemble the salad with fresh greens and dressing once the chicken is warmed. If the salad was already dressed, it is best consumed cold or at room temperature without reheating the chicken.
Frequently Asked Questions
-
Can I use pre-cooked chicken for this antipasto salad?
Absolutely! If you’re short on time or prefer not to grill, using pre-cooked chicken is a fantastic alternative. You can use rotisserie chicken, leftover grilled chicken from a previous meal, or even pre-cooked chicken breast strips. Simply shred or chop the chicken and incorporate it into the salad during the assembly stage. Ensure the chicken is seasoned well, or toss it with a little extra vinaigrette before adding it to the salad to boost its flavor.
-
What are the best ways to customize the antipasto elements in this salad?
The beauty of antipasto is its inherent flexibility, allowing for endless customization. Beyond the core ingredients, consider adding a variety of olives like Kalamata or Castelvetrano for different briny notes. Marinated artichoke hearts provide a wonderful tang and tender texture. Roasted red peppers, sun-dried tomatoes, and pickled red onions are also excellent additions that bring depth and color. For a meatier antipasto experience, thinly sliced salami, prosciutto, or pepperoni can be incorporated, adding savory and salty dimensions that truly embody the spirit of Italian appetizers.
-
How can I ensure my salad remains crisp and fresh, especially if I’m packing it for lunch?
To maintain maximum crispness, especially for packed lunches, it’s best to keep the dressing separate from the salad ingredients. Pack the dressing in a small, leak-proof container and add it just before eating. Additionally, try to layer your salad components strategically: place the sturdiest ingredients like chicken and peppers at the bottom, followed by greens, and then more delicate items like tomatoes and cheese on top. Storing the salad in an insulated lunch bag can also help keep it cool and crisp throughout the day.