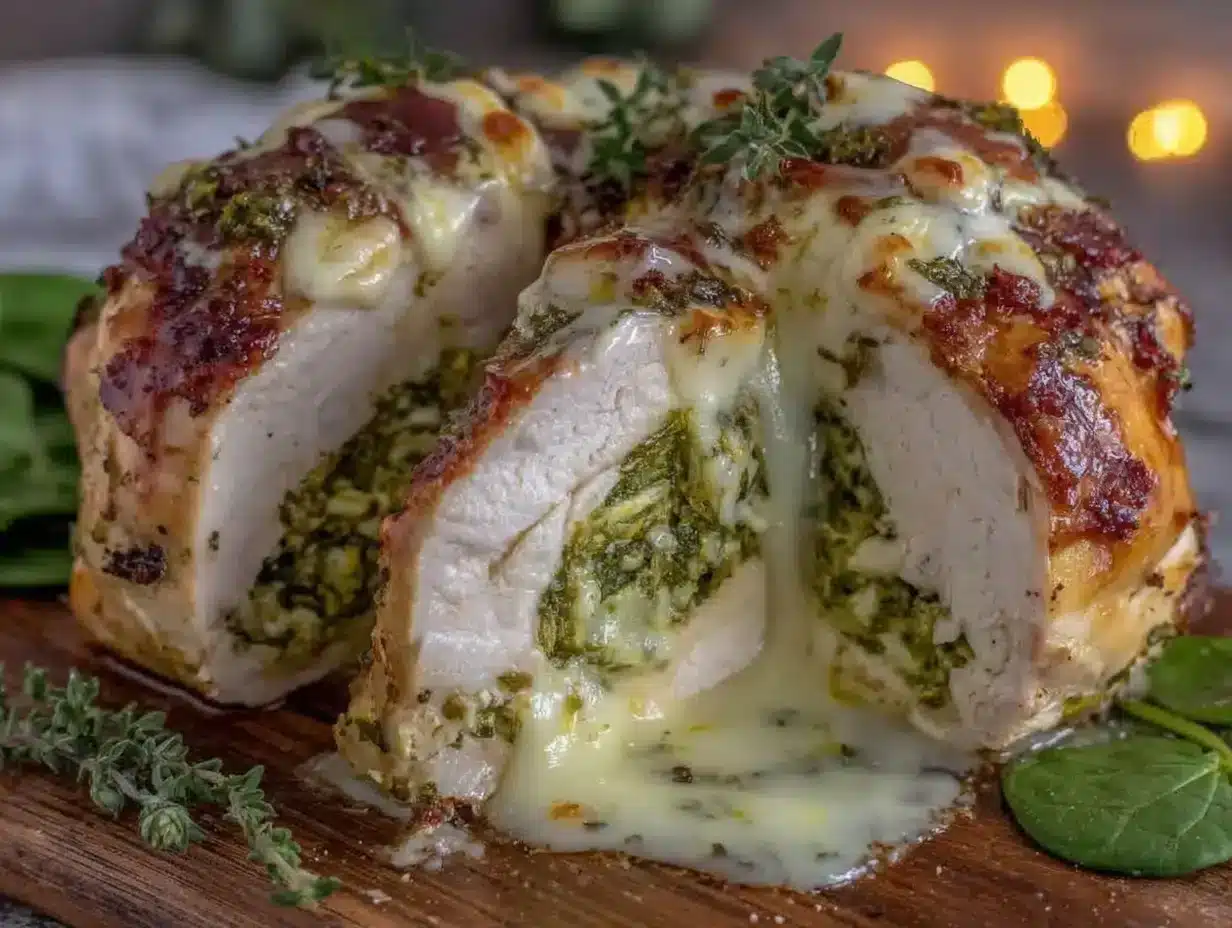
Keto Creamy Spinach Stuffed Chicken Breast Recipe Easy Weeknight Dinner
Some nights, after a marathon day of meetings and errands, I just want dinner to be done—fast, satisfying, and no-nonsense. Enter this Keto Creamy Spinach Stuffed Chicken Breast.
I stumbled on this recipe during one of those chaotic weeks when my fridge was low on options but my craving for comfort food was high. The creamy, cheesy spinach filling surprised me by making the chicken juicy and tender instead of dry and boring—a rookie mistake I’ve made way too many times in the past.
Why You Will Love This Recipe
- Juicy Chicken Every Time: The creamy spinach filling locks in moisture, ensuring your chicken breasts remain tender and succulent, a common pitfall in many keto chicken dishes.
- Quick & Hands-Off Prep: Assembly is remarkably fast, taking less than 10 minutes, perfect for busy schedules when a fresh, homemade meal is desired without extensive cooking time.
- Keto-Friendly Comfort Food: Indulgent flavors from rich cream cheese and mozzarella provide that satisfying comfort without any hidden carbs or dietary guilt, aligning perfectly with keto macros.
- Versatile & Customizable: Easily adapt the recipe by adding your favorite herbs, swapping cheeses, or incorporating extra vegetables like mushrooms or sun-dried tomatoes for a personalized touch.
- Meal Prep Friendly: This dish is an excellent candidate for making ahead, allowing you to have delicious lunches and dinners readily available for several days, streamlining your weekly meal planning significantly.
Honestly, this is now one of my go-to recipes when I want something special but don’t have hours to spend in the kitchen. And if you’ve ever worried about stuffed chicken being dry or bland, give this version a try. It’s creamy, flavorful, and downright satisfying.
Ingredients You Need
For this Keto Creamy Spinach Stuffed Chicken Breast, we’ll be focusing on quality ingredients that bring out the best flavors. You likely have many of these pantry staples already, making this recipe even more accessible for a weeknight dinner. Ensuring fresh ingredients, especially the spinach and cheese, will elevate the dish to new heights. Remember that the precise quantities are detailed within the provided recipe card, so don’t hesitate to consult that for exact measurements.
Keto Creamy Spinach Stuffed Chicken Breast

A quick and satisfying keto-friendly dinner featuring juicy chicken breasts stuffed with a creamy, cheesy spinach filling. Perfect for busy weeknights and meal prep.
- 4 boneless, skinless chicken breasts (about 6 oz / 170g each)
- 2 tablespoons olive oil (30 ml)
- Salt and black pepper to taste
- 4 cups fresh baby spinach (120g)
- 4 oz cream cheese, softened (115g)
- 1 cup shredded mozzarella cheese (113g)
- 2 cloves garlic, minced
- 1 teaspoon Italian seasoning
- Fresh parsley, chopped (optional garnish)
- 1Preheat your oven to 375°F (190°C). Rinse and pat dry the chicken breasts. Butterfly each breast by slicing horizontally almost to the other side, then open like a book. Pound to an even thickness about ½ inch (1.25 cm) if thick. Season both sides with salt and pepper.
- 2Heat 1 tablespoon olive oil in a skillet over medium heat. Add minced garlic and cook for about 30 seconds until fragrant. Add spinach and cook until wilted, about 2-3 minutes. Remove from heat and drain any excess liquid thoroughly.
- 3In a mixing bowl, combine softened cream cheese, shredded mozzarella, grated Parmesan, cooked spinach and garlic, Italian seasoning, and red pepper flakes if using. Mix until creamy and well combined.
- 4Spread an even layer of the spinach mixture onto one side of each butterflied chicken breast. Fold the other side over the filling and press gently to seal. Use toothpicks if needed to keep closed.
- 5Heat remaining 1 tablespoon olive oil in an oven-safe skillet over medium-high heat. Sear the stuffed chicken breasts for 2-3 minutes per side until golden brown.
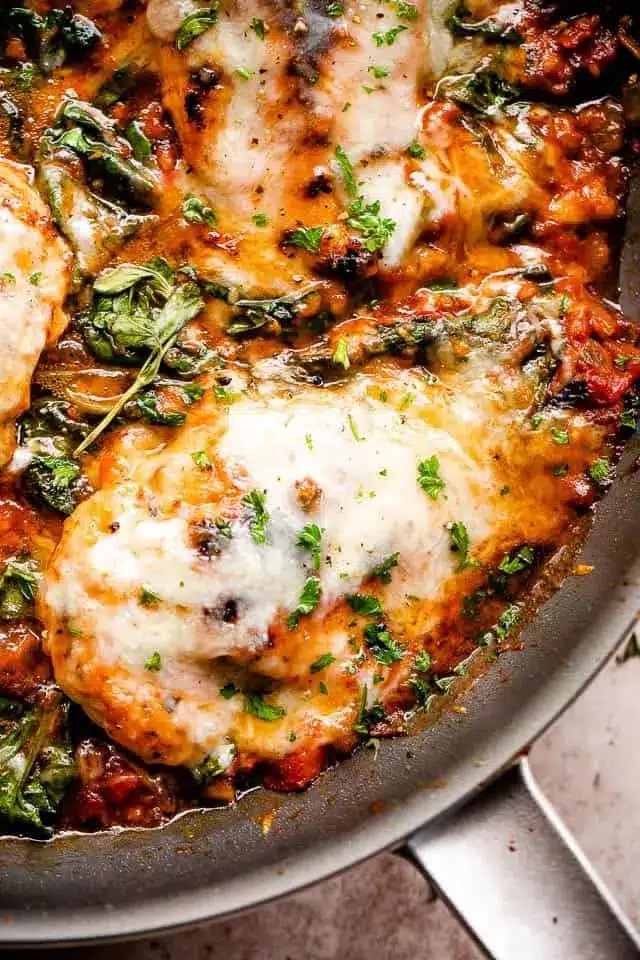
- 6Transfer the skillet to the preheated oven or place chicken in a baking dish. Bake uncovered for 20-25 minutes until internal temperature reaches 165°F (74°C) and cheese filling is bubbling.
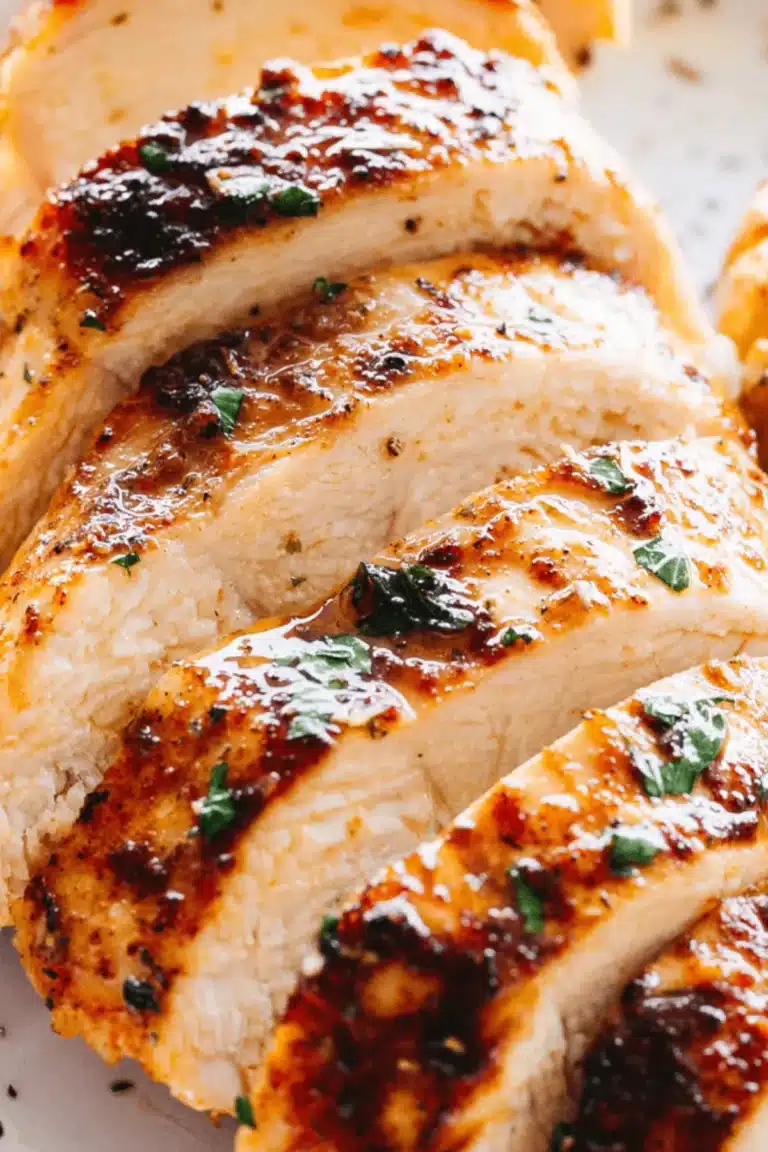
- 7Remove chicken from oven and let rest for 5 minutes before slicing. Sprinkle with fresh parsley before serving.
Keywords: keto, low-carb, stuffed chicken breast, creamy spinach, easy dinner, weeknight meal, keto chicken, cheesy chicken
- chicken breasts: opt for boneless, skinless varieties, aiming for breasts of similar size for even cooking. If they are particularly thick, you’ll want to butterfly them to create a pocket for the delicious filling.
- olive oil: a good quality extra virgin olive oil is recommended for both searing the chicken and infusing it with subtle flavor.
- salt and black pepper: essential for basic seasoning, these foundational spices enhance all the other flavors present in the dish.
- fresh baby spinach: this will be cooked down to concentrate its flavor and reduce moisture, ensuring a creamy, not watery, filling.
- cream cheese: use full-fat cream cheese, softened, as it forms the creamy base of the filling and contributes to a luxuriously smooth texture.
- mozzarella cheese: shredded mozzarella melts beautifully, adding that desirable gooeyness to the spinach filling. Fresh mozzarella can also be used if shredded well.
- Parmesan cheese: this adds a sharp, nutty depth to the cheese mixture, complementing the spinach and creaminess.
- garlic: fresh minced garlic provides warmth and a mild pungent flavor that is crucial for the filling’s aromatic profile.
- Italian seasoning: this blend of herbs ties the filling together nicely, offering a classic savory note.
- red pepper flakes: an optional addition that provides a subtle hint of heat, perfect for those who enjoy a little spice.
- fresh parsley: this is primarily for an optional garnish, adding a pop of color and a fresh, herbaceous finish right before serving.
Always ensure your ingredients are at their freshest for the most vibrant flavors. Consider this a base recipe that invites personal touches and culinary creativity.
Variations
Vegan Delight: For a plant-based twist on this creamy delight, simply swap the chicken for thick slices of cauliflower steak or large portobello mushrooms. The creamy spinach filling can be recreated using cashew cream cheese or a silken tofu base blended with nutritional yeast and garlic for that savory, cheesy essence. Ensure your vegan cheese selection melts well to achieve that desirable gooey texture, and consider adding some toasted pine nuts for a delightful crunch that mimics the richness of the original.
Low-Carb & Flavorful: While the original is already keto-friendly, you can enhance the low-carb aspect further. Instead of traditional breading or coatings, ensure the chicken is perfectly seared to lock in moisture. For the filling, consider adding finely chopped sun-dried tomatoes or a sprinkle of finely diced jalapeños for an extra layer of flavor complexity. Serving this alongside zucchini noodles or a generous portion of cauliflower rice will further enhance its low-carbohydrate profile.
Mediterranean Flair: Infuse this dish with the vibrant tastes of the Mediterranean by adding ingredients like chopped Kalamata olives, sun-dried tomatoes, and a pinch of dried oregano to the spinach filling. A sprinkle of feta cheese alongside the mozzarella would also introduce a delightful tanginess. When serving, a drizzle of good quality olive oil and a scattering of fresh dill or parsley would complete the regional theme.
How to Prepare Keto Creamy Spinach Stuffed Chicken Breast
Step 1: Preheat Oven and Prepare Chicken
The first crucial step in creating your exquisite Keto Creamy Spinach Stuffed Chicken Breast is to preheat your oven. Aim for a temperature of 375°F (190°C), allowing it to reach the optimal heat for even baking. While the oven is warming up, take your chicken breasts and rinse them under cool water. Gently pat them dry with paper towels, as this is essential for achieving a good sear later on. This preparation ensures that the surface of the chicken is ready to brown beautifully.
Now, it’s time to prepare the chicken for stuffing, a technique that ensures a generous filling. Using a very sharp knife, carefully slice each chicken breast horizontally, cutting almost all the way through but leaving one side attached, like opening a book. This process is called butterflying and creates a pocket perfect for holding the creamy spinach mixture. If your chicken breasts are particularly thick, you can gently pound them with a meat mallet or rolling pin (wrapped in plastic wrap to prevent sticking) until they are an even thickness, about ½ inch (1.25 cm) thick. This evenness is key for uniform cooking and makes the stuffing process much simpler.
Once butterflied and possibly pounded, season both sides of each chicken breast generously with salt and freshly cracked black pepper. Don’t be shy with the seasoning; it forms the foundational flavor profile for the entire dish. This simple yet effective step ensures that the chicken itself is flavorful and well-balanced, providing a delicious base for the creamy, cheesy filling that’s to come. Properly seasoned chicken is the backbone of a truly delicious stuffed breast.
Step 2: Sauté Spinach and Garlic
To begin building the vibrant flavors of your filling, heat one tablespoon of olive oil in a skillet over medium heat. Once the oil is shimmering, add your minced garlic. Cook the garlic for approximately 30 seconds, stirring constantly, until it becomes wonderfully fragrant. Be careful not to let it burn, as burnt garlic can impart a bitter taste to the entire dish. This quick sautéing releases the garlic’s essential oils, infusing the oil with its aromatic essence.
Next, add the fresh baby spinach to the skillet. Cook the spinach, stirring occasionally, until it wilts down significantly, which usually takes about 2 to 3 minutes. The volume of fresh spinach reduces dramatically as it cooks, concentrating its flavor and making it manageable for the filling. Once the spinach is thoroughly wilted, remove the skillet from the heat. It’s crucial to allow the spinach to cool slightly before proceeding.
This is arguably the most critical step for a non-soggy filling: draining the excess liquid. After the spinach has cooled a bit, press it firmly with the back of a spoon against the side of the pan or, for even better results, wrap it in a clean kitchen towel and squeeze out as much moisture as possible. Excess water can make your filling runny and cause the chicken to steam rather than bake properly. This diligent draining ensures a thick, luscious filling that stays put.
Step 3: Mix the Creamy Filling
In a medium-sized mixing bowl, combine the softened cream cheese. This is the luscious, rich base that will bind all the other ingredients together into a cohesive and creamy filling. Ensure the cream cheese is at room temperature or slightly softened to make mixing much easier and prevent lumps. The quality of your cream cheese directly impacts the final texture and richness, so using full-fat is highly recommended for the best outcome.
Add the shredded mozzarella cheese and the grated Parmesan cheese to the bowl. These cheeses are vital for both their meltability and their contribution to the overall flavor profile. The mozzarella will provide that irresistible gooey stretch, while the Parmesan adds a sharp, savory depth that complements the spinach beautifully. Stir these cheeses into the cream cheese until they begin to incorporate.
Now, add the thoroughly drained and slightly cooled sautéed spinach and garlic mixture to the bowl. Sprinkle in the Italian seasoning and the optional red pepper flakes for a touch of heat. Mix everything together until it is thoroughly combined and forms a creamy, uniform filling. Taste a small amount (if you’re not concerned about raw cheese) and adjust seasonings if necessary, adding a touch more salt, pepper, or Italian seasoning to suit your preference.
Step 4: Stuff the Chicken Breasts
Take each butterflied chicken breast and carefully spread an even layer of the prepared creamy spinach mixture onto one half of the inside surface. Aim to distribute the filling generously but avoid overfilling, which can make it difficult to seal the chicken properly. The goal is to have a substantial amount of the delicious filling without it oozing out excessively during the next steps.
Once the filling is in place, gently fold the other half of the chicken breast over the filling, creating a sealed parcel. Press the edges together gently with your fingers to help the chicken adhere and to secure the filling inside. If you find that the chicken is struggling to stay closed, don’t hesitate to use a couple of toothpicks to secure the edges. These will act like little stitches, ensuring the filling remains contained throughout the cooking process.
Ensure that the chicken is neatly enclosed around the filling. The smooth, even surface of the stuffed breast is what you’re aiming for. Taking a moment to ensure a good seal will prevent the precious filling from escaping during baking, keeping your chicken moist and the flavors concentrated within. This careful stuffing is key to the success of the dish.
Step 5: Sear the Chicken
Heat the remaining one tablespoon of olive oil in an oven-safe skillet over medium-high heat. This step is critical for developing a beautiful golden-brown crust on the exterior of the chicken. The Maillard reaction, which occurs during searing, not only enhances the visual appeal but also deepens the flavor profile of the chicken. Ensure the oil is hot enough before adding the chicken; you should see a slight shimmer. This ensures an effective sear.
Carefully place the stuffed chicken breasts into the hot skillet. Allow them to sear undisturbed for about 2 to 3 minutes per side. You are looking for a lovely golden-brown color to develop. This process should be quick; the aim is not to cook the chicken through at this stage, but rather to create that flavorful exterior crust and begin the cooking process. Avoid overcrowding the pan; if necessary, sear the chicken in batches to ensure proper browning for each piece.
The searing also plays a vital role in locking in the juices of the chicken. By creating a crust on the outside, you help to retain the moisture within the meat, contributing to a more tender and succulent final product. This crucial step is what elevates simple stuffed chicken to a restaurant-quality dish, adding texture and a rich depth of flavor that baking alone cannot achieve. This golden crust is your first indicator of a successful dish.
Step 6: Bake and Rest the Chicken
Once the chicken breasts have been beautifully seared on both sides, it’s time to transfer them to the oven. If you used an oven-safe skillet, you can simply place the entire skillet into your preheated 375°F (190°C) oven. Alternatively, if your skillet is not oven-safe, carefully transfer the seared chicken breasts to a prepared baking dish. Ensure they are arranged in a single layer, not touching each other, to promote even cooking.
Bake the stuffed chicken breasts uncovered for approximately 20 to 25 minutes. The exact baking time will depend on the thickness of your chicken breasts and your oven’s calibration. The goal is for the chicken to reach an internal temperature of 165°F (74°C). This ensures that the chicken is cooked through and safe to eat, while still remaining moist and tender. The cheese filling should be melted and bubbling enticingly.
After removing the chicken from the oven, it is absolutely essential to let it rest for at least 5 minutes before slicing. This resting period allows the juices within the chicken to redistribute evenly throughout the meat. If you cut into it immediately, all those delicious juices will run out, leaving you with drier chicken. The brief rest ensures that every bite is as succulent and flavorful as possible. Finally, sprinkle with fresh chopped parsley for a touch of color and freshness before serving.
Pro Tips for Keto Creamy Spinach Stuffed Chicken Breast
Don’t skip the spinach draining step. I learned this the hard way when my filling was soggy and leaked during baking, making a mess and potentially drying out the chicken. Squeeze or press out all excess moisture after cooking the spinach; a clean kitchen towel is your best friend here for maximum water extraction.
Butterflying and pounding are key to even cooking. If your chicken breasts are unevenly thick, they won’t cook at the same rate, leading to some parts being dry while others might be undercooked. I use a meat mallet or rolling pin wrapped in plastic wrap to gently pound them to a uniform ½-inch thickness, ensuring perfection every time.
Searing first makes a huge difference in flavor and texture. Skipping the sear step results in less flavorful, paler chicken that can also be drier. The golden crust adds a wonderful textural contrast and locks in those essential juices, contributing significantly to the overall deliciousness.
Use full-fat cream cheese for the best results. Low-fat versions don’t melt as smoothly and can make the filling grainy or watery, compromising the creamy texture you’re aiming for. Full-fat cream cheese provides richness and a superior mouthfeel.
Always check the chicken’s internal temperature. I highly recommend using a meat thermometer to avoid under- or overcooking; 165°F (74°C) is the ideal temperature for perfectly cooked, juicy, and safe chicken. This is a foolproof way to guarantee success.
Toothpicks are your secret weapon for keeping the filling contained. Don’t be shy about using them to hold the chicken together during baking; they’re easy to spot and remove before serving, preventing any messy escapes of that delicious creamy spinach filling.
Serving Suggestions for Keto Creamy Spinach Stuffed Chicken Breast
Decoration
A sprinkle of fresh, finely chopped parsley is the classic and most effective garnish for this dish. Its vibrant green color offers a beautiful contrast against the golden-brown chicken and creamy filling. For an extra touch of elegance, a very light dusting of smoked paprika can add a subtle reddish hue and a hint of smoky aroma without overpowering the main flavors. A few slivers of toasted almonds or pine nuts can also provide a delightful textural and visual accent, enhancing the overall presentation.
Side Dishes
To complement the richness of the stuffed chicken, consider serving it with light and fresh low-carb options. Roasted asparagus spears tossed with lemon zest and a touch of garlic offer a crisp, slightly bitter counterpoint. Steamed or sautéed green beans, perhaps with a hint of butter and slivered almonds, provide a simple yet satisfying accompaniment. A vibrant salad featuring mixed greens, cucumber, cherry tomatoes, and a light vinaigrette dressing is another excellent choice for a refreshing balance.
Creative Serving Ideas
For a more casual presentation, slice the rested stuffed chicken breasts into thick medallions and serve them over a bed of creamy cauliflower mash. This creates a comforting and substantial meal that’s still very keto-friendly. Another idea is to deconstruct the dish slightly by serving the sliced chicken alongside a dollop of the creamy spinach filling on the side, allowing diners to add as much as they desire. For a truly impressive appetizer, cut the cooked chicken into smaller, bite-sized pieces and serve them with a toothpick for easy handling.
Preparation & Storage
Storing Leftovers
Properly stored leftovers of your Keto Creamy Spinach Stuffed Chicken Breast can maintain their delicious quality for up to 4 days in the refrigerator. Ensure the chicken has cooled completely before transferring it to an airtight container. This prevents condensation buildup, which can lead to a less desirable texture upon reheating. It’s best to store the chicken whole or in larger pieces to minimize surface area exposure and retain moisture.
Freezing
This dish freezes remarkably well, making it an excellent candidate for advanced meal preparation. To freeze, wrap each cooled stuffed chicken breast tightly in plastic wrap, followed by a layer of aluminum foil or placing it inside a freezer-safe bag. Properly frozen, the chicken can be stored for up to 2 to 3 months. Ensure it’s well-sealed to prevent freezer burn, which can affect both texture and flavor.
Reheating
Reheating is straightforward and aims to preserve the chicken’s moisture and the integrity of the filling. For best results, thaw frozen chicken breasts overnight in the refrigerator. Then, reheat in a preheated oven at 350°F (175°C) for about 15-20 minutes, or until thoroughly warmed through. Covering the chicken loosely with foil during reheating helps to prevent the exterior from drying out and ensures the filling stays creamy and warm.
Frequently Asked Questions
-
Can I use frozen spinach instead of fresh for the filling?
Yes, you absolutely can use frozen spinach, but with a crucial caveat: you must thaw it completely and squeeze out every last drop of moisture before incorporating it into the cream cheese mixture. Frozen spinach contains significantly more water than fresh, and failing to drain it thoroughly will result in a watery filling that can leak out during baking and make the chicken soggy. I’ve used frozen spinach many times when fresh wasn’t available, and it works beautifully as long as you are diligent with the draining process; it’s a common shortcut that requires careful execution.
-
What if I don’t have cream cheese? Can I substitute it with something else for the filling?
While cream cheese provides the ideal creamy texture and tangy flavor for this filling, you can explore a few alternatives if necessary. Mascarpone cheese offers a similar richness and creamy consistency, though it might be slightly less tangy. Ricotta cheese is another option, but be aware that it tends to be a bit looser and can result in a less cohesive filling; draining the ricotta thoroughly can help mitigate this. For a dairy-free version, a high-quality cashew cream cheese or a well-seasoned blend of blended silken tofu and nutritional yeast can mimic the creaminess and savory notes, though the exact flavor profile will differ.
-
How can I ensure the chicken is fully cooked and not dry?
The most reliable method to ensure your chicken is perfectly cooked and wonderfully moist is by using an instant-read meat thermometer. Insert the thermometer into the thickest part of the stuffed chicken breast, making sure not to touch the filling itself. The chicken is safely cooked when it reaches an internal temperature of 165°F (74°C). If you don’t have a thermometer, you can check by carefully cutting into the center of the thickest part; the juices should run clear, and there should be no pinkness remaining in the chicken meat.