Dill Pickle Ranch Smash Chicken Tacos with Crispy Cheese Lace – Flavor Bomb!
Dill Pickle Ranch Smash Chicken Tacos with Crispy Cheese Lace are a culinary revelation, marrying tangy dill pickle notes with creamy ranch and a shatteringly crisp cheese exterior. This dish offers a unique textural and flavor experience that is both comforting and exciting. It’s the kind of meal that transforms an ordinary weeknight into something memorable, showcasing how simple ingredients can create extraordinary results with a bit of clever technique.
The journey to this recipe began on a quiet, rainy Saturday, a perfect backdrop for culinary exploration and a craving for something with a vibrant zing. The thought of combining the distinct brine of dill pickles with the cooling essence of ranch, all folded into tender, smashed chicken and topped with dramatic, crispy cheese lace, felt like pure inspiration. These tacos have quickly earned a permanent spot in my regular meal rotation, and I’m thrilled to share every detail on achieving that perfect crispiness every single time.
Why You Will Love This Recipe
- Bold Flavor Fusion: The unexpected yet harmonious marriage of dill pickle brine and ranch seasoning creates a zesty, tangy profile that awakens the palate. This combination is both familiar enough to be comforting and unique enough to be utterly captivating. The chicken absorbs these delightful flavors while achieving a fantastic texture.
- Irresistible Texture Contrast: Experience the magic of the crispy cheese lace, a delicate, shattering shell that encases the taco fillings. This element provides an incredible crunch that perfectly complements the tender chicken and soft tortilla. It’s like adding the best part of a gourmet grilled cheese to your taco.
- Effortless Elegance: Despite their impressive appearance, these tacos are surprisingly simple to make, making them ideal for busy weeknights or casual entertaining. The smashing technique for the chicken is both efficient and effective, yielding delicious results with minimal fuss. The dramatic cheese lace adds a visual flair that will impress any guest.
- Customizable Delight: This recipe serves as a fantastic base for personalization, allowing you to tailor it to your specific taste preferences. Whether you opt for different cheeses, add extra toppings, or adjust the spice level, the core elements of flavor and texture remain incredibly satisfying. It’s a versatile canvas for your culinary creativity.
Ingredients You Need
The foundation of any great dish lies in the quality of its ingredients. For these Dill Pickle Ranch Smash Chicken Tacos, selecting fresh, vibrant components will ensure the best possible outcome. The tanginess comes from good quality dill pickles and their brine, while a creamy ranch seasoning mix provides a familiar, comforting base. The chicken itself should be lean and tender, able to soak up the marinade and achieve a beautiful crisp during the smashing process.
Dill Pickle Ranch Smash Chicken Tacos with Crispy Cheese Lace

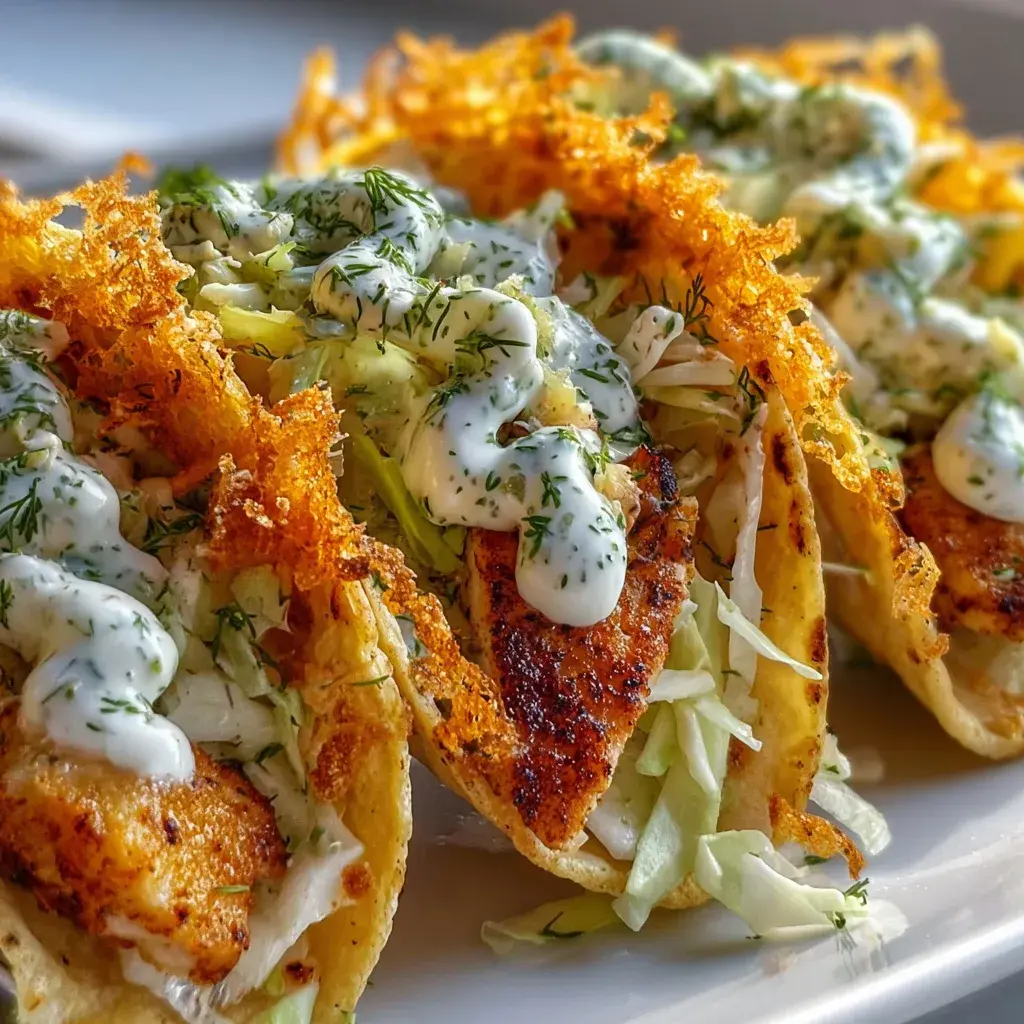
Irresistible tacos featuring tangy dill pickle-infused ranch, tender smashed chicken, and a dramatic, crispy cheese lace that shatters with each bite. A perfect fusion of creamy, tangy, and crunchy flavors that's surprisingly easy to make.
- 2 boneless, skinless chicken breasts (about 1 lb total)
- 1/2 cup dill pickle brine
- 1/4 cup ranch seasoning mix
- 1/4 cup mayonnaise
- 1/4 cup sour cream
- 2 tablespoons chopped fresh dill (optional)
- 1 tablespoon olive oil, plus more for cooking
- 8 small flour or corn tortillas
- 2 cups finely shredded cheddar and Monterey Jack cheese blend
- Optional Toppings: Diced avocado, fresh cilantro, pickled red onions, sliced jalapeños, extra pickle spears, hot sauce
- 1Pound chicken breasts to about 1/2-inch thick. In a shallow dish, whisk together dill pickle brine, ranch seasoning mix, mayonnaise, sour cream, and fresh dill (if using). Add chicken breasts, ensuring they are fully coated. Marinate for at least 30 minutes, or up to 24 hours in the refrigerator.
- 2Remove chicken from marinade, patting them lightly dry with paper towels. Discard excess marinade.
- 3Heat 1 tablespoon of olive oil in a large skillet or cast-iron pan over medium-high heat.
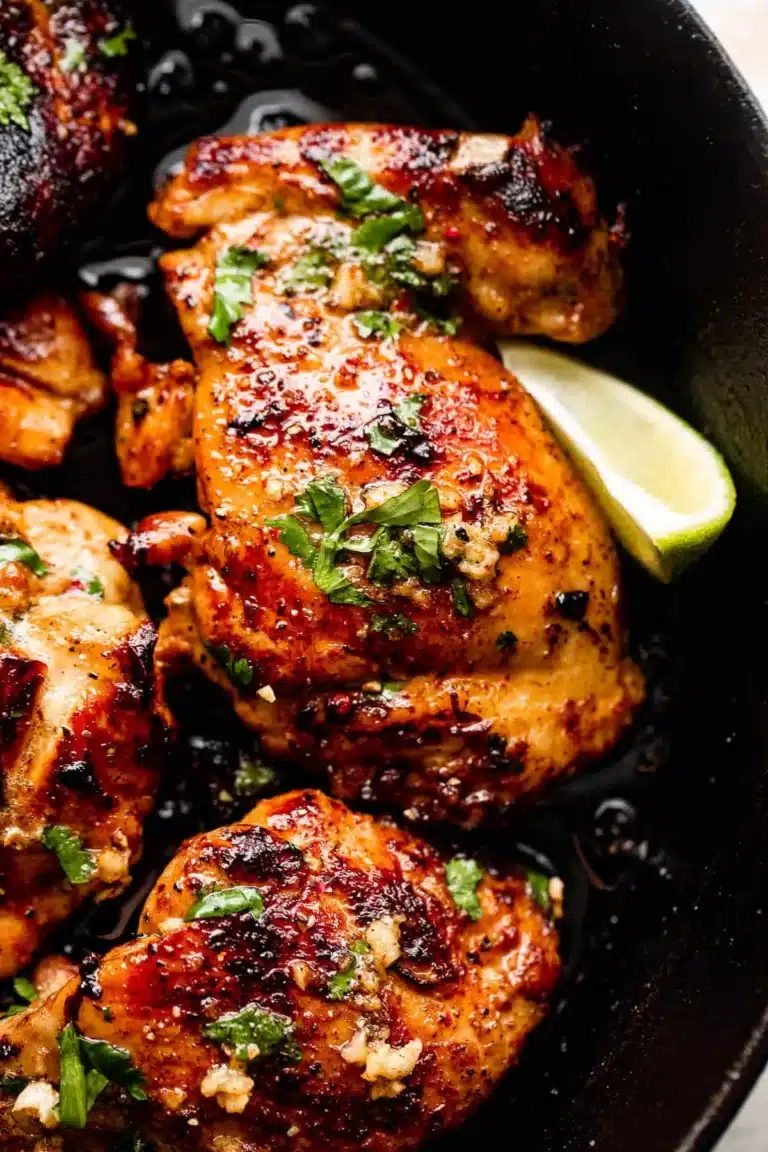
- 4Sear chicken breasts for about 4-5 minutes per side, until golden brown. Press down firmly with a spatula during the first 30 seconds of cooking to encourage browning and smashing.
- 5Reduce heat to medium and continue cooking until chicken is cooked through (internal temperature of 165°F / 74°C). Remove chicken from skillet and let rest for 5 minutes before finely chopping or shredding.
- 6Wipe the skillet clean if necessary, and return to medium-high heat. Add a little more olive oil if needed.
- 7To make the cheese lace: Sprinkle about 1/4 cup of the cheese blend in a circle slightly larger than a tortilla in the hot skillet. Immediately place a tortilla on top of the cheese. Cook for 45-60 seconds, or until the edges of the cheese are golden brown and crispy. Carefully flip the tortilla, so the cheese is now on the outside, and cook for another 15-30 seconds until the tortilla is slightly crispy and the cheese is fully melted and browned. Remove from skillet and repeat with remaining tortillas and cheese.
- 8Assemble tacos: Place the smashed chicken onto the cheesy side of the tortillas. Add your desired toppings.
Keywords: chicken tacos, dill pickle, ranch, crispy cheese, smash chicken, weeknight dinner, Tex-Mex
Quantities for each ingredient are detailed within the recipe card, ensuring you have all the precise measurements needed for success.
Variations
This recipe is a wonderfully adaptable canvas, inviting a host of creative interpretations that cater to diverse dietary needs and flavor preferences.
Vegan Delight: To transform these tacos into a plant-based marvel, simply substitute the chicken with firm or extra-firm tofu. Press the tofu thoroughly to remove excess water, then cube and marinate it in the pickle ranch mixture. Alternatively, use smashed chickpeas seasoned similarly for a different texture. The key is to ensure adequate crisping in the pan.
Low-Carb Lifestyle: For those adhering to a low-carbohydrate diet, the solution is elegantly simple: ditch the traditional tortilla. Opt instead for large lettuce leaves, such as butter or romaine, to serve as your taco shells. These provide a refreshing crunch and keep the carbohydrate count impressively low, allowing you to enjoy all the delicious fillings.
Spicy Fiesta: Elevate the heat by incorporating diced jalapeños or serrano peppers directly into the chicken marinade. A dash of your favorite hot sauce in the ranch mixture or as a finishing drizzle will also amplify the spice factor. Consider adding a sprinkle of chili flakes for an extra kick that tantalizes the taste buds.
How to Prepare Dill Pickle Ranch Smash Chicken Tacos
Step 1: Marinating the Chicken
Begin by preparing the chicken for its flavorful journey. For the best results, choose boneless, skinless chicken breasts and pound them to an even thickness, approximately ½-inch. This uniformity ensures consistent cooking and tenderization. Place the pounded chicken in a resealable bag or shallow dish.
In a separate bowl, whisk together the dill pickle juice, ranch seasoning mix, and a touch of olive oil. This potent mixture is the heart of the taco’s flavor. Pour this marinade over the chicken, ensuring each piece is thoroughly coated. Seal the bag or cover the dish and refrigerate for at least 30 minutes, or ideally, for several hours up to 24 hours to allow the flavors to deeply penetrate the meat.
The acidity in the pickle juice works to tenderize the chicken, while the ranch seasoning infuses it with savory herbs and spices. Don’t discard the remaining marinade; it’s a flavorful liquid gold that can be used in other applications or discarded after marinating.
Step 2: Preparing the Smashed Chicken
Once the chicken has had ample time to marinate, it’s time to get it ready for the pan. Remove the chicken from the marinade, letting any excess drip off, and pat it lightly with paper towels. While you want the flavor to stay, excess moisture can hinder crisping. You can either slice the marinated chicken into manageable pieces or keep them whole, depending on your preference for smashing.
Heat a large skillet over medium-high heat with a tablespoon or two of oil, such as vegetable or canola oil. Once the oil is shimmering hot, carefully place the chicken pieces into the skillet. Do not overcrowd the pan; cook in batches if necessary to ensure each piece gets direct contact with the hot surface for optimal browning.
This is where the “smash” technique truly comes into play. For the first 30 seconds to a minute of cooking, use a sturdy spatula or burger press to firmly press down on each piece of chicken. This action increases the surface area in contact with the hot pan, promoting a beautiful golden-brown crust and ensuring the chicken cooks through quickly and evenly, locking in its juices.
Step 3: Achieving the Crispy Cheese Lace
This is the show-stopping element that truly elevates these tacos. While the chicken is cooking or resting, prepare for the cheese lace. You’ll need a non-stick or well-seasoned cast iron skillet, preferably one that’s already been used for cooking the chicken, as it will retain some flavorful bits. Ensure the skillet is clean and dry.
Heat the skillet over medium heat. Once warm, sprinkle about 2-3 tablespoons of finely shredded cheese in a circular pattern, slightly larger than your tortilla. A blend of cheddar and Monterey Jack cheeses works exceptionally well due to their melting and browning capabilities. Allow the cheese to melt and begin to bubble around the edges, forming a delicate lacy pattern.
Immediately, or just as the cheese begins to crisp, place a tortilla directly on top of the melting cheese. Gently press the tortilla down with a spatula. You’ll want to cook this for about 45-60 seconds, or until the edges of the cheese lace turn golden brown and crispy, and the tortilla is warmed through and pliable. This quick cooking time is crucial for achieving that perfect crisp without burning the cheese.
Step 4: Assembling the Tacos
With your perfectly smashed chicken and delicate cheese lace ready, it’s time for assembly. Carefully lift the cheese-lace-and-tortilla creation from the skillet. You can either place the smashed chicken directly onto the cheesy side of the tortilla or fold the cheese-lace-tortilla in half like a taco shell and then fill it. The former method allows for a more integrated bite.
Chop or shred the smashed chicken into bite-sized pieces if you haven’t already. Pile a generous portion of the flavorful, crispy chicken onto the center of the cheese-lined tortilla. The warmth from the chicken will help further crisp the cheese slightly as it sits.
Now, add a drizzle of your favorite dill pickle ranch dressing or sauce over the chicken. This dressing should be creamy and tangy, echoing the flavors infused into the chicken. A good quality ranch dressing, perhaps with a touch of extra pickle juice stirred in, is ideal here. The goal is a harmonious blend of tastes and textures in every single bite.
Step 5: Adding the Finishing Touches
The tacos are nearly complete, but a few final touches will add layers of freshness and complexity. Consider adding a sprinkle of fresh cilantro, finely chopped for a bright, herbaceous note that cuts through the richness. Pickled red onions offer a beautiful color contrast and a sharp, acidic bite that complements the other flavors wonderfully.
For an extra burst of pickle flavor, add a few thin slices of dill pickle spears or chips directly onto the chicken. If you enjoy a bit of heat, a few thinly sliced jalapeños or a dash of your favorite hot sauce can be added at this stage. A dollop of sour cream or a small spoonful of guacamole can also add a luxurious creamy element.
Finally, gently fold the tortilla around the filling to create your taco. The crispy cheese lace should elegantly drape over the edges, creating a visually stunning presentation. Serve immediately to ensure the maximum crispiness of the cheese lace and the optimal temperature of the chicken. The symphony of flavors and textures is best enjoyed piping hot.
Step 6: Serving and Enjoying
These Dill Pickle Ranch Smash Chicken Tacos are designed to be a centerpiece of your meal. Serve them immediately after assembly to capture that perfect crispness. The combination of the tender, flavorful chicken, the zesty pickle ranch sauce, and the shatteringly crisp cheese lace makes for an unforgettable culinary experience. They are perfect for a lively weeknight dinner or a fun weekend gathering.
For a complete meal, consider pairing these tacos with a light, refreshing side dish. A simple slaw or a crisp green salad would provide a lovely counterpoint to the richness of the tacos. You might also want to have extra dill pickle ranch sauce available for those who love to add an extra drizzle to their tacos. The goal is to enhance, not overpower, the star of the show.
The joy of these tacos lies in their satisfying crunch and bold flavors. Each bite is a delightful mix of tangy, creamy, savory, and cheesy notes, all wrapped in a warm tortilla. They are a testament to how creative flavor combinations can transform a simple concept into something truly special. Don’t be afraid to encourage everyone to customize their tacos with their favorite toppings; the more personalized, the better.
Pro Tips for Dill Pickle Ranch Smash Chicken Tacos
Even Thickness is Key: When pounding the chicken breasts, aim for a consistent ½-inch thickness across the entire piece. This ensures that all parts of the chicken cook at the same rate, preventing some sections from drying out while others remain undercooked. A meat mallet with a flat side or a rolling pin can be used effectively for this.
Don’t Skimp on the Pan Heat: A properly preheated skillet is absolutely essential for achieving that desired crispy crust on the smashed chicken and for creating a beautiful, golden cheese lace. If the pan is not hot enough, the chicken will steam rather than sear, resulting in a less appealing texture and color. Listen for that distinct sizzle when the chicken hits the pan.
Work in Batches for Best Results: Overcrowding the skillet is a common mistake that leads to steaming and uneven cooking. Whether you’re searing the chicken or making the cheese lace, give each component adequate space in the pan. This allows for better heat circulation and more efficient browning, ultimately leading to superior texture and flavor. It might take a little longer, but the payoff is worth it.
Finely Shred Your Cheese: For the most delicate and crispy cheese lace, use a box grater to finely shred your cheese. Pre-shredded cheeses often contain anti-caking agents that can interfere with smooth melting and crisping. The finer the shred, the more surface area will come into contact with the hot pan, creating a more intricate and satisfying lacy effect. Experiment with different cheese blends to find your favorite combination.
Master the Timing: The cheese lace cooks very quickly. Watch it closely as it melts; the moment the edges start to brown and crisp is your cue to add the tortilla. Similarly, the tortilla cooks rapidly on the cheese. Overcooking will result in a burnt or bitter cheese lace. Practice makes perfect, and after a few tries, you’ll instinctively know the right moment to flip or remove from the heat.
Serving Suggestions for Dill Pickle Ranch Smash Chicken Tacos
Decoration
Elevate the visual appeal of your tacos with thoughtful garnishes. Freshly chopped cilantro adds a vibrant green hue and a burst of herbaceous freshness. Thinly sliced radishes can provide a peppery crunch and a bright pink contrast. A sprinkle of smoked paprika over the chicken before serving adds a touch of smoky depth and a warm, reddish-orange color, enhancing the overall presentation.
Side Dishes
To complement the rich and tangy flavors of the tacos, consider serving them with a light and refreshing side. A simple coleslaw made with shredded cabbage and a light vinaigrette offers a crisp, cool balance. Elote, or Mexican street corn salad, provides a creamy, cheesy, and slightly spicy accompaniment. A simple cucumber and tomato salad dressed with lime juice and cilantro offers a clean, palate-cleansing contrast.
Creative Serving Ideas
Transform taco night into an interactive experience with a “Build-Your-Own” taco bar. Lay out bowls of shredded lettuce, diced tomatoes, diced onions, avocado or guacamole, sour cream, and extra pickles. Offer both corn and flour tortillas to cater to different preferences and textures. For a fun twist, include a selection of hot sauces, from mild to fiery, allowing guests to customize their heat level. This approach makes the meal engaging and ensures everyone gets exactly what they like.
Preparation & Storage
Storing Leftovers
These tacos are best enjoyed fresh due to the crispy cheese lace, which can soften over time. However, if you have leftovers, store the components separately to maintain maximum quality. Keep the smashed chicken in an airtight container in the refrigerator for up to 2-3 days. Store any remaining dill pickle ranch sauce in a separate sealed container. Tortillas can be stored at room temperature for a day or two.
Freezing
Freezing these tacos is not recommended if you want to preserve the crispiness of the cheese lace and the optimal texture of the smashed chicken. The moisture content in the ingredients, especially after cooking and chilling, can lead to a less desirable texture upon thawing. It’s best to prepare the components and assemble just before serving.
Reheating
To reheat the chicken, place it in a skillet over medium heat with a touch of oil, stirring occasionally until heated through and slightly crisped again. This method helps revive some of the crispiness. The dill pickle ranch sauce can be gently warmed or used cold. For the cheese lace, it’s best to make it fresh. Reheating the tortilla might work in a dry skillet, but the cheese will likely not regain its original crispness.
Frequently Asked Questions
- Can I make the dill pickle ranch sauce from scratch?
Absolutely! To create a homemade dill pickle ranch sauce, combine ½ cup of sour cream or Greek yogurt, ¼ cup of mayonnaise, 2 tablespoons of finely chopped fresh dill, 1 tablespoon of pickle juice, 1 teaspoon of garlic powder, ½ teaspoon of onion powder, and salt and pepper to taste. Whisk all ingredients together until smooth and creamy. Adjust pickle juice for tanginess and consistency as needed. This homemade version offers a fresher flavor profile and allows you to control the ingredients.
- What kind of pickles are best for this recipe?
Dill pickles are essential for the signature tangy flavor. You can use whole dill pickles, spears, or even dill pickle chips, as long as they are brined in dill. The quality of the pickle juice matters significantly, as it’s a primary flavoring agent for the marinade and the sauce. For the best results, opt for a good quality, naturally fermented dill pickle if possible, as these often have a more complex and authentic flavor. Avoid sweet or bread-and-butter pickles, as they will alter the intended taste profile of the taco.
- How can I make the cheese lace crispier?
Ensuring the cheese lace is exceptionally crispy involves a few key factors. Firstly, use a hot, well-seasoned skillet; a cast-iron skillet is ideal for its heat retention. Secondly, make sure the cheese is finely shredded, as this allows for quicker and more even melting and browning. Thirdly, don’t overcrowd the pan when making the lace – give each portion of cheese ample space to spread and crisp up. Finally, cook the cheese lace for just the right amount of time; watch for golden brown edges and listen for a gentle sizzle, indicating it’s achieving perfect crispiness without burning. Overcooking will make it tough and bitter.