Soft Brazilian Coconut Cake
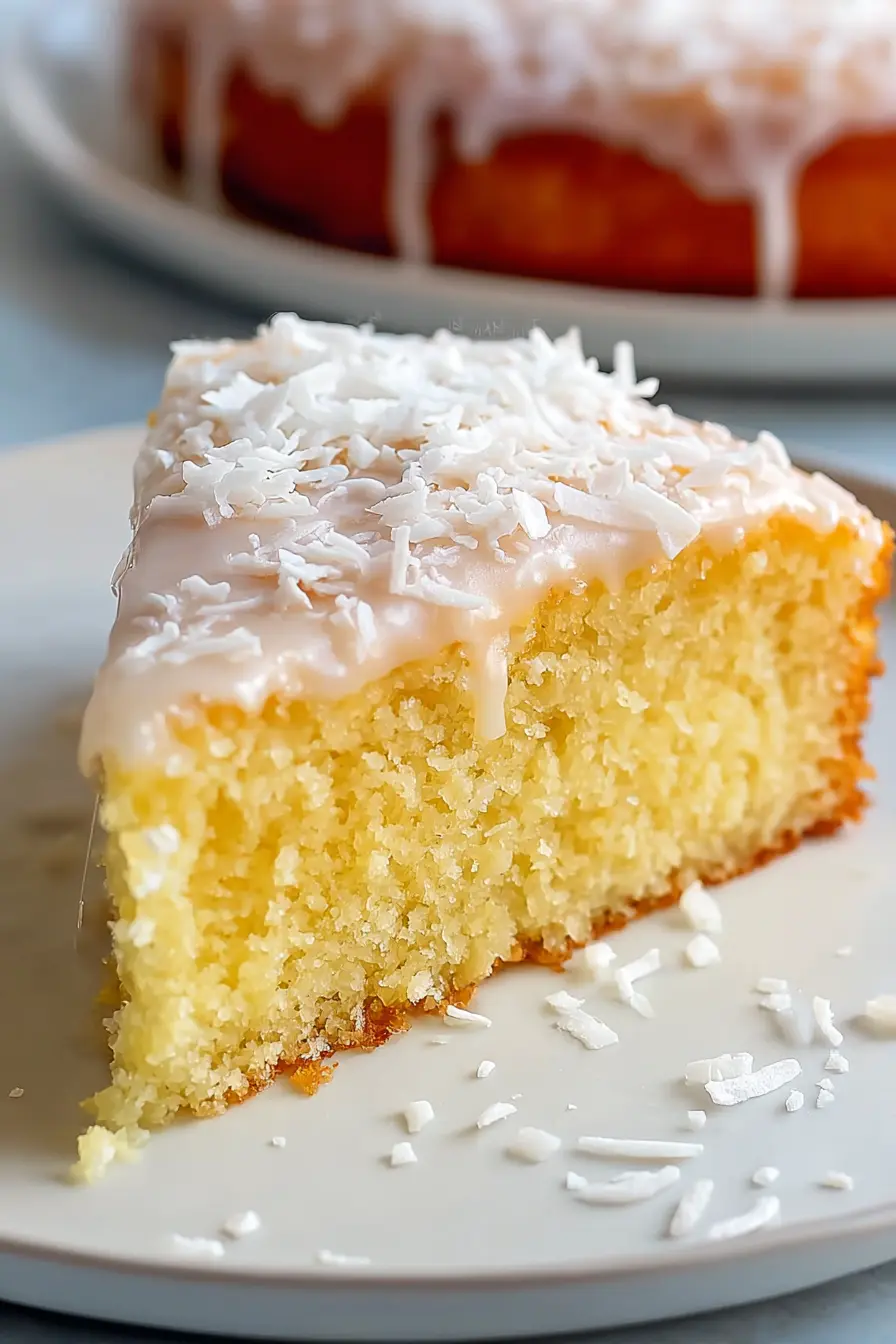
Brazilian Coconut Cake is a delightful treat that combines a light, airy sponge with a luscious, sweet coconut soak. This dessert is perfect for any occasion, offering a taste of the tropics with minimal fuss. Its moist texture and comforting sweetness make it an instant favorite.
This cake is more than just a dessert; it’s an experience of simple elegance. The preparation is straightforward, allowing even novice bakers to achieve impressive results. The magic happens as the warm cake absorbs a rich, creamy coconut glaze, transforming into a wonderfully tender and flavorful confection.
Why You Will Love This Recipe
- Effortless Preparation: The batter comes together quickly, and the baking process is straightforward, making it ideal for busy bakers.
- Incredibly Moist Texture: A generous coconut and condensed milk soak ensures every bite is lusciously tender and rich.
- Tropical Flavor: The prominent coconut notes bring a delightful taste of the tropics to your table.
- Make-Ahead Friendly: This cake improves with time as the glaze fully penetrates the crumb, making it perfect for entertaining.
- Beautifully Simple Presentation: Topped with shredded coconut, it offers an appealing, natural aesthetic without needing complex frosting.
Ingredients You Need
The quality of your ingredients will significantly impact the final taste and texture of your Brazilian Coconut Cake. Using fresh eggs, good quality flour, and pure vanilla essence will elevate this simple dessert. The coconut milk and condensed milk are key to achieving that signature moistness and sweetness.
Brazilian Coconut Cake
A light, airy Brazilian-style coconut cake soaked with a rich coconut and condensed milk glaze, then finished with a generous layer of shredded coconut for a moist and flavorful dessert.
- 1/2 cup unsweetened coconut milk
- 3/4 cup granulated sugar
- 1 teaspoon baking powder
- 4 large eggs, separated
- 3/4 cup plain all-purpose flour
- 1 teaspoon vanilla essence
- 3/4 cup sweetened condensed milk
- 1/3 cup unsweetened coconut milk
- 3/4 cup sweetened shredded coconut
- 1Preheat the oven to 350°F (175°C). Lightly grease a 9x9-inch cake pan, or a pan of similar size.
- 2In a medium bowl, sift together the all-purpose flour and baking powder until evenly combined. Set aside.
- 3Separate the eggs, placing the yolks in a small bowl and the whites in a large mixing bowl or the bowl of a stand mixer. Beat the egg whites on medium-high speed until stiff peaks form.
- 4Reduce the mixer speed to low and gradually incorporate the yolks and sugar, alternating between one yolk and a portion of the sugar. With the final addition, mix in the vanilla essence. Continue beating until the sugar has dissolved and the mixture appears smooth.
- 5Add the sifted dry ingredients gradually to the egg mixture, mixing after each addition until the batter is uniform and free of lumps. Stir in the coconut milk until fully blended.
- 6Transfer the batter to the prepared pan and bake for 25 to 30 minutes, or until a toothpick inserted into the center comes out clean.
- 7While the cake bakes, prepare the glaze by stirring together the sweetened condensed milk and the coconut milk in a medium bowl until smooth.
- 8Once the cake is out of the oven, use a skewer or toothpick to poke holes all over the surface. Make plenty of holes so the glaze can soak in thoroughly.
- 9Pour the glaze evenly over the warm cake and allow it to absorb for at least 10 minutes at room temperature, or chill longer in the refrigerator for a more deeply soaked texture.
- 10When the cake has absorbed the glaze, scatter the shredded coconut evenly over the top. Slice and serve.
Keywords: Brazilian Coconut Cake, Coconut Cake, Tropical Cake, Easy Cake, Make-Ahead Cake
All ingredient quantities are detailed within the recipe card above for your convenience.
Variations
While the classic Brazilian Coconut Cake is divine on its own, you can easily adapt it to suit different dietary preferences or flavor profiles. Consider adding a hint of lime zest to the batter for a brighter, more citrusy note. This can beautifully complement the coconut and add a refreshing twist.
For a decadent twist, you could incorporate a layer of thinly sliced pineapple beneath the batter before baking. As the cake bakes and the pineapple caramelizes slightly, it will release its sweet juices, infusing the cake with an extra layer of tropical fruitiness.
If you’re looking for a lighter, perhaps even healthier option, consider reducing the amount of condensed milk in the glaze and supplementing with a bit more unsweetened coconut milk. You could also experiment with adding a touch of passion fruit pulp to the glaze for a tangy counterpoint to the sweetness, creating an exciting flavor combination.
How to Prepare Brazilian Coconut Cake
Step 1: Preparing the Cake Pan and Oven
Begin by preheating your oven to the specified temperature, typically around 350°F (175°C). This ensures the oven is at the perfect, consistent heat for your cake to bake evenly. A properly preheated oven is the first step to a successful bake, preventing your cake from being undercooked in the center or overcooked on the edges.
Next, take a moment to prepare your cake pan. A standard 9×9 inch square pan is ideal for this recipe, providing the right depth for the cake to bake and for the glaze to soak. Lightly grease the pan with butter or non-stick cooking spray, ensuring all the corners and edges are coated. You can also lightly dust it with flour after greasing, tapping out any excess.
This careful preparation of the pan is crucial for easy cake removal. A well-greased and floured pan will prevent the cake from sticking, allowing it to release cleanly after baking, whether you plan to serve it directly from the pan or invert it. This simple step saves you from frustrating moments of a cake breaking apart.
Step 2: Combining Dry Ingredients
In a medium-sized mixing bowl, you will combine the dry ingredients for the cake batter. This includes the all-purpose flour and the baking powder. Sifting these ingredients together is a beneficial practice that helps to aerate them and ensures they are evenly distributed throughout the flour.
When flour and baking powder are sifted together, any clumps are broken up, and the leavening agent (baking powder) is dispersed uniformly. This even distribution is critical for achieving a consistent rise in the cake, preventing pockets of dense cake where too much baking powder might have clumped. A uniform rise leads to a lighter, more tender crumb.
Once sifted and combined, set this bowl of dry ingredients aside. It will be gradually incorporated into the wet ingredients in a later step. Having them ready ensures a smooth transition in the batter-making process, minimizing the time the batter is overmixed once the wet ingredients are introduced.
Step 3: Whipping the Egg Whites
This step is foundational to the cake’s signature airy texture. Carefully separate the egg yolks from the egg whites. Ensure no yolk contaminates the whites, as even a trace can prevent them from whipping up properly. Place the egg whites in a large, clean mixing bowl, preferably one that is grease-free.
Using an electric mixer (handheld or stand mixer), begin beating the egg whites on medium-high speed. You are aiming for stiff peaks. This means that when you lift the beaters out of the mixture, the peaks that form stand straight up and do not curl over. This process incorporates a significant amount of air into the whites.
The volume created by the whipped egg whites is what gives this cake its characteristic lightness and sponge-like quality. Without this step, the cake would be much denser. Patience here is key; allow the mixer to do its work until you achieve those firm, glossy peaks that promise a beautifully risen cake.
Step 4: Incorporating Yolks, Sugar, and Vanilla
Once you have achieved stiff peaks with your egg whites, it’s time to gently incorporate the other wet ingredients and the sugar. Reduce the mixer speed to low. Gradually add the egg yolks one at a time, allowing each to incorporate slightly before adding the next. This prevents the whites from deflating too quickly.
Next, begin adding the granulated sugar gradually, still with the mixer on low speed. Continue mixing until the sugar is completely dissolved and the mixture becomes smooth, glossy, and airy. You can test for dissolved sugar by rubbing a small amount between your fingers; it should feel smooth, not gritty.
Finally, add the vanilla essence to the mixture. Give it a final, gentle mix until it’s fully combined. This stage builds a rich, aerated base for your cake batter, contributing to its tender crumb and delicate flavor profile. The goal is a stable, airy mixture that holds its shape well.
Step 5: Combining Batter Components
Now, it’s time to bring the dry and wet ingredients together to form the cake batter. You will add the sifted dry ingredients (flour and baking powder mixture) to the egg mixture in stages. It’s often recommended to add them in two or three additions, mixing gently after each addition.
Use a spatula or the mixer on its lowest setting to fold or mix the dry ingredients into the wet. The key here is to mix only until the ingredients are just combined and no dry streaks of flour remain. Overmixing at this stage can develop the gluten in the flour too much, leading to a tougher cake texture.
Once the dry ingredients are incorporated, gently stir in the unsweetened coconut milk until the batter is smooth and uniform. The batter should have a lovely, pourable consistency. This careful combination ensures you retain the airiness from the egg whites while creating a cohesive, delicious batter ready for baking.
Step 6: Baking the Cake
Carefully pour the prepared batter into the greased and floured cake pan. Spread it evenly with a spatula to ensure a level surface for baking. The batter should fill the pan about two-thirds of the way, allowing room for it to rise.
Place the pan into the preheated oven. Bake for the recommended time, which is typically around 25 to 30 minutes for a 9×9 inch pan. During baking, resist the urge to open the oven door too frequently, especially in the first 20 minutes, as this can cause the cake to sink.
To check for doneness, insert a toothpick or a thin skewer into the center of the cake. If it comes out clean, with no wet batter clinging to it, the cake is ready. The top should look lightly golden and feel springy to the touch. Once baked, remove it from the oven and let it cool slightly in the pan on a wire rack.
Step 7: Preparing and Applying the Glaze
While the cake is baking or cooling slightly, prepare the luscious glaze. In a medium bowl, whisk together the sweetened condensed milk and the unsweetened coconut milk until they are thoroughly combined and smooth. This mixture will be rich, creamy, and wonderfully sweet.
Once the cake has come out of the oven and has cooled for a few minutes in its pan, it’s time to apply the glaze. Use a skewer, a toothpick, or even a thin fork to poke numerous holes all over the surface of the warm cake. Make sure to create plenty of holes, going deep into the cake, not just on the surface. This allows the glaze to penetrate evenly.
Slowly and deliberately, pour the prepared glaze evenly over the warm cake, allowing it to seep into the holes you’ve created. The warm cake will readily absorb this sweet, creamy mixture, becoming incredibly moist. After the glaze has had a chance to soak in for a bit, scatter the sweetened shredded coconut generously over the top, creating a beautiful finish.
Pro Tips for Brazilian Coconut Cake
Warm Cake, Warm Glaze: For optimal absorption, pour the prepared glaze over the cake while it is still warm from the oven. The heat of the cake creates a more receptive structure for the liquid to soak into deeply. This ensures every bite is infused with that sweet, coconutty goodness.
Porous Perfection: Don’t skimp on poking holes! Use a skewer or toothpick to create a generous network of holes across the entire surface of the cake, not just in the center. This guarantees that the coconut soak reaches every corner and edge, making each slice consistently moist and flavorful.
The Patience Factor: Allow the cake to rest and absorb the glaze for at least 10-15 minutes after pouring. Even better, let it sit for a few hours or even overnight in the refrigerator. The flavors meld and deepen, and the texture becomes even more wonderfully moist and tender.
Ingredient Harmony: When selecting your coconut milk, opt for unsweetened full-fat coconut milk for both the batter and the glaze. This provides the richest coconut flavor and the best creamy texture without adding unnecessary sugar. The quality of your ingredients truly shines in this simple yet elegant dessert.
Toasting the Coconut: For an extra layer of flavor and a slightly more sophisticated look, you can lightly toast the shredded coconut before sprinkling it on top. Spread the coconut on a baking sheet and toast in a low oven (around 300°F/150°C) for a few minutes, watching it very carefully to prevent burning. This brings out a nutty depth that complements the sweet glaze wonderfully.
Serving Suggestions for Brazilian Coconut Cake
Decoration
The classic decoration for Brazilian Coconut Cake is a generous scattering of sweetened shredded coconut over the top after the glaze has soaked in. This creates a beautiful, snowy appearance and adds a delightful textural contrast to the moist cake. For an extra touch, you can lightly toast the shredded coconut before applying it to enhance its nutty flavor and give it a golden hue.
If you want to add a bit more flair, consider adding a sprinkle of toasted slivered almonds for added crunch and visual interest. A dusting of powdered sugar can also be used, especially if you’ve opted for a less sweet glaze. Fresh, delicate edible flowers can provide a pop of color and an elegant finish.
Alternatively, a few thin slices of fresh coconut, if available, can offer a more substantial and visually striking topping. The key is to keep the decoration relatively simple to complement the cake’s rustic charm and focus on its natural coconut flavor.
Side Dishes
This moist and sweet cake pairs wonderfully with a cup of strong, black coffee. The slight bitterness of the coffee cuts through the richness of the cake, creating a perfectly balanced flavor experience. It’s an ideal combination for an afternoon pick-me-up or a delightful end to a meal.
For a lighter accompaniment, a side of fresh berries, such as raspberries, strawberries, or blueberries, can provide a refreshing contrast. Their tartness and vibrant colors offer a beautiful visual and palate-cleansing element. Sliced tropical fruits like mango or pineapple also complement the cake’s flavors beautifully.
A small dollop of lightly sweetened whipped cream is another excellent addition. It adds an extra layer of creaminess without overpowering the cake’s delicate flavors. Avoid heavily flavored creams that might compete with the coconut. A simple, airy whipped cream is all you need.
Creative Serving Ideas
Serve slices of Brazilian Coconut Cake slightly chilled for a refreshing treat, especially on a warm day. The chill allows the glaze to firm up slightly, offering a delightful contrast in texture. It also makes the cake feel even more invigorating.
Consider cutting the cake into small, bite-sized squares and serving them as part of a dessert platter or as petit fours at a party. This allows guests to sample other treats while still enjoying the unique flavor of the coconut cake. It’s an elegant way to present a homemade favorite.
For a more elaborate dessert, serve a slice of the cake with a quenelle of coconut sorbet or a scoop of vanilla bean ice cream. The combination of warm cake (if slightly re-warmed) and cold ice cream is always a winner. This elevates the simple cake into a more sophisticated dessert experience.
Preparation & Storage
Storing Leftovers
Due to the rich condensed milk and coconut milk glaze, this Brazilian Coconut Cake is best stored in the refrigerator. Transfer any leftover cake to an airtight container or cover the original pan tightly with plastic wrap or foil. This will help to prevent the surface from drying out and maintain its moistness.
The cake typically stays fresh and delicious in the refrigerator for about 3 to 4 days. In fact, many find that the flavor and texture improve over the first day or two as the glaze continues to penetrate the cake crumb. It’s a dessert that truly benefits from a little extra time.
Avoid storing it at room temperature for extended periods, as the dairy-based glaze can spoil. If you live in a very warm climate, refrigeration is especially important to keep the cake at its best and safest.
Freezing
Yes, Brazilian Coconut Cake freezes exceptionally well, making it an excellent candidate for baking ahead of time. It’s best to freeze individual slices for easier thawing and portion control. Wrap each slice securely in plastic wrap, ensuring there are no air gaps, and then place them in a freezer-safe bag or container.
When properly wrapped, the cake can be stored in the freezer for up to 1 month. The freezing process helps to preserve its moist texture and delightful flavor for a future treat. While the topping might appear slightly less fluffy after thawing, the overall taste and texture will remain wonderfully intact.
For the best results when freezing, ensure the cake has completely cooled and the glaze has had a chance to set before wrapping. This helps prevent condensation issues that can affect the texture.
Reheating
Generally, there is no need to reheat Brazilian Coconut Cake. It is designed to be enjoyed chilled or at room temperature. The moist, soaked texture is part of its charm, and warming it up can sometimes make it feel a bit too soft or mushy.
However, if you prefer a slightly softer bite than when served directly from the refrigerator, you can allow a slice to sit at room temperature for about 10 to 15 minutes before serving. This will take the chill off and allow the glaze to soften slightly without making the cake warm.
If you do choose to warm it slightly, a very short stint in a microwave on a low power setting (just a few seconds) might be considered, but proceed with extreme caution to avoid overcooking or making it gummy. The true beauty of this cake lies in its cool, moist, and tender nature straight from the fridge.
Frequently Asked Questions
-
Why are the egg whites beaten separately for this Brazilian Coconut Cake?
Beating the egg whites separately and until stiff peaks form is a crucial step that introduces a significant amount of air into the cake batter. This trapped air expands during baking, creating a light, airy, and sponge-like texture that is characteristic of this cake. Without this aeration, the cake would be much denser and heavier, losing its delicate crumb and melt-in-your-mouth quality.
-
Can I use sweetened shredded coconut for the glaze topping if I prefer a sweeter finish?
Absolutely! While the recipe typically calls for sweetened shredded coconut for the topping, you can certainly use sweetened if you desire a more intensely sweet finish. The sweetened condensed milk in the glaze already provides a considerable amount of sweetness, but adding sweetened coconut will further enhance that profile. It’s a matter of personal preference, and either choice will result in a delicious topping that complements the moist cake.
-
How long does Brazilian Coconut Cake typically take to absorb the glaze, and should it be served immediately after?
The glaze begins to absorb almost immediately upon contact with the warm cake, but for the best results, it’s recommended to let it soak for at least 10 to 15 minutes at room temperature before serving. However, for the most decadent experience, allowing the cake to rest in the refrigerator for several hours or even overnight is ideal. This extended resting period allows the glaze to fully penetrate the cake crumb, resulting in an exceptionally moist, tender, and flavorful dessert. Serving it after this resting period, rather than immediately, significantly enhances its texture and taste.