Juicy Oven Roasted Chicken – No More Dry Chicken!

There’s something incredibly satisfying about a perfectly roasted chicken breast. It’s a dish that can be both a comforting staple and a canvas for culinary creativity, offering a delightful balance of simplicity and flavor. When done right, it’s incredibly juicy, tender, and packed with savory goodness, making it a go-to meal for busy weeknights or relaxed weekend dinners.
This particular recipe for oven-roasted chicken breast has become a cherished favorite in many kitchens, and for good reason. It consistently delivers succulent results, banishing the dreaded dry chicken forever. The secret lies in a simple yet incredibly effective brining technique combined with a thoughtfully crafted spice blend that elevates the natural flavor of the chicken.
Why You Will Love This Recipe
- Perfectly Tender & Juicy: This recipe guarantees moist and tender chicken breasts every single time, eliminating the frustration of dry or tough poultry.
- Incredibly Easy Preparation: With just a few straightforward steps involving brining, seasoning, and baking, this recipe is accessible for cooks of all skill levels.
- Remarkable Versatility: The seasoned chicken breast serves as a fantastic base for countless meals, pairing beautifully with a wide array of side dishes and easily adaptable for salads, wraps, and other creative dishes.
- Customizable Flavor Profile: While the provided spice blend is excellent, you have the freedom to experiment with your favorite herbs and spices to tailor the taste to your exact preferences.
- Quick to Make: Despite its impressive results, this recipe is surprisingly quick, allowing you to enjoy a delicious, home-cooked meal without spending hours in the kitchen.
Ingredients You Need
The quality of your ingredients plays a significant role in the final outcome of any dish, and this roasted chicken breast recipe is no exception. Opting for fresh, high-quality chicken breasts will ensure the most delicious results. The simple yet effective spice blend relies on common pantry staples, but using freshly ground pepper can enhance the overall aroma and flavor. Don’t underestimate the power of good quality herbs and spices; they are the backbone of flavor development in this dish.
Oven Roasted Chicken Breast

This juicy and tender roasted chicken breast recipe turns out perfect every time! Say goodbye to dry chicken with this easy recipe featuring a quick saltwater soak and a delicious homemade spice mix.
- 1 to 1.5 pounds boneless, skinless chicken breasts
- 4 cups lukewarm water
- ¼ cup salt
- 1 tablespoon olive oil
- ¼ teaspoon salt (optional)
- ¼ teaspoon fresh ground black pepper
- ½ teaspoon smoked or sweet paprika
- ½ teaspoon garlic powder
- ½ teaspoon onion powder
- ½ teaspoon dried thyme
- ½ teaspoon dried basil
- ½ teaspoon dried rosemary
- ¼ teaspoon dried parsley
- ⅙ teaspoon cayenne pepper
- fresh chopped parsley, for garnish
- 1Preheat the oven to 425˚F.
- 2Brine: Place the chicken breasts in a large bowl. In a large measuring cup or mixing bowl, combine lukewarm water and salt; stir, then pour over chicken breasts. Set aside for 20 to 30 minutes. You can also cover the bowl and refrigerate for up to 2 hours.
- 3In the meantime, prepare the chicken seasoning blend. Combine the salt, pepper, paprika, garlic powder, onion powder, dried thyme, dried basil, dried rosemary, dried parsley, and cayenne pepper in a small bowl; stir until thoroughly incorporated. Set aside.
- 4Season the chicken: Pour out the salt water and rinse each chicken breast under cold water; pat them dry with paper towels. Place the chicken in a baking dish and rub the olive oil all over each chicken breast. Sprinkle the seasoning blend evenly over the chicken breasts on all sides.
- 5Bake: Transfer to the oven and bake for 22 to 25 minutes, or until internal temperature reaches 165˚F. Use an instant-read meat thermometer to check for doneness.
- 6Broil: For a browned, crispy top, set your oven to broil on HIGH for the final 3 to 4 minutes until golden on top.
- 7Rest: Remove the chicken breasts from the oven and transfer them to a serving plate to rest for 10 minutes before cutting and serving.
- 8Serve: Garnish with fresh chopped parsley and serve.
Keywords: chicken breast, roasted chicken, baked chicken, healthy dinner, easy recipe
Quantities for each ingredient are detailed within the provided recipe card for your convenience.
Variations
One of the most appealing aspects of oven-roasted chicken breast is its inherent adaptability. The core recipe provides a fantastic foundation, but it’s also a wonderfully forgiving base for creative culinary exploration. Consider how you can transform this simple dish into something entirely new with a few thoughtful adjustments.
For those seeking a plant-based alternative, the principles of brining and seasoning can be applied to firm tofu or even substantial vegetables like cauliflower steaks. A quick soak in a seasoned brine, followed by a coating of your favorite spice blend and a period in the oven, can yield surprisingly satisfying results. This approach allows for a vegan-friendly meal that still boasts wonderful texture and depth of flavor, proving that deliciousness isn’t exclusive to poultry.
If you’re mindful of carbohydrate intake, this recipe is already a strong contender, but you can further enhance its low-carb appeal. By ensuring your spice blend contains no added sugars and serving the chicken with low-carb accompaniments like roasted asparagus, a fresh green salad with a vinaigrette, or cauliflower rice, you can create a perfectly balanced and satisfying meal. This makes it an ideal choice for ketogenic or other low-carbohydrate diets.
Exploring global flavors offers another exciting avenue for variation. Imagine infusing the chicken with the vibrant notes of a Mediterranean marinade, perhaps incorporating lemon zest, oregano, and a touch of garlic. Alternatively, a spicy kick from a homemade Mexican-inspired seasoning blend, featuring chili powder and cumin, could transform the dish into a zesty centerpiece. The possibilities are truly endless, limited only by your culinary imagination.
How to Prepare oven roasted chicken breast
Step 1: The Art of Brining
The journey to incredibly juicy chicken breast begins with a crucial, yet simple, step: brining. This process, though often overlooked for boneless cuts, makes a profound difference in moisture retention and tenderness. Brining involves submerging the chicken in a saltwater solution, which helps the meat absorb moisture and flavor, thereby creating a more succulent final product.
To prepare the brine, you’ll need a substantial bowl or even a large zip-top bag capable of holding your chicken breasts comfortably. Combine four cups of lukewarm water with a quarter cup of salt. Stir this mixture gently until the salt is completely dissolved, ensuring an even distribution of the brining agent. Lukewarm water is ideal as it helps the chicken begin to come closer to room temperature, promoting more even cooking later on.
Carefully place your boneless, skinless chicken breasts into the prepared brine. Ensure that each piece is fully submerged in the salty water. Cover the bowl securely, or seal the zip-top bag, and let the chicken breasts work their magic for a period of 20 minutes to a maximum of two hours. Any longer than this can begin to make the chicken too salty, so adhere to the recommended timeframes for the best results.
Step 2: Crafting the Perfect Seasoning Blend
While the chicken is undergoing its brining transformation, it’s the perfect time to assemble the aromatic spice blend that will impart a delicious, savory crust. This blend is designed to complement the chicken without overpowering its natural flavor, offering a complex yet balanced taste. Having all your spices measured and mixed beforehand ensures a smooth transition to the next stage of cooking.
Gather all your dry seasonings in a small bowl. This typically includes a quarter teaspoon of salt (though this is optional, as the brine will have already seasoned the chicken), a quarter teaspoon of fresh ground black pepper for a touch of warmth, and a half teaspoon each of smoked or sweet paprika, garlic powder, onion powder, dried thyme, dried basil, and dried rosemary. For a hint of heat, a pinch, or about one-eighth of a teaspoon, of cayenne pepper is added, though this can be adjusted to your preference.
Using a fork or a small whisk, thoroughly combine all the spices. Ensure there are no clumps and that the colors are evenly distributed throughout the mixture, creating a visually appealing and fragrant blend. This meticulous mixing ensures that each bite of chicken receives a consistent and delightful burst of flavor. Set this aromatic blend aside, ready to be generously applied.
Step 3: Seasoning and Preparing for the Oven
Once the brining period is complete, it’s time to prepare the chicken for its flavorful coating. The first step involves removing the chicken from the brine and rinsing it under cold running water. This rinsing helps to wash away any excess salt from the surface of the chicken, preventing it from becoming overly salty after cooking.
After rinsing, thoroughly pat the chicken breasts dry with paper towels. This step is critical for achieving a nice sear and allowing the seasonings to adhere properly. Moisture on the surface of the chicken can create steam, which hinders browning. Once dried, place the chicken breasts in a baking dish, ensuring they have a little space between them for even cooking.
Drizzle a tablespoon of olive oil over all the chicken breasts and use your hands or a brush to ensure they are evenly coated. The olive oil acts as a binder for the spices and contributes to a beautiful golden-brown crust. Now, generously sprinkle the prepared seasoning blend over all sides of each chicken breast, pressing lightly to ensure it adheres. You don’t necessarily need to use every bit of the seasoning blend; adjust the amount according to your taste preference.
Step 4: The Roasting Process
With the chicken beautifully seasoned and ready, it’s time to introduce it to the heat of the oven. Preheat your oven to a relatively high temperature, around 425°F (220°C). This higher temperature is key to achieving that desirable golden-brown exterior while ensuring the inside cooks through quickly and remains tender and juicy.
Carefully place the baking dish containing the seasoned chicken breasts into the preheated oven. The cooking time will vary slightly depending on the thickness of your chicken breasts, but a general guideline is between 20 to 25 minutes. It’s imperative to use an instant-read meat thermometer to accurately gauge doneness. Insert the thermometer into the thickest part of the breast, avoiding any bones if using bone-in cuts.
The chicken is perfectly cooked when it reaches an internal temperature of 165°F (74°C). If your chicken breasts are of significantly different thicknesses, they might cook at slightly different rates. You can either pound them to a more uniform thickness before seasoning or start checking for doneness around the 18-minute mark to ensure you don’t overcook the thinner pieces. Thinner breasts may only require around 20 minutes, while thicker ones could take closer to 25 minutes.
Step 5: Achieving a Golden-Brown Finish (Optional Broil)
For those who desire an extra touch of visual appeal and a slightly crispier exterior, an optional broiling step can be incorporated. This final burst of intense heat provides a lovely browned finish to the chicken, enhancing its presentation and adding a delightful textural contrast.
After the chicken has reached its internal temperature of 165°F (74°C) and is mostly cooked through, you can switch your oven’s setting to the broiler on HIGH. Position the oven rack about 6 to 8 inches below the broiler element. Carefully place the baking dish back into the oven under the broiler.
Keep a very close eye on the chicken during this stage, as broiling can happen very quickly and can easily lead to burning. Allow the chicken to broil for just 3 to 4 minutes, or until the tops of the chicken breasts are beautifully golden brown and slightly caramelized. This brief period under the broiler adds a wonderful final touch to the dish, making it even more enticing.
Step 6: The Crucial Resting Period
The final, and arguably one of the most important, steps in achieving perfectly juicy oven-roasted chicken breast is the resting period. Skipping this vital step is a common mistake that can lead to dry chicken, even if it was cooked perfectly. Resting allows the juices, which have been pushed to the center of the meat during cooking, to redistribute back throughout the entire breast.
Once you remove the chicken from the oven, immediately transfer the cooked chicken breasts from the hot baking dish to a clean cutting board or a warm serving plate. Covering the chicken loosely with foil during this time can help to retain warmth without steaming the exterior. This gentle tenting is sufficient to keep the chicken hot while it rests.
Let the chicken breasts rest for at least 5 to 10 minutes before you even think about slicing into them. This period is crucial for allowing the muscle fibers to relax and reabsorb the accumulated juices. If you cut into the chicken too soon, all those delicious, moisture-rich juices will simply run out onto the plate, leaving you with drier meat. Patience here will be richly rewarded with exceptionally moist and flavorful chicken.
Pro Tips for oven roasted chicken breast
Invest in an Instant-Read Thermometer: This is perhaps the single most valuable tool for ensuring perfectly cooked chicken breast. It takes the guesswork out of determining doneness, preventing both undercooked and overcooked poultry. Aim for an internal temperature of 165°F (74°C) in the thickest part of the breast.
Embrace the Rest: As highlighted in the preparation steps, allowing your chicken to rest for 5-10 minutes after cooking is non-negotiable for maximum juiciness. This simple step allows the meat’s natural juices to redistribute evenly, resulting in tender and succulent bites.
Don’t Fear Thighs (or Bone-In Cuts): While this recipe focuses on boneless, skinless breasts, chicken thighs are inherently more forgiving and tend to stay moist due to their higher fat content. If you opt for thighs, expect a slightly longer cooking time. Bone-in chicken breasts or even whole chickens also benefit greatly from brining and roasting, though their cooking times will be significantly extended.
Experiment with Your Spice Rack: The provided seasoning blend is excellent, but don’t hesitate to personalize it. Consider adding smoked paprika for a deeper flavor, a pinch of red pepper flakes for extra heat, or even incorporating dried herbs like oregano or marjoram for a Mediterranean twist. Pre-made rubs like Montreal steak seasoning or lemon pepper blends also work beautifully.
Even Thickness is Key: Chicken breasts often have a thick end and a thin end. For the most consistent cooking results, consider pounding the thicker end slightly with a meat mallet or the flat side of a heavy pan to achieve a more uniform thickness. This will help ensure all parts of the chicken cook at the same rate, preventing dryness in thinner sections.
Serving Suggestions for oven roasted chicken breast
Decoration
To elevate the visual appeal of your oven-roasted chicken breast, consider simple yet effective garnishes. A scattering of fresh, chopped parsley over the top just before serving adds a vibrant pop of green and a hint of fresh, herbaceous aroma. Thinly sliced lemon wedges placed around the chicken on the serving platter offer a bright contrast and a subtle invitation to add an extra zesty note to individual portions.
Side Dishes
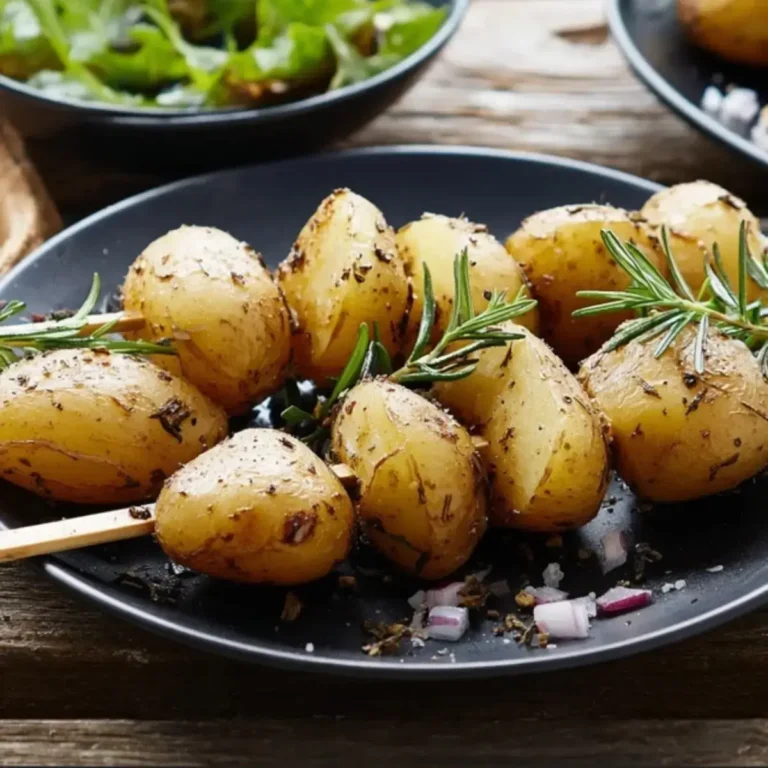
Perfectly roasted chicken breast is incredibly versatile and pairs wonderfully with a multitude of side dishes. For a classic pairing, consider roasted potatoes, such as crispy smashed potatoes or garlic butter hasselback potatoes, which soak up any extra pan juices beautifully. A vibrant and fresh dinner salad, like a creamy cucumber salad or a colorful heirloom tomato salad, provides a refreshing counterpoint to the richness of the chicken.
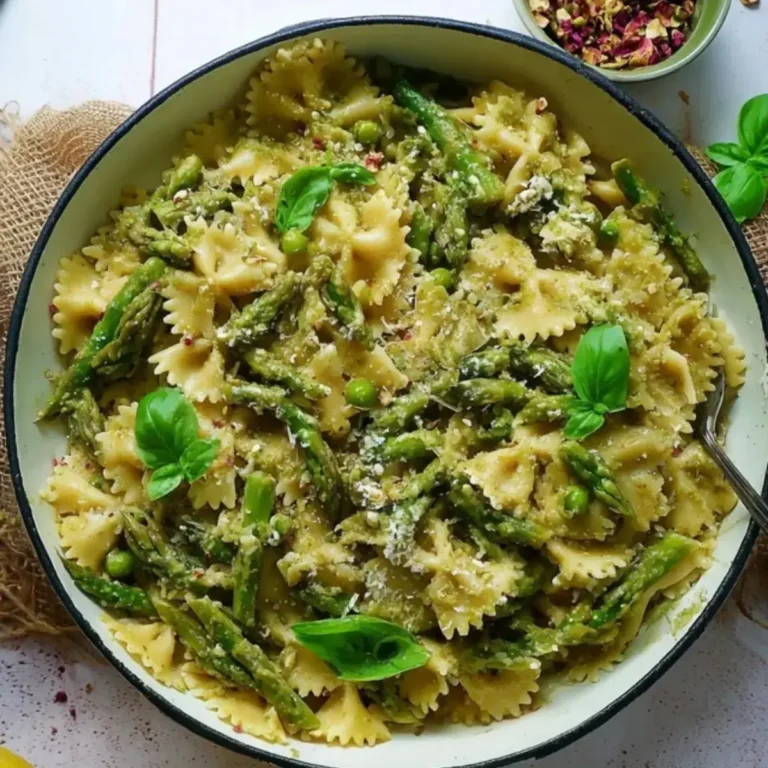
For a lighter or lower-carbohydrate option, consider serving the chicken alongside balsamic-roasted cabbage steaks or roasted cauliflower steaks, which offer a satisfying texture and earthy flavor. Steamed or sautéed green beans, asparagus, or broccoli are also excellent choices that provide essential nutrients and a pleasant crunch. Don’t forget the comforting appeal of a simple side of fluffy rice or quinoa, which can absorb any delectable pan drippings.
Creative Serving Ideas
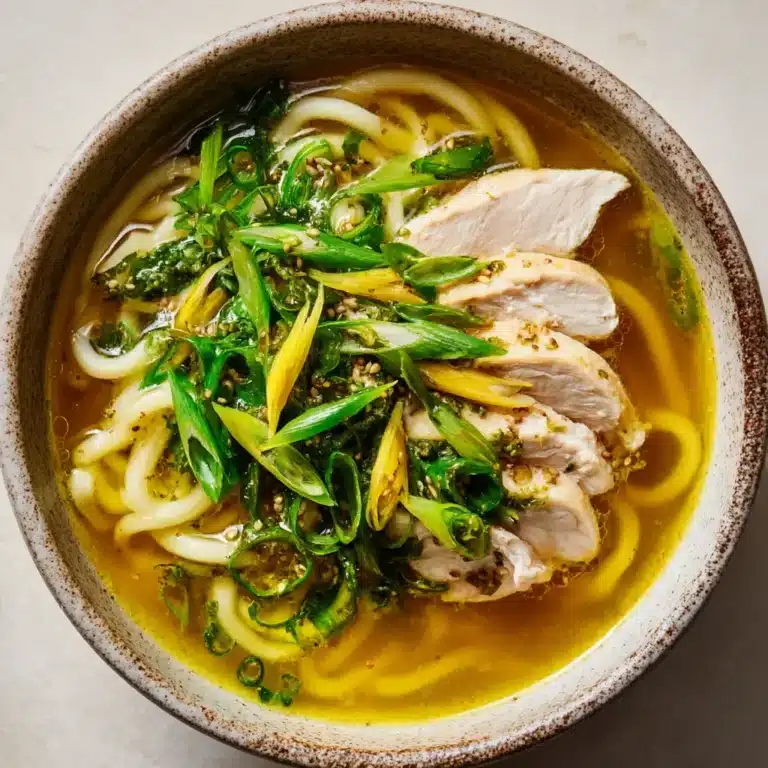
Leftover roasted chicken breast is a culinary treasure trove waiting to be repurposed. Slice it thinly and use it as the protein for a quick and satisfying chicken shawarma wrap, layering it with hummus, tahini sauce, and fresh vegetables. Diced chicken can be a fantastic addition to hearty soups, such as a comforting chicken noodle or a flavorful Thai chicken soup. Shredded chicken is perfect for creating flavorful chicken flautas or incorporating into a creamy chicken salad for sandwiches or lettuce wraps.
Consider using the roasted chicken to create delicious enchiladas or a vibrant Mediterranean bowl, adding grains like farro or couscous, a generous portion of roasted vegetables, and a flavorful dressing. Even simple additions like walnuts and celery can transform diced chicken into a delightful walnut chicken salad. The cooked chicken can also be a star ingredient in dishes like chicken pozole verde or green chili chicken enchiladas, showcasing its ability to adapt to diverse flavor profiles.
Preparation & Storage
Storing Leftovers
One of the best aspects of this oven-roasted chicken breast recipe is its excellent staying power. Once cooked and cooled, leftover chicken can be stored in an airtight container in the refrigerator for up to four days. Ensure the container is properly sealed to prevent the chicken from drying out or absorbing odors from other foods in the fridge. This makes it incredibly convenient for meal prepping lunches or quick dinners throughout the week.
Freezing
If you find yourself with more cooked chicken than you can consume within the storage window, freezing is an excellent option. To freeze, wrap the cooled chicken breasts tightly in plastic wrap, ensuring all air is expelled. For an extra layer of protection against freezer burn, you can then wrap the plastic-covered chicken again in aluminum foil or place it inside a heavy-duty freezer bag. Properly frozen, the chicken can maintain its quality for three to four months.
Reheating
When you’re ready to enjoy your refrigerated or frozen leftovers, proper reheating is key to retaining moisture and flavor. For refrigerated chicken, place the chicken in a skillet with a small amount of added liquid, such as a tablespoon of water or butter. Cover the skillet and heat over low to medium-low heat, allowing the chicken to warm through gently. Avoid high heat, as this can cause the chicken to dry out again.
If reheating from frozen, it’s best to thaw the chicken in the refrigerator overnight before using the skillet method. Alternatively, you can reheat smaller portions of chicken in the microwave, using the same principle of adding a little liquid and heating in short intervals, stirring as needed, until warmed through. The goal is to gently warm the chicken without cooking it further, which would lead to a tougher texture.
Frequently Asked Questions
-
Can I brine the chicken breasts for longer than the recommended 20 minutes, perhaps overnight?
While the recipe suggests a brining time of 20 minutes to 2 hours for optimal results with boneless, skinless chicken breasts, brining for significantly longer periods, such as overnight, can lead to the chicken becoming too salty and having a mushy texture. The salt works by breaking down proteins, and extended exposure can over-process the meat. For boneless breasts, sticking to the recommended timeframe ensures the ideal balance of moisture and texture. If you prefer longer brining, it’s generally more suitable for larger cuts of meat like whole chickens or bone-in pieces, and even then, careful monitoring is advised.
-
What is the best way to tell if my chicken breast is cooked through without using a thermometer?
While an instant-read meat thermometer is the most accurate and recommended method for determining chicken doneness, there are visual cues you can look for if one is unavailable. The juices that run out when you pierce the thickest part of the chicken should be clear, not pink. Additionally, the flesh of the chicken should be opaque white throughout, with no pinkness visible. However, these visual indicators can be subjective and may not always guarantee the chicken has reached a safe internal temperature of 165°F (74°C), so using a thermometer is always the safest bet for food safety.
-
Can I use different types of oil or seasonings for this recipe?
Absolutely! This recipe is wonderfully forgiving and encourages personalization. You can substitute olive oil with other neutral oils like avocado oil or grapeseed oil, or even melted butter for a richer flavor. The seasoning blend is also highly adaptable. Feel free to experiment with different herbs like oregano, dill, or tarragon, or add spices like cumin, coriander, or a touch of chili powder for a different flavor profile. Pre-made spice blends such as Italian seasoning, Cajun seasoning, or lemon pepper seasoning can also be used as a substitute for the homemade blend, though be mindful of their salt content and adjust accordingly.