Classic Mimosa Recipe – Made In a Pitcher!
No Sunday brunch is complete without a pitcher of my favorite mimosa recipe! This is a classic cocktail made from orange juice and Prosecco, or Champagne if you prefer. Mix your mimosas in a pitcher with fresh citrus for your next party.
I’m sharing all my best tips and tricks to ensure your mimosas are as delightful and refreshing as can be. If you’re looking for more crowd-friendly brunch cocktails, try my Chambord bellini and happy hour vodka lemonade, both mixed perfectly in pitchers.
Why You Will Love This Recipe
- Effortless Preparation: This mimosa recipe is incredibly simple to whip up, requiring minimal effort and time, making it perfect for busy hosts.
- Crowd-Pleasing Appeal: Its classic combination of flavors is universally loved, ensuring that guests of all ages will enjoy this delightful beverage.
- Versatile Presentation: Whether served in elegant flutes or casual tumblers, mimosas always feel festive and special.
- Customizable Flavors: While the classic is divine, this recipe opens the door to endless variations and personal touches with different juices and garnishes.
- Make-Ahead Convenience: Key components can be prepped in advance, allowing you to relax and enjoy your guests rather than being stuck in the kitchen.
Ingredients You Need
The beauty of a mimosa lies in its elegant simplicity, and selecting high-quality ingredients elevates this classic cocktail from good to truly unforgettable. Freshly squeezed orange juice offers a vibrant, natural sweetness that store-bought options often lack. Choosing a good quality sparkling wine, whether it’s Prosecco, Cava, or Champagne, is crucial for that essential effervescence and complex flavor profile.
Classic Mimosa Recipe
This classic mimosa recipe is made for a brunch crowd! It's a simple cocktail made with orange juice and Prosecco. Mix it in a pitcher with fresh citrus for your next party!
- 1 bottle (750 mL) Prosecco
- 3-4 cups orange juice, I use 50% less sugar, or you can use freshly squeezed
- citrus slices (grapefruits, oranges, lemons, limes)
- cranberry Juice, for serving
- 1Fill a pitcher with your choice of sliced citrus.
- 2Pour the bottle of Prosecco over the fruit.
- 3Slowly pour in the orange juice to combine with the Prosecco.
- 4Pour the mimosas into champagne flutes and add a splash of cranberry juice to each. Cheers!
Keywords: mimosa, brunch, cocktail, orange juice, prosecco, party, drink
- prosecco: one bottle (750 ml), chilled for optimal fizz and refreshment.
- orange juice: 3-4 cups, preferably freshly squeezed or a high-quality store-bought pulp-free variety, also chilled.
- citrus slices: a colorful assortment of grapefruits, oranges, lemons, and limes, thinly sliced for both visual appeal and subtle flavor infusion.
- cranberry juice: a small amount for serving, adding a beautiful ruby splash and a hint of tartness to each glass.
The precise quantities for these ingredients are readily available in the detailed recipe card, ensuring you can perfectly balance the flavors for your desired taste and number of servings.
Variations
The classic mimosa is a masterpiece of simplicity, but its inherent structure makes it a fantastic canvas for creative twists. Consider infusing your brunch with seasonal flavors by swapping the traditional orange juice for other delightful fruit combinations. This allows you to tailor the cocktail to the occasion and your guests’ preferences, making every gathering feel unique and special.
For a low-carb option, experiment with a blend of sparkling water and a sugar-free orange-flavored syrup, perhaps with a splash of lime juice to mimic the citrus tang. This still provides the festive effervescence without the sugar content. Another exciting variation involves incorporating pureed fruits like mango or peach into the base before adding the sparkling wine, creating a thicker, more smoothie-like consistency and intense fruit flavor.
To create a truly unique experience, try adding a hint of liqueur. A touch of Grand Marnier can add a sophisticated orange-cognac depth, while Chambord brings a lovely berry note. For a spicy kick, a dash of ginger syrup or a few muddled mint leaves can transform the mimosa into something entirely unexpected and delightful. Remember to adjust the sweetness and flavor profile based on your chosen additions, always aiming for a balanced and refreshing drink.
How to Prepare mimosa recipe
Step 1: Select Your Citrus
The first step in crafting a perfect pitcher of mimosas involves carefully selecting and preparing your citrus. This isn’t just about aesthetics; the citrus slices actually contribute subtle aromatic notes and a hint of zest to the finished drink. Aim for a variety of citrus fruits to provide a complex flavor profile and a visually appealing presentation.
Thinly sliced oranges, ruby red grapefruits, tart lemons, and zesty limes all offer unique contributions. Consider using a mandoline slicer for uniform, delicate rounds that float beautifully in the pitcher. Ensure the fruit is ripe and fragrant for the best possible aroma. Wash all fruits thoroughly before slicing to remove any residue.
Step 2: Add Citrus to the Pitcher
Once your citrus fruits are sliced into elegant rounds, it’s time to arrange them in your serving pitcher. This step is where the visual magic begins. A clear glass pitcher works best, allowing your guests to admire the vibrant colors of the fruit as it steeps. Don’t overcrowd the pitcher; you want enough space for the liquids to mingle freely and for the fruit to release its subtle essences.
Gently place the citrus slices into the bottom of a clean, dry pitcher. You can layer them for a more organized look or simply toss them in. Some people like to use just one type of citrus, such as only oranges, for a more focused flavor. Others prefer a mix, and this recipe encourages experimentation to find your personal favorite combination. The citrus will begin to subtly infuse the liquid, adding a refreshing brightness.
Step 3: Introduce the Sparkling Wine
Now comes the moment of effervescence: adding the sparkling wine. This is a critical step that sets the stage for the mimosa’s iconic bubbly texture. Gently pour the entire bottle of chilled Prosecco or your chosen sparkling wine over the citrus slices already in the pitcher. The goal here is to preserve as much of the carbonation as possible, so a slow and steady pour is recommended.
Avoid vigorous shaking or stirring at this stage, as that will cause the bubbles to dissipate quickly. The cold temperature of the wine is essential for maintaining its fizz. If your Prosecco isn’t sufficiently chilled, the drink might taste flat, so ensure it has been in the refrigerator for at least a few hours. The sight of the bubbles interacting with the fruit is a beautiful preview of the delightful cocktail to come.
Step 4: Incorporate the Orange Juice
With the sparkling wine settled, it’s time to add the vibrant orange juice, which balances the acidity of the wine and adds a touch of sweetness. Slowly pour the chilled orange juice into the pitcher, allowing it to gently combine with the Prosecco. This gradual addition helps maintain the drink’s fizziness and prevents the two liquids from mixing too aggressively, which could dull the sparkling sensation.
The ratio of sparkling wine to orange juice is traditionally 1:1, but this can be adjusted to your preference. Some like a drier mimosa with more wine, while others prefer it sweeter with more juice. Using freshly squeezed orange juice will yield the brightest, most natural flavor. If using store-bought, opt for a pulp-free variety to ensure a smooth texture. The color should transform into a beautiful, inviting golden hue.
Step 5: Gentle Stirring (Optional)
While it’s tempting to vigorously stir the pitcher to combine everything, resist the urge. The goal is to integrate the ingredients without sacrificing the precious carbonation that makes a mimosa so delightful. A very gentle stir with a long spoon or a cocktail stirrer is all that’s needed. You want to ensure the orange juice and Prosecco are mixed, but the bubbles should remain largely intact.
If you’ve added a large quantity of fruit slices, a gentle swirl can help them distribute throughout the liquid. The citrus will continue to infuse its subtle flavor during this brief mixing process. Over-stirring will result in a flat drink, diminishing the celebratory feel. The beautiful layering of colors should be mostly preserved, creating an inviting visual as well.
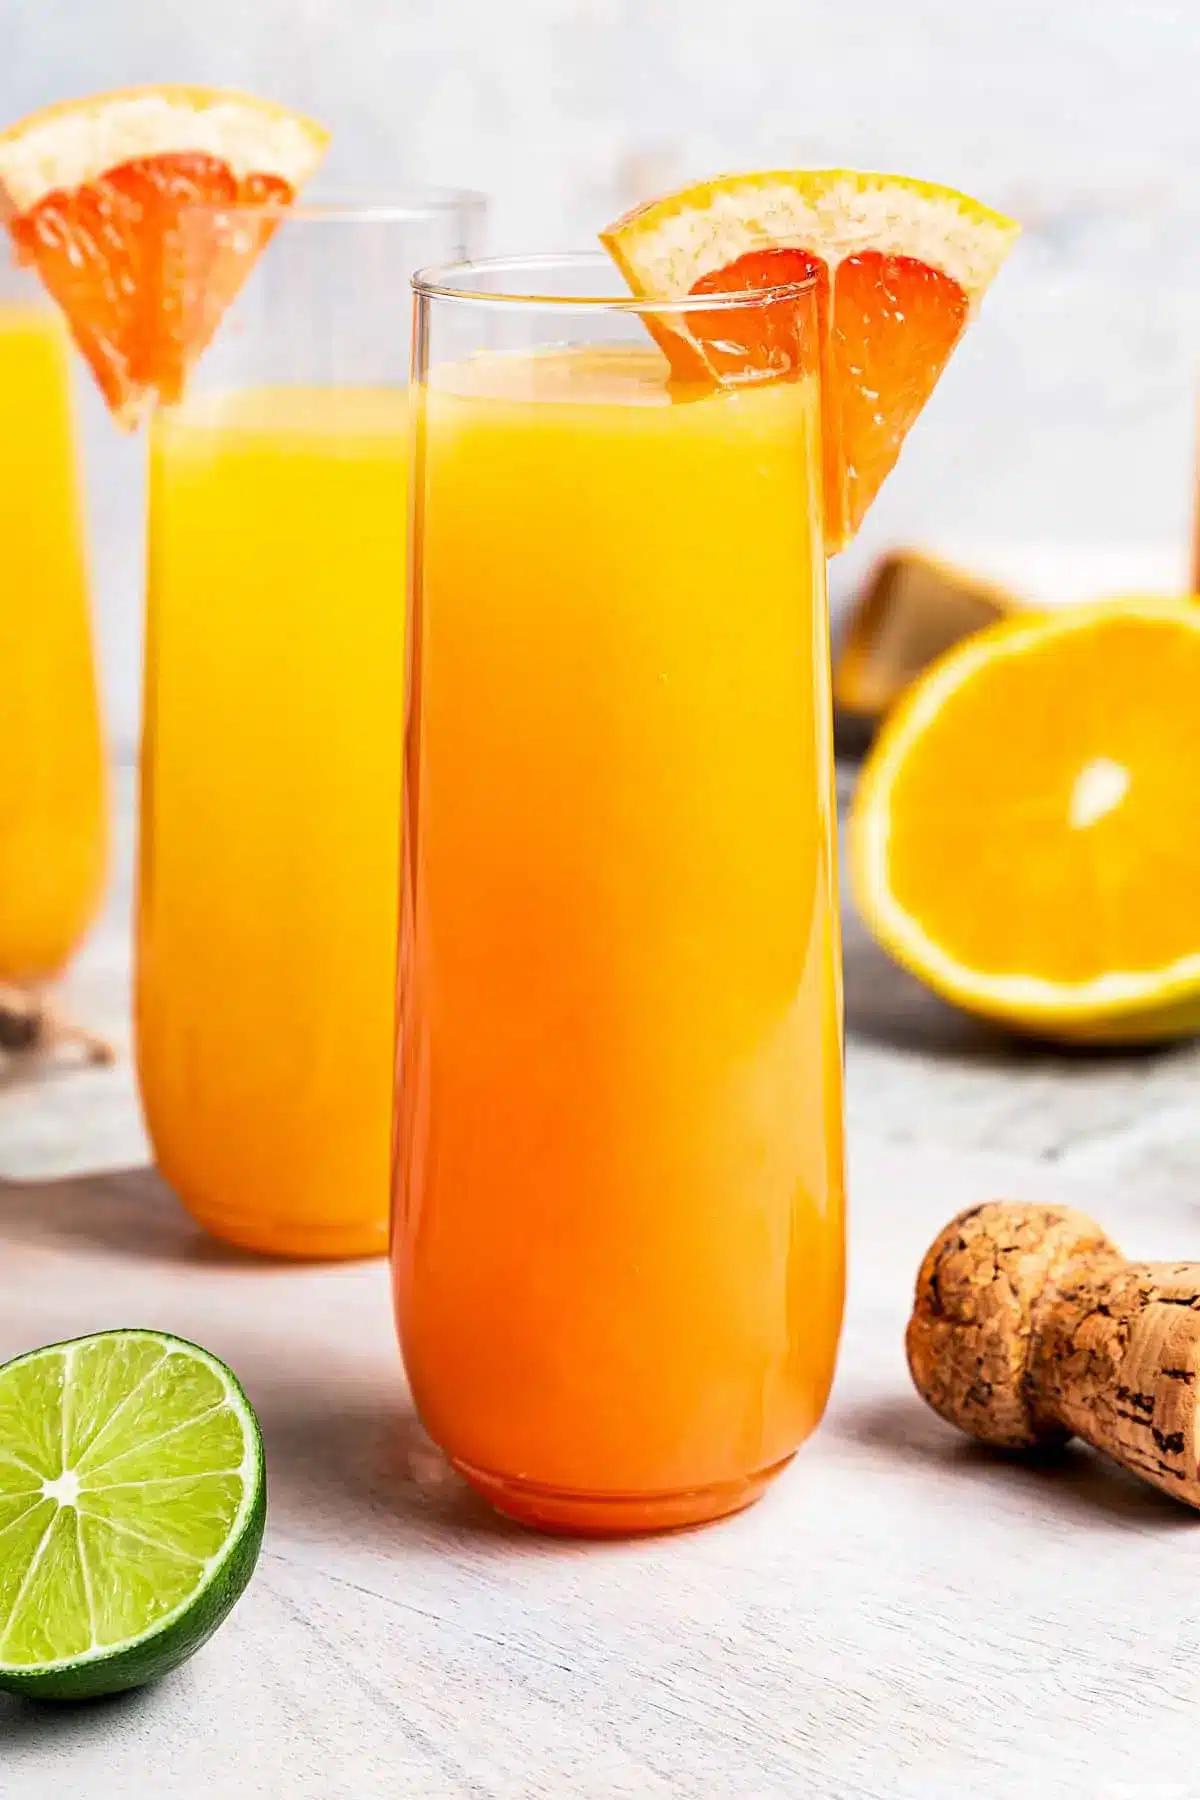
Step 6: Serve and Garnish
The final step is to serve your beautifully prepared pitcher of mimosas. Ladle the cocktail into chilled champagne flutes or wine glasses. If you’ve included citrus slices in the pitcher, you can carefully spoon a slice or two into each glass as a garnish. The vibrant fruit floating in the golden liquid creates an elegant and appealing presentation, inviting guests to enjoy the refreshing beverage.
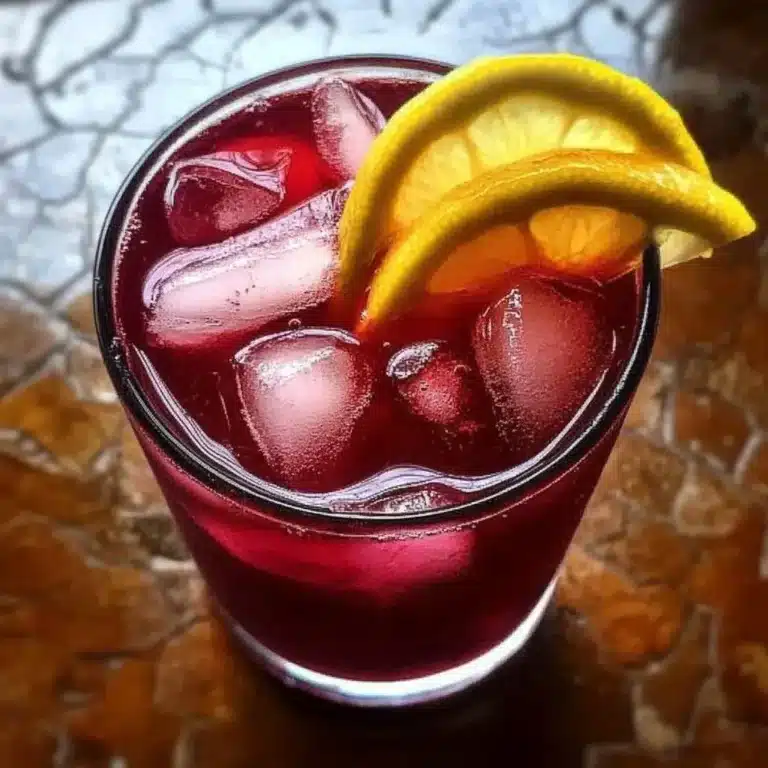
For an extra touch of color and flavor, add a small splash of cranberry juice to each glass before serving. This creates a lovely visual gradient and a delightful tart counterpoint to the sweet orange juice and bubbly wine. Ensure your glasses are cold to keep the mimosas refreshing for as long as possible. Cheers to a perfectly crafted mimosa!
Pro Tips for mimosa recipe
Chill Everything Thoroughly: For the most effervescent and refreshing mimosas, ensure both your sparkling wine and orange juice are thoroughly chilled before mixing. Cold ingredients maintain their bubbles much better than room-temperature ones.
Use Quality Sparkling Wine: While you don’t need the most expensive Champagne, opt for a good quality Prosecco or Cava. The flavor of the wine significantly impacts the final taste of your mimosa. A dry or Brut style is generally preferred to avoid an overly sweet cocktail.
Freshly Squeezed Orange Juice is Key: If time permits, freshly squeezed orange juice makes a world of difference. It offers a brighter, more natural flavor and avoids the sometimes artificial taste of some store-bought varieties. Strain out the pulp for a smoother texture.
Don’t Over-Stir: The key to a good mimosa is its bubbles. Mix the ingredients gently and avoid aggressive stirring, which will cause the carbonation to dissipate quickly, resulting in a flat drink.
Experiment with Citrus Garnishes: Beyond orange slices, consider adding thin slices of grapefruit, lemon, or lime to the pitcher. These can add subtle aromatic notes and a visually appealing flair to your mimosas. A twist of citrus peel can also be a sophisticated garnish.
Serving Suggestions for mimosa recipe
Decoration
The visual appeal of a mimosa can be significantly enhanced with thoughtful decoration. Start with the citrus slices themselves, arranged artfully in the pitcher and in each glass, showcasing vibrant oranges, rosy grapefruits, and zesty lemons. Consider rimming the glasses with a fine sugar or salt, perhaps infused with a little orange zest for an extra aromatic touch. A delicate sprig of mint or a single edible flower can add an unexpected pop of color and sophistication, transforming a simple drink into a work of art.
Side Dishes
Mimosas are the quintessential brunch beverage, and they pair beautifully with a wide array of dishes. Their bright, refreshing nature cuts through the richness of many breakfast and brunch favorites. Consider serving them alongside fluffy pancakes, decadent French toast, or a savory quiche. They also complement lighter fare such as fruit salads, yogurt parfaits, or smoked salmon platters. For heartier appetites, a classic pairing includes eggs Benedict, crispy bacon, or savory breakfast sausages.
Creative Serving Ideas
Elevate your mimosa experience with a “mimosa bar” where guests can customize their drinks. Offer a selection of sparkling wines, various juices like cranberry, pineapple, or grapefruit, and an array of fruit garnishes such as berries, peach slices, or even pomegranate seeds. You could also introduce flavored syrups or liqueurs for adventurous palates. For a themed event, consider a “sunrise mimosa” by layering grenadine at the bottom of the glass before adding the mimosa mixture, creating a stunning visual effect. Another idea is to infuse your sparkling wine with herbs like rosemary or thyme beforehand for a unique aromatic twist.
Preparation & Storage
Storing Leftovers
While mimosas are best enjoyed fresh due to the effervescence of the sparkling wine, leftovers can be stored if absolutely necessary. It’s crucial to transfer any remaining mimosa mixture to an airtight container or a bottle with a tight-fitting stopper. This will help to minimize the loss of carbonation. For the best results, consume the leftover mimosa within 24 hours of preparation.
Freezing
Freezing mimosas is generally not recommended, as the carbonation and delicate balance of flavors are significantly compromised upon thawing. Sparkling wine expands when frozen, which can crack containers, and the texture of the drink becomes unappealingly flat and watery. It’s far better to make only what you anticipate consuming or to prepare the non-alcoholic components separately and add the sparkling wine just before serving.
Reheating
Mimosas are intended to be served cold and are not suitable for reheating. The process of warming would eliminate all of the carbonation and alter the taste unfavorably. If you have leftover components, such as the orange juice and fruit mixture, these can be chilled and then combined with freshly opened, chilled sparkling wine when you’re ready to serve again. Always start with cold ingredients for the best result.
Frequently Asked Questions
-
Why is it called a mimosa?
The name “mimosa” for this popular cocktail is derived from the mimosa plant ( _Acacia dealbata_ ), also known as silver wattle. The vibrant golden-yellow color of the mimosa flower, with its fluffy, pom-pom-like appearance, closely resembles the hue and perhaps even the effervescent quality of the bubbly cocktail. It’s a delightful linguistic connection that links the visual appeal of the drink to a beautiful natural element.
-
What is a good Champagne substitute for mimosas?
While Champagne is the traditional choice, there are several excellent substitutes that work beautifully in a mimosa recipe. Prosecco, an Italian sparkling wine, is a popular and often more budget-friendly option that offers a fruity, crisp profile. Spanish Cava is another fantastic choice, typically drier and more complex than Prosecco. Many American wineries also produce excellent dry sparkling wines that are perfect for mimosas. The key is to choose a wine that is well-chilled and has good effervescence; look for terms like “Brut” or “Extra Dry” for a less sweet result.
-
Can I prepare mimosas in advance?
Yes, you can prepare some components of your mimosa pitcher in advance, which is a huge help for entertaining. The citrus slices can be added to the pitcher with the orange juice and refrigerated for several hours, allowing the flavors to meld. However, it is crucial to add the sparkling wine just before serving to maintain maximum fizziness. Adding the sparkling wine too early will result in a flat, unappealing drink, so mix the bubbly element only when you are ready to pour and serve.